How to integrate Zoom with WordPress?
Last updated on July 3rd, 2024 at 07:50 am
Zoom is one of the prominent video conferencing platforms. It is compatible with Linux, Chrome, Android, iOS, macOS, and Windows. Other than hi-tech expertise, it is known for its simple use and interface.
There are plenty of features of Zoom. This includes plugins, screen sharing, extensions of browsers. These functionalities and features have made Zoom a No#1 Video teleconferencing platform.
I am text block. Click edit button to change this text. Lorem ipsum dolor sit amet, consectetur adipiscing elit. Ut elit tellus, luctus nec ullamcorper mattis, pulvinar dapibus leo.
Table of Content
Some key stats related to Zoom
- Zoom has 470,000 customers.
- The valuation of this platform exceeded during the outbreak of COVID-19. The participants grew by 2900%.
- In 2020, Zoom generated $2.6 billion in revenue
How are businesses strengthening their operations using the Zoom platform?
Zoom is the World’s leading communication platform. It has a magnificent portfolio of communication services and products. It has earned its name for its categorized pricing system. You can even sign up on Zoom for free and enjoy the features like:-
- Quickly connect using video
- Connect from any device
- Seamlessly collaborate
- Boost your meetings
- Keep the communication alive
The business can fulfill its basic need using Zoom’s free version. They can elevate their operations using Zoom’s business plan.
- With Zoom’s business account, you can host unlimited meetings with 300 members.
- You can bridge the language barriers. One can enable live language interpretation in webinars or meetings.
Hence, we can conclude that it is the best platform with limitless possibilities.
Why should businesses integrate Zoom with WordPress?
Have a WordPress site? Consider integrating Zoom and WordPress. Why? Read this post to find out!!
With Zoom WordPress integration, you can host meetings from your site. Hence, an added perk if you are arranging public events via Zoom. Your potential customers can access the meeting invitation links or details. To integrate Zoom with WordPress, you need to collect the RSVPs, send reminders, etc.
Is your WordPress site experiencing difficulties? See our article to learn more about potential ways and reasons to fix it.
Zoom WordPress integration will not just benefit your users who are dialing in. Rather, it will assist your team to manage the meetings.
You can handle the meetings from the dashboard of your WordPress website. Hence, the users and your team do not have to face trouble. They do not have to manage the app separately for meetings. But you need to keep a close check for WordPress Plugin conflicts.
How to integrate Zoom with WordPress?
Step 1: Installation and Activation of the Uncanny Automator Plugin
Make sure to use this Plugin for the connection of Zoom with WordPress. It can assist you to develop automated workflows without writing code.
If you are facing trouble loading resources in WordPress, check this post!!

This sophisticated plugin acts as the bridge for different tools, apps, and plugins. It is equipped with all types of automated workflows.
Did you know that you can secure the domain of a WordPress website by adding an SSL certificate? If not, read this article!! First, you must install and activate this plugin. Once active, a message will pop-up asking for the installation of Uncanny Automator. This will be the free version. Uncanny Automator plugin’s lite version has fewer features. This will be your pro version’s base.
Then navigate for “Automator” and click “License activation”. Then you need to fill in the details of the license key. You can look for the details on your Uncanny Automator site’s account.
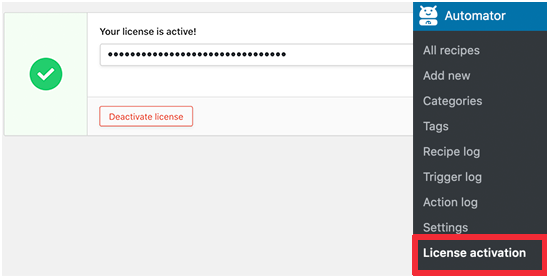
The Uncanny Automator is installed and activated.
Step 2: Set your Zoom account
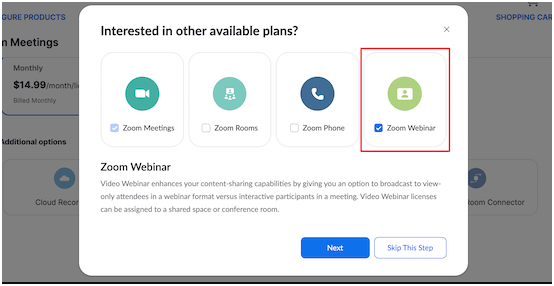
For Zoom WordPress integration, you need to have Zoom’s Pro version and webinar addon.
You need to visit Zoom and subscribe to a plan according to your requirement. Buy the addon of Zoom webinar for the integration of webinars.
After you have purchased your premium account, visit Zoom App Marketplace. Sign in and develop an app that sends info between WordPress and Zoom.
Tap the ‘Develop’. This you can see on the menu item and choose ‘Build App’. (Check the drop-down menu for the same).

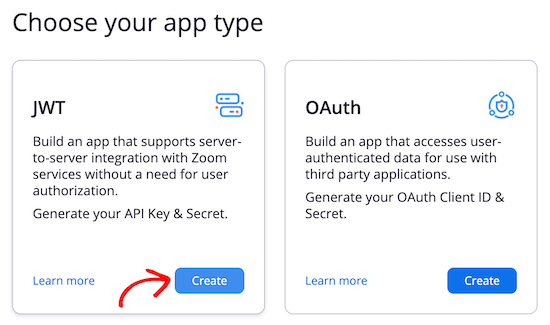
You will be taken on-screen wherein you have to choose the app type to develop.
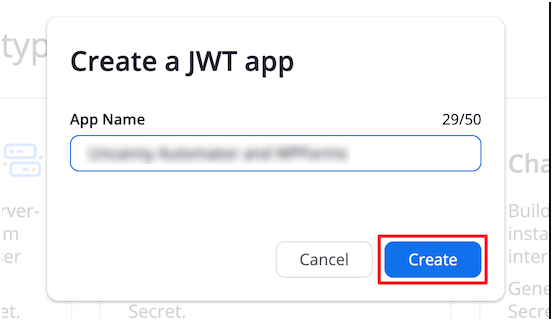
Find the box that states ‘JWT’ and tap ‘Create’.
Fill in the desired name in the popup. This is just for reminder purposes and it will not be visible to your users. Then click ‘Create’.
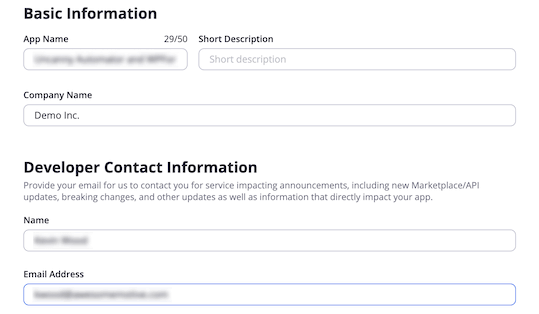
You must complete ‘Developer Contact Information’ and Basic Information’ It is required so that the team of Zoom can reach you if required. Tap ‘Continue’.
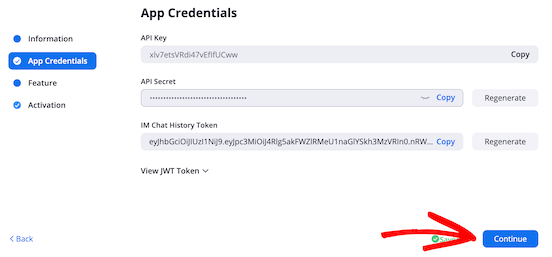
Make sure to copy ‘API’ and the ‘API Secret’ keys. Next, you paste these keys onto the text editor.
Then, click ‘Continue’.
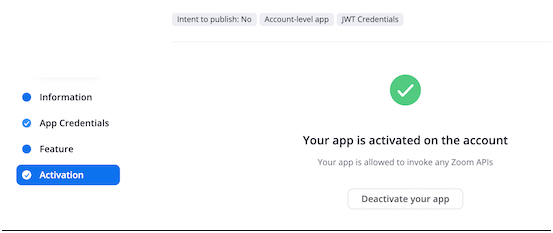
You will be notified about the activation.
Step 3: Set up a New Zoom meeting
You have to set up the new Zoom meeting to connect with your WordPress website.
Tap the ‘Schedule a Meeting’ link. Here you need to fill in the meeting details on the Zoom account.
Mark the section of Registration as “Registered”.
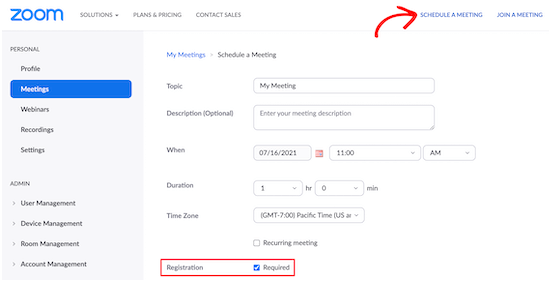
Your integration will not work if you fail to do so. Then tap the button “Save”.
Step 4: Creation of Webinar
On your Zoom account, under the option ‘Personal’, tap ‘Webinars’. Tap the button ‘Schedule a Webinar’.

Complete all the information from the Webinar and move onto the next page.
Again ensure to mark the registration section as required.
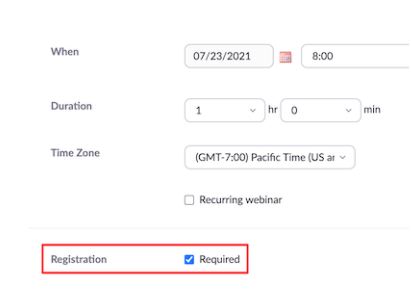
Tap “Save”.
Step 5: Connect WordPress with Zoom Webinars and Meetings
After you activate the Uncanny Automator and set up the Zoom, you need to create a connection.
You must first check into “Automator” and click “Settings”. This you can access on the dashboard of WordPress and tap the ‘Zoom Meeting’.
Next, paste the ‘API Key’ and ‘API Secret keys’ which you have earlier copied.
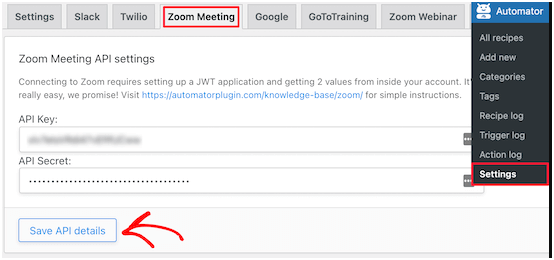
Once done, tap ‘Save API details’.
To integrate webinars of Zoom, you must tap the option ‘Zoom Webinar’.
Choose ‘Save API details’ once you paste the ‘API Key’ and ‘API Secret’.
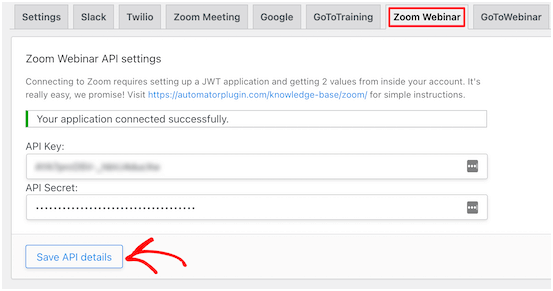
You are done with Zoom WordPress integration!!
Now by using Uncanny Automator Integration, you can manage some neat things.
Step 6: Registering the users with Zoom Meeting after the WordPress Form Completion
The moment the user fills the form, this integration will register the users for Zoom meetings automatically. It can be used to schedule the coaching calls, onboard new clients, etc.
In any case, if your WordPress form is not active, then create one.
Uncanny Automator can work on all the solutions of major forms. This includes Formidable Forms, WPForms, etc.
Here for your reference, we will use WPForms
You need to connect Zoom with the WordPress form.
Develop a “recipe”. It is an automation that links different apps and plugins together.
Search for “Automator” and Click “Add new”. Click the option “Everyone” and tap the button “Confirm”.

The option “Everyone Recipes” can be set up by any user. But the “logged-in recipes” can only be triggered by the users who log in to your site.
You must pick the recipe type’s that suit your requirements. Tap the button “Confirm”.
Give a recipe name. Here, again these recipes won’t be visible to your users.
Each recipe will have two parts. They are actions and triggers.
Now, the trigger is an event. It will assist you to start the action and recipe. On the other hand, action is a task that will help you to run the task. The task “Action” will run after you “Trigger” the task.
For the initial trigger, you must choose ‘WPForms’. This you will see on the meta box of the ‘Trigger’.
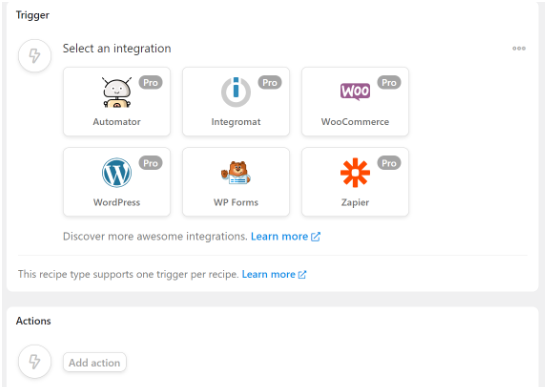
You will come across two different options.
Here, we will choose the option, ‘A form is submitted’. It will forward all the form submissions to Zoom.
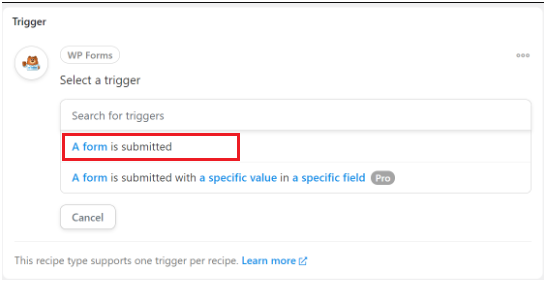
From the dropdown list, click the option “Save”.
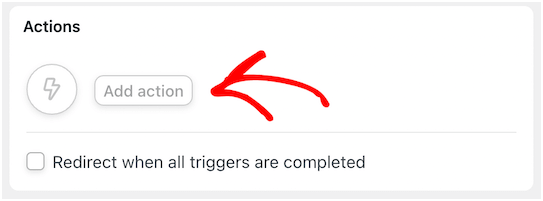
Next, choose the ‘Add action’. This you will find under the meta box “Actions”.
Choose ‘Automator’ from the integration list.
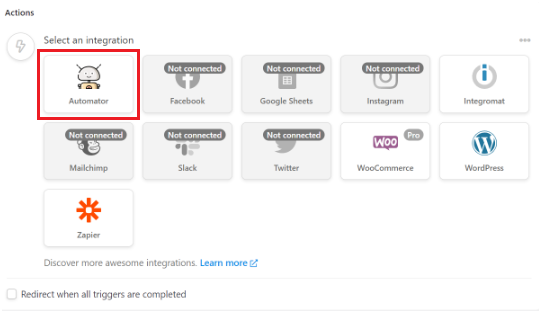
Choose an option ‘Call a custom function/method’
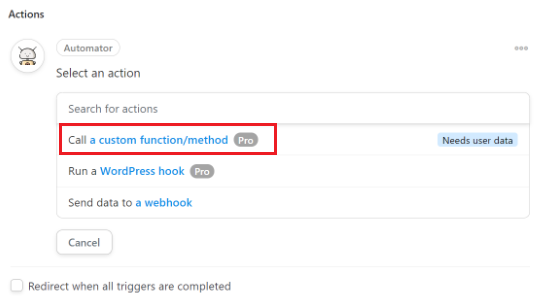
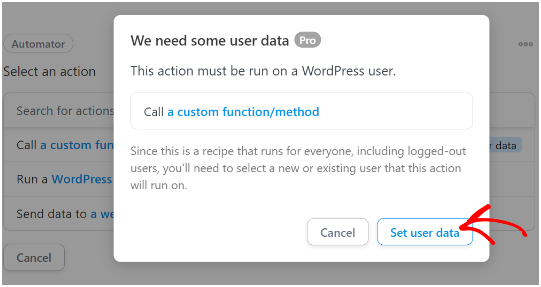
Uncanny Automator will notify a message that states that you require user data. This will run the recipe. Click ‘Set user data’.
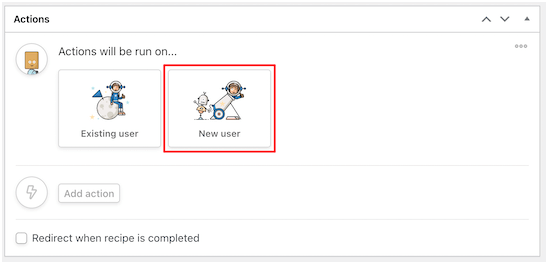
Under meta box Action, pick the ‘New user’.
For each field tap the ‘Asterisk (*)’ sign. Choose a section from the Zoom Meeting form.
Let’s understand this simply,
For the first name of the user, you must choose the “Name” section from the form.
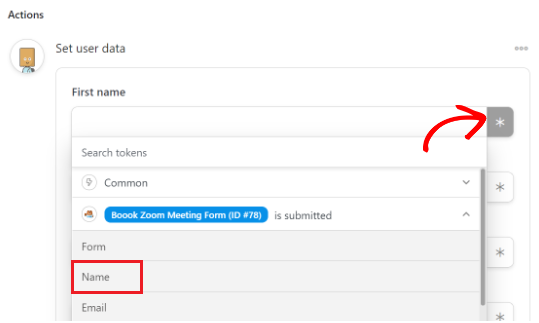
Likewise, you can add the subscriber’s information in the new Zoom meeting. Choose Asterisk sign again and fill in the details such as display name, username, and email.
Scroll down and set the role of the user as ‘Subscriber’ and tap ‘Do nothing’. Your details will not be saved if the user does not exist.
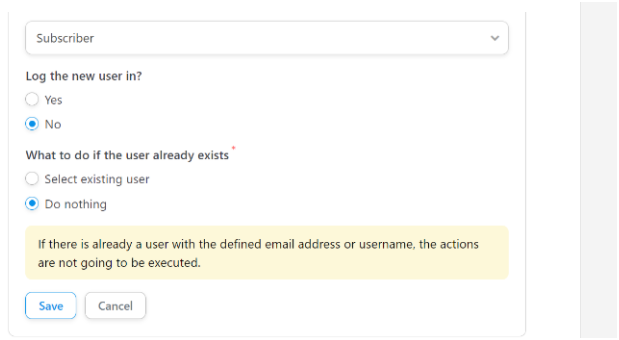
Tap “Save’ and click the button ‘Add action’.
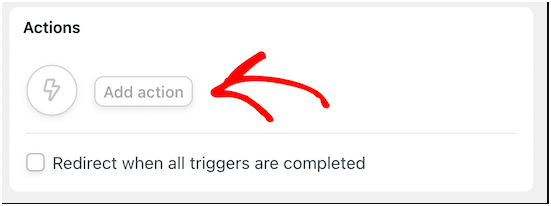
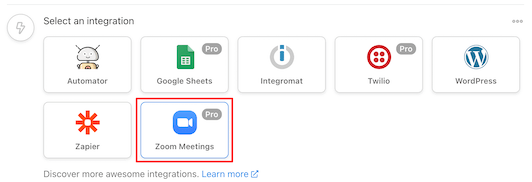
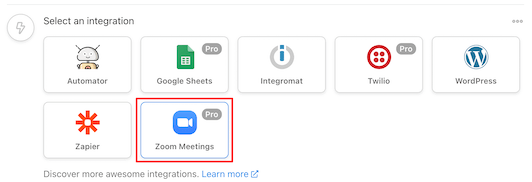
From the integration’s list choose ‘Zoom Meetings’.
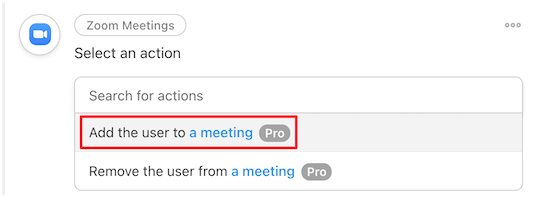
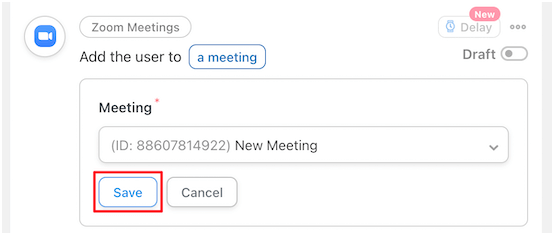
For the addition of the new user, choose the ‘Add the user to a meeting’ from the dropdown.
Then, you can choose the Zoom meeting you want users to register for in the ‘Meeting box’, and then click ‘Save’.
Select the right meeting name. Otherwise, users will be registered for the wrong meeting.
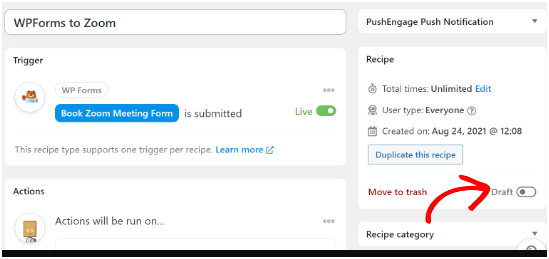
You must choose the toggle in the section” Recipe” and publish your recipe. The meeting will be live.
So, when a user fills the form, he/ she will be registered to the Zoom meeting automatically.
Step 7: Registering the user after the WordPress Form completion for Zoom webinars
This is another prominent integration for registering the users. The steps are pretty similar to the last step.
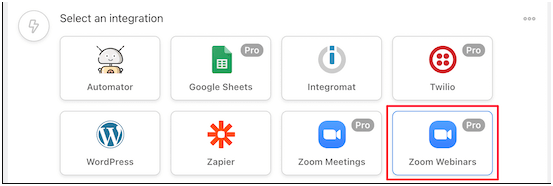
However, you need to choose ‘Zoom Webinars’ in the place of ‘Zoom Meetings’. Again follow the same steps for the trigger. And choose the button ‘Add action’ and tap ‘Zoom Webinars’.
You will notice the drop-down menu.
Choose ‘Add the user to a webinar’
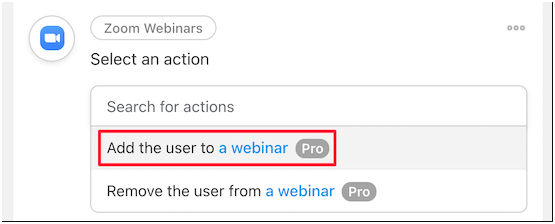
Check for the term “Webinars” from the drop-down and tap ‘Save’
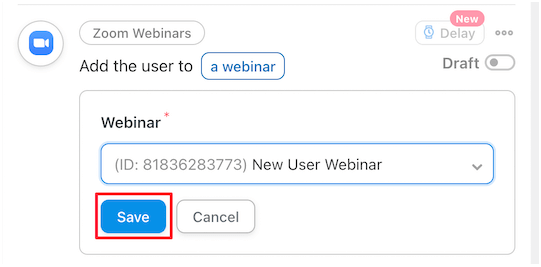
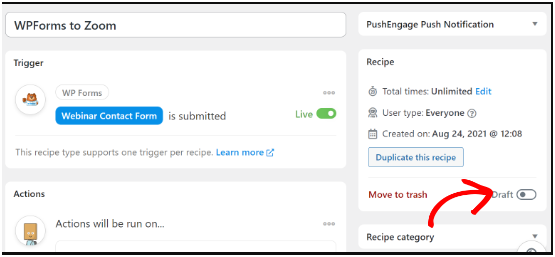
Make the recipe live. By doing this, your users will enroll in the webinar automatically.
Save your toggle in the section “Recipe” that displays ‘Live’.
Step 8: Registration of clients for Zoom webinar after purchasing in WordPress
This is the other way to make a connection to Zoom with WordPress. Here you can enroll new clients in the webinar product. They can check after they make a purchase at the WooCommerce shop.
Set up the WooCommerce store. After setting up you must make navigation to Automator. Then tap “Add new”. Choose the option ‘Everyone’ and tap ‘Confirm’.

You can name your recipe and choose ‘WooCommerce’ in the meta box termed as ‘Trigger’.
You will find a list under this option. Go for the first option.
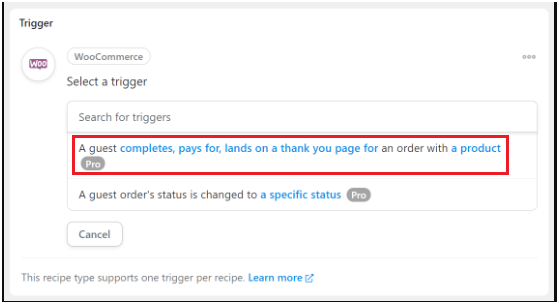
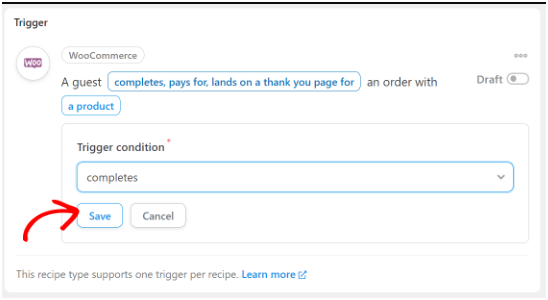
Choose the ‘Completes’ in the section ‘Trigger condition’ box. This will initiate the automation when the client makes the purchase.
Then, click ‘Save’.
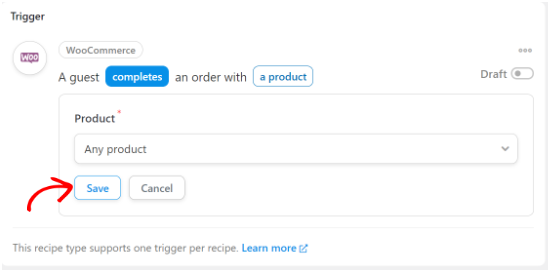
You need to pick a specified item in the store. Under the section “product”, choose “products” and tap ‘Save’.
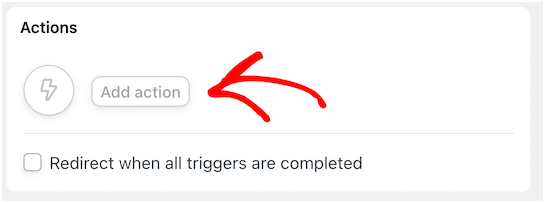
You must add an action for the recipe. Choose the ‘Add action’ under the section “Actions”.
Under the section “Select an integration” choose ‘Automator’

Select the option ‘Call a custom function/method’.

You will see a popup. Tap the button ‘Set user data’

Choose the option ‘New user’ under the section ‘Actions’.

Choose ‘Asterisk (*)’. Fill in the data of the user. You can add ‘Billing first name’ under the Name field.

Likewise, fill other fields too. Select ‘Customer’ and tap ‘Do nothing’. Click “Save” after you have filled all the fields.

Next, choose the ‘Add action’.

Select “Zoom Webinars” from select an integration.
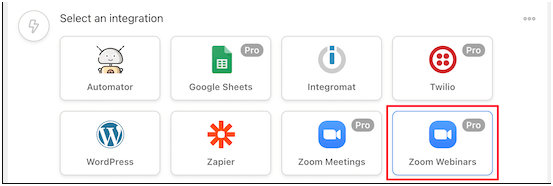
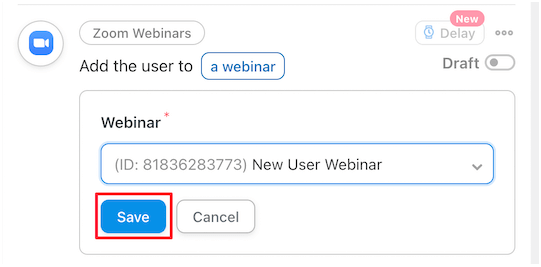
From the drop-down list choose ‘Add the user to a webinar’. New users will be registered automatically.

Choose ‘Webinar’. Now if you have numerous webinars running, then choose the one that is associated with the WooCommerce product
Click the toggle ‘Recipe’ that says ‘Live’.
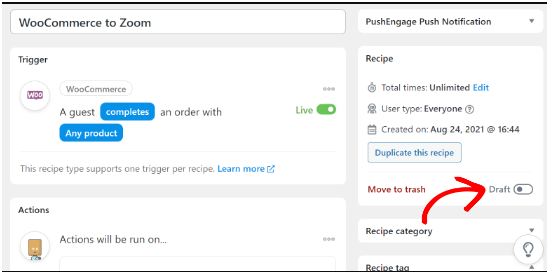
So, whenever the client makes the purchase, the users will register for the said product webinar.
Step 9: Registration of the members for the Zoom meeting after signing up in the WordPress
If you are running the membership website, then registration of new users is a great approach.
Once you set up the site, navigate for Automator. Go for Add new, and choose ‘Logged-in’ and choose ‘Confirm’.
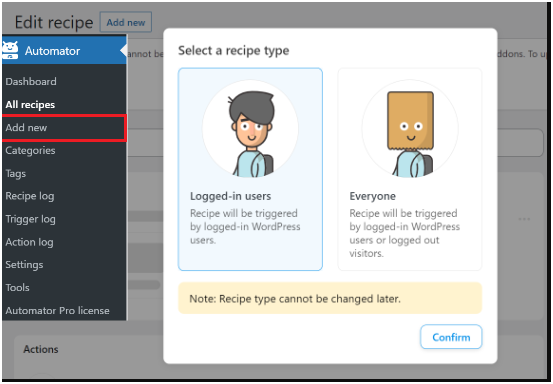
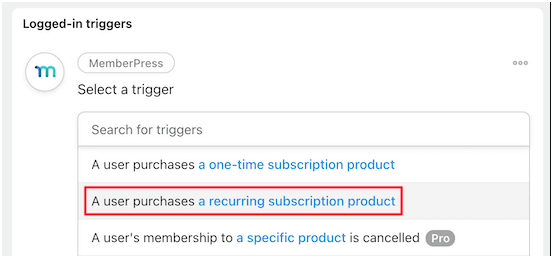
Choose “ logged-in recipe” and tap the trigger ‘MemberPress’ trigger.
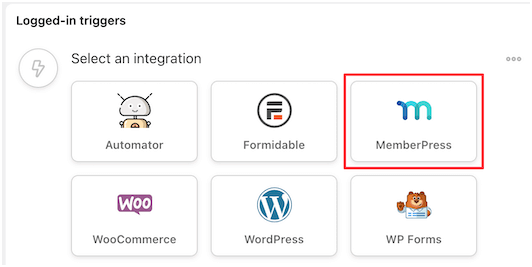
You will see various triggers to select. Here we will choose a ‘recurring subscription product’. You can choose the product type as per your site.
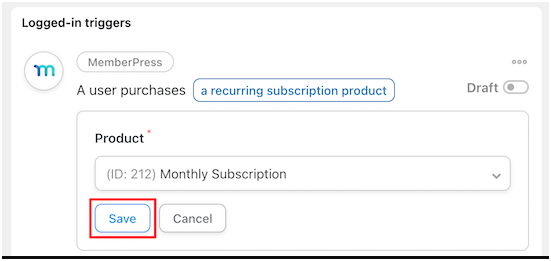
Select the product of subscription from the drop and choose ‘Save’.
Under the box ‘Actions’ and choose the ‘Add action’

You will see all the available integrations. Select ‘Zoom Meetings’.

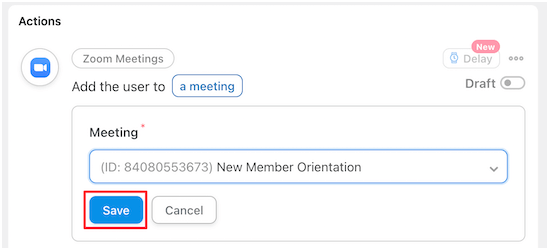
Choose ‘Add the user to a meeting’.

Choose the ‘Meeting’ and click the option ‘Save’.
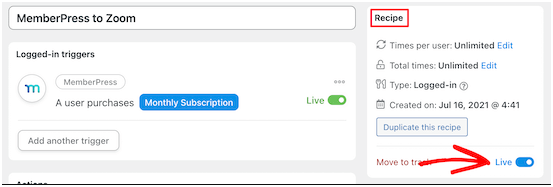
Click the’ Draft’ under ‘Recipe’ and mark the section as “Live”.
The new members will be enrolled in your orientation call.
If you still have doubts regarding Zoom WordPress integration, hire 24×7 WP Support!!
We are an established company for web design and development. We have decades of experience in offering services to integrate Zoom with WordPress. This includes performance and speed issues, WordPress hacking support, etc.
Why wait !! Consult our experts today!!

