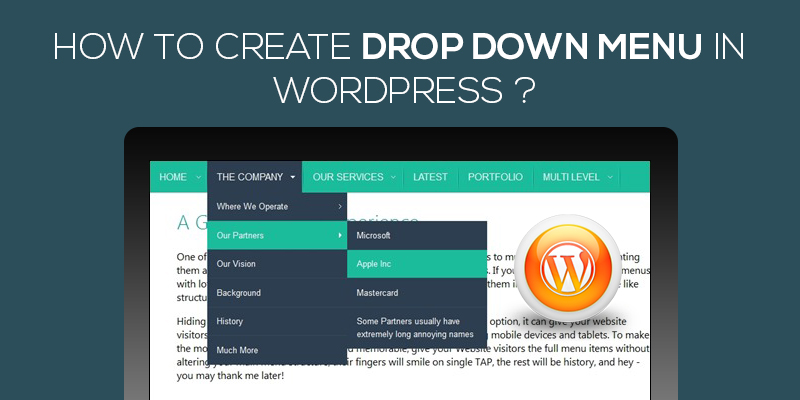
How To Add Drop Down Menu in WordPress
Last updated on August 11th, 2021 at 06:16 am
What’s the dropdown menu? And why do you need it?
Ok, imagine that your website has a very stylish appearance but when it comes to the list of menus, it apparently fails. It seems that you have deliberately stuffed items adjacent to each other.
This might have appeared decent when you would have started with creating the WordPress website but as your business grew, you would have now realized that the appearance of menus isn’t looking good and you need to do something to give your website a better and sophisticated look.
Right?
So what to do?
All you need to do is add a dropdown menu in WordPress. To educate you on the same, we articulate this piece.
Let’s start with answering why do you need to add sub-menu in WordPress?
Why Add Sub-menu In WordPress?
WordPress menus are defined as the list of web links or a storage house of items.
- Menus ease the task of navigating through the WordPress website and also embed additional links in the same.
- Website owners can easily create custom-fit menus, easily embed posts, categories, add pages, category archives, author archives, tag archives, or induce custom links using the WordPress menu system. These can be viewed on the front-end side of the website as per the convenience of the owner.
- Dropdown menus give you ease to add one or more than one custom menus as per your desire and requirement.
Exciting right? Let’s move ahead to see how can you effectively add dropdown menus within the WordPress website.
How to Create Dropdown Menus within the WordPress Website?
Without wasting much time, we move ahead to see how we can create menus and dropdown menus using the WordPress website.
Create a menu in your WordPress website:
1: Start with logging in the WordPress website.
2: Move ahead to the sidebar menu and then click on the Menus.

3: Here, click on create a new menu to start the process of creating a new menu.
4: Enter a name as per your choice on the menu name.
5: Now, click on Create Menu.

6: Next, move to the menu settings and under the assigned menu section, you can easily locate the menu position.
7: Finally, click on the save menu to update the changes.
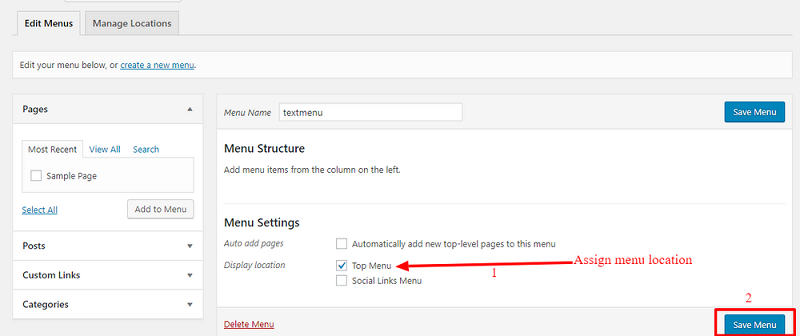
The above was just the first step in creating a menu under the WordPress website. Now, we need to customize the above to add a dropdown menu.
Add pages to the menu:
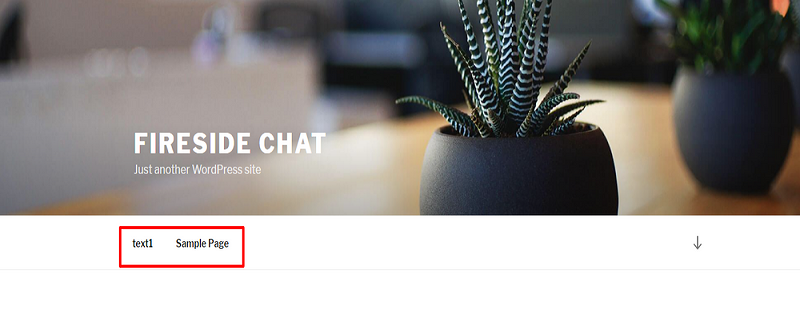
The first step here is to add pages within the menu. To do so, you need to follow the given below steps. Login to the WordPress admin dashboard and then go to appearances and then menus.
Once you are there:
1. Click on pages to select the pages that you wish to add within the WordPress website.
2. Now, click select the pages that you want to add within the menus of the site.
3. After you have selected the different pages, click on Add to Menu.
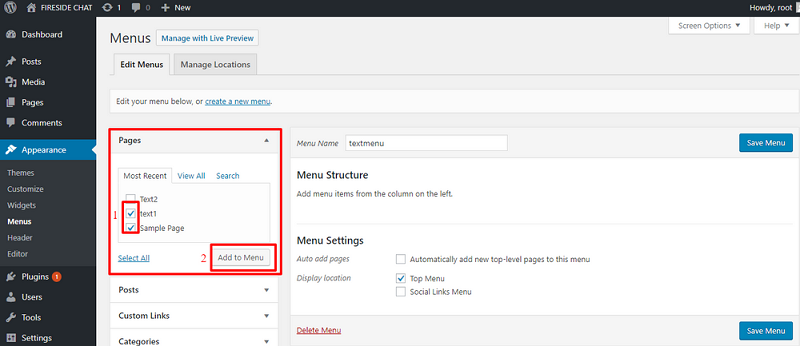
4. The pages would be added and you can see it as soon as you have selected them.
5. Don’t forget to click on the save menu to update the changes.
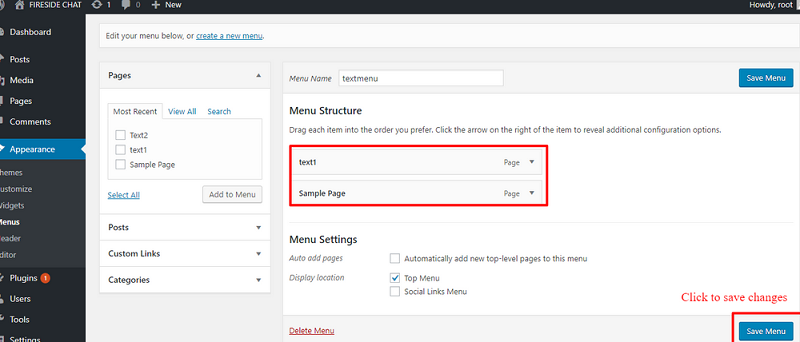
6. You can visit the site to see if the changes made have been reflected on the WordPress website.
Adding Custom Links
In case you wish to add customized links under the menu as an item, this, section will help you out.
Follow the steps to do so:
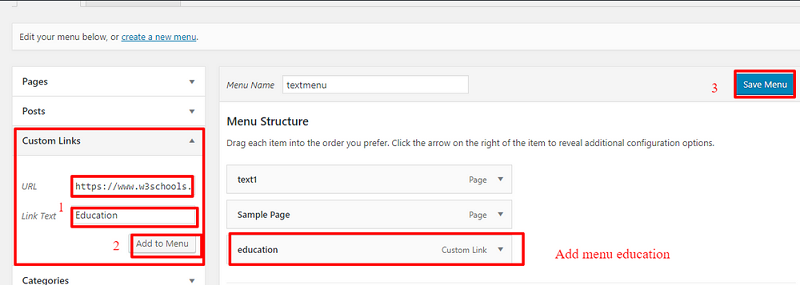
1: Select on Custom links.
2: Now paste the chosen URL.
3: Type in the text or the title under which you wish to show the link under the menu.
4: Finally, click on add to Menu to complete the process.
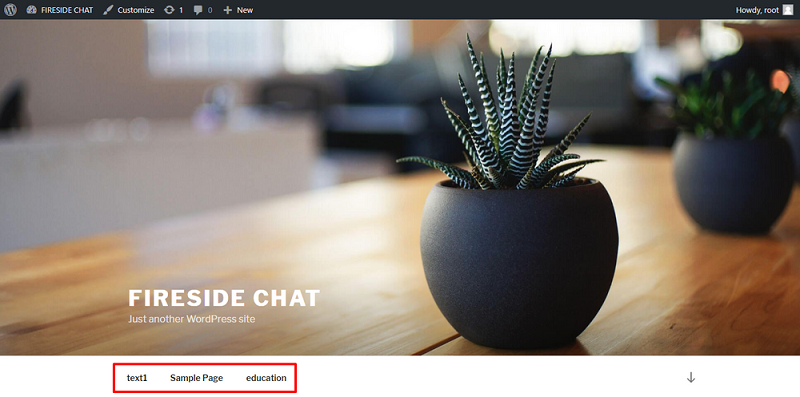
5. Visit the site to see if the links are successfully added.
Creating Sub-menu
1: Follow the above steps as logging in the site and then go to pages. Here, you can select all the pages that you wish to add as the child item to create the dropdown.
2: Click on add to the menu. View the pages that you want to add.
In order to add a submenu in the WordPress website, all you need to do is drop and drag the pages that you plan to add in the dropdown. Visit the site to see whether the changes have been reflected.
And that’s all you have successfully added Sub-menus within the WordPress website.

