
How to set up Cloudflare SSL on WordPress
Last updated on September 28th, 2021 at 10:57 am
We must know that there are different types of SSL certificates present. But there are some paid versions and some of them are for free. However, in this article, we are going to connect all the users with a free SSL certificate including a complete setup of SSL certificate with the help of Cloudflare. The user also makes sure that most of the free SSL certificate is signed by your own and after applying these certificates it always shows a security warning to the users. In this article, we are going to discuss getting a free SSL certificate and not showing any kind of security warning to the users.
How to get an SSL Certificate for free and not show a security warning to the users?
Most of our readers / Users think that is that possible. But we are going to clear to you that yes, it is possible. Users need to follow all these steps carefully after that user needs to achieve a free SSL Certificate with no security issue.
How to add Cloudflare flexible SSL to WordPress?
Here is the list with the help of that users can set up Cloudflare free SSL into any WordPress website. so check out the list carefully which is given below in detail.
- Requesting and setting up free SSL on the Cloudflare
- Which plugin required to install on the WordPress website
- Convert the WordPress website URL
- Enforce HTTPS via Cloudflare
- The mixed content issue to be resolved
Requesting and setting up free SSL on the Cloudflare
- First of all, the user needs to sign up for Cloudflare. For that user needs to visit the official website of Cloudflare.
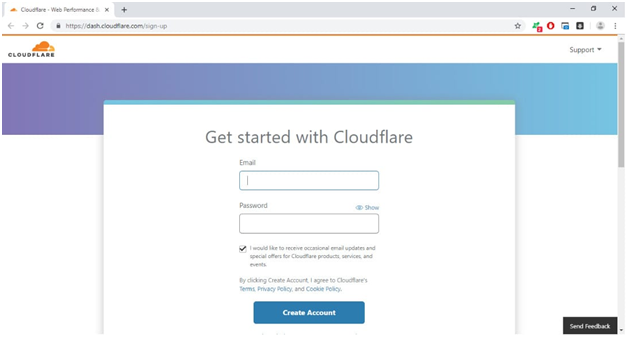
- If the user is new then the user must go to sign up and enter all the correct credentials which are required.
- However, if the user is already signed up then the user needs to go for logged in but voting correct credential which is created at the time of registration of creating an account. Check out the image given below.
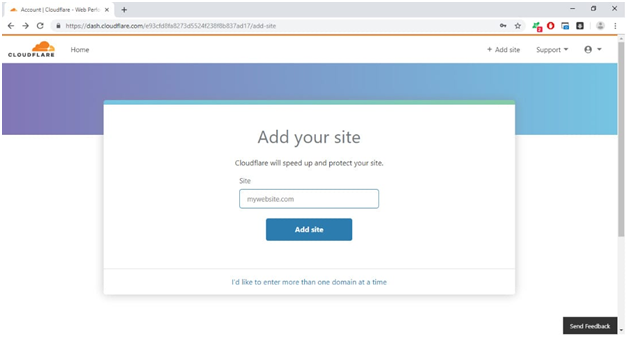
- Now users need to add their website URL or domain name of the website. check the image given below.
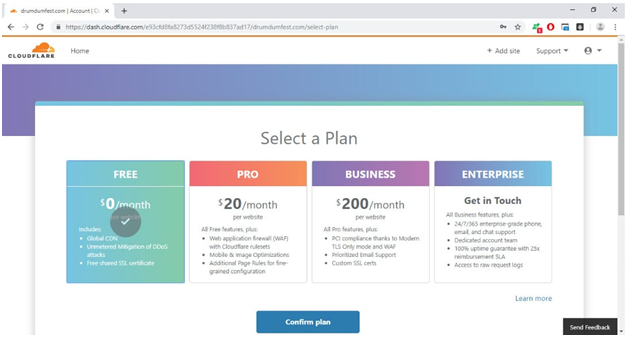
- Now used in must required to choose a plan. We are showing all after choosing a free plan here in this section we are going to choose a free plan. check out the image which is given below.
- Now the user must be required to change the name server of the domain.
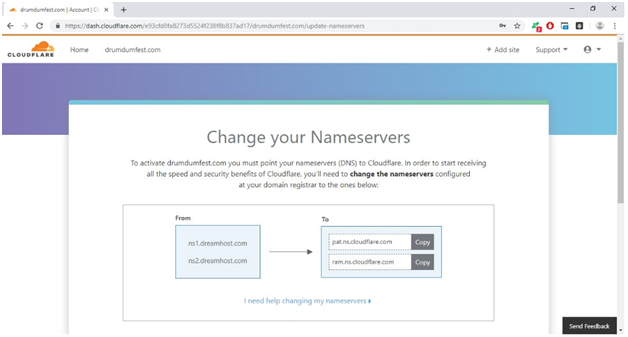
Important Note- For completing a user needs to put the name server of Cloudflare. Users must keep these to their domain name registered and configure all because there is a chance that hosting service providers have different name servers. After copying all the name servers click on the “ continue” option. Now the user will be able to redirect all these settings of this domain.
How to request the flexible SSL certificate?
- If the user is not able to see a page similar to the above image then the user must click on the “home” option and then click on the domain that has been added by the user.
- Now the user will face a complete row of icons. From these icons, the user needs to click on the “ Crypto” option.
- After that user will see a drop-down menu that contains a lot of options from that user that need to click on the “ flexible” option.
- If the user follows all the steps which are given above and the user also pointed all their name servers to Cloudflare then Cloudflare SSL will be activated within 15 minutes approximately.
- Cloudflare Activation depends upon several factors such as the complete period consumed by DNS, Cloudflare and etc.
Which plugin is required to install and activate into the wordpress website?
Cloud Flare SSL Plugin
For completing all further processes users need to install and activate the “Cloudflare SSL plugin”. Let’s discuss in detail the complete procedure.
Generic Process to install and activate any plugin
- The first phone user needs to visit the WordPress admin panel with the help of entering the correct credentials which are required. details that are required for login into the WordPress admin panel are username or Email Id and password.
- After successfully logged in to the WordPress admin panel, users need to click on the “Plugin” option.
- Now the supporter’s menu appears in front of the user but with lots of options but the user needs to click on the “ Add New Plugin” option.
- A new tab appears in front of the user now the user needs to add a Keyword in the search box panel which appears on the right side of the page.
Installing and Activate Cloudflare Flexible SSL Plugin
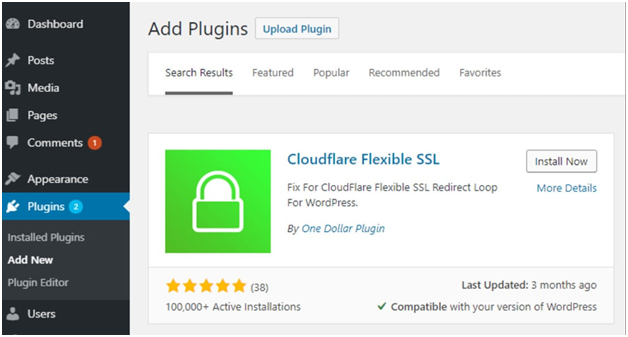
- Now the user needs to enter the “ Cloudflare Flexible SSL” keyword in the search panel and then press the enter button on the keyboard.
- Now a completely new list appears in front of the user. however, users need to choose the first option from the list.
- Now the user needs to install Cloudflare Flexible SSL Plugin after this process is completed the user needs to click on the activate option at the same time.
- Now the Cloudflare Flexible SSL plugin has been successfully installed and activated into the wordpress admin panel of the user. Check out the image given below.
HTTPS redirection Plugin
- Now the user needs to enter the “ HTTPS redirection” keyword in the search panel and then press the enter button on the keyboard.
- Now a completely new list appears in front of the user. however, users need to choose the first option from the list.
- Now the user needs to install the HTTPS redirection Plugin after this process completes and the user needs to click on the activate option at the same time.
- Now the HTTPS redirection plugin has been successfully installed and activated into the WordPress admin panel of the user. Check out the image given below.
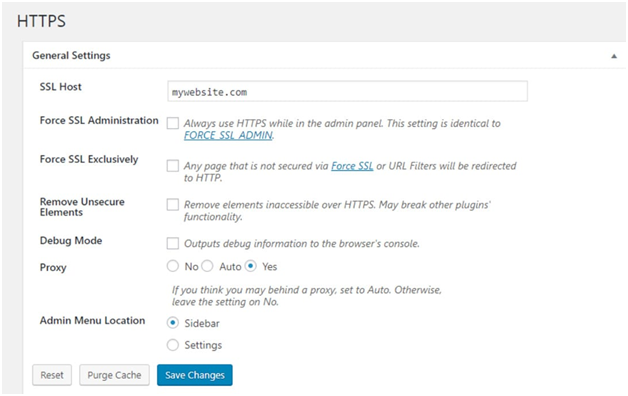
The requirement of this plugin is that it will avoid all “redirect loops”. The complete traffic will be forced on HTTPS. However, usually, both plugins working are the same in the WordPress admin panel. due to several security reasons of WordPress user fees that one plugin is not working after installing many times so, this is the alternative way and one of them will work.
Installing and Activate Really Simple SSL Plugin
According to our developer’s research, a really simple SSL plugin is very light in weight and the user does not require to change any kind of setting during installing this plugin into the WordPress admin panel. users are required to only click on activate the plugin and go ahead to activate SSL. Phone on the step given below how to activate and install a really simple SSL plugin into the WordPress admin panel read it carefully.
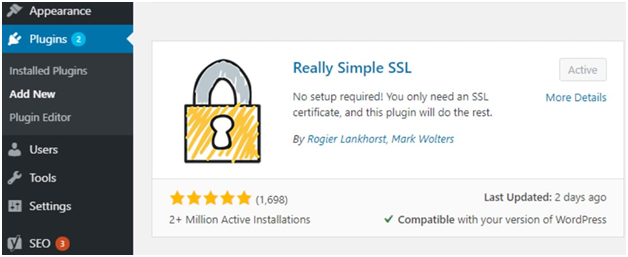
- Now the user needs to enter the “Really Simple SSL” keyword in the search panel and then press the enter button on the keyboard.
- Now a completely new list appears in front of the user. However, users need to choose the first option from the list.
- Now the user needs to install the Really Simple SSL Plugin after this process completes and the user needs to click on the activate option at the same time.
- Now the Really Simple SSL plugin has been successfully installed and activated into the wordpress admin panel of the user. Check out the image given below.
How to change the wordpress website URL?
As we know that there are two URLs that are connected with a WordPress website is WordPress address and site address.
WordPress Address- According to the WordPress address, it always shows the location of all admin pages, content, and all-important directories and files. In other words, we can say that this is the core of our WordPress website which always shows and determines all functionality of WordPress.
Site Address- Where visitors land on your website.
What is the cause after changing the wordpress address?
In the above section, we learned about WordPress addresses and site addresses. However, if we change our WordPress address then it will harm our complete website. The thing is that users only change site addresses. Follow all the steps that are given below and help all the users to change site addresses. So, read all the steps carefully that are given below.
- All the steps to login into the wordpress admin panel are given above. After successfully logged in to the wordpress admin panel.
- Users need to click on the “Setting ” option that is present on the left side of the screen.
- After clicking on the “Setting” option now the user will see a sub-context menu appear in front of the user. But users need to click on the “General” option that is present in the sub context menu.
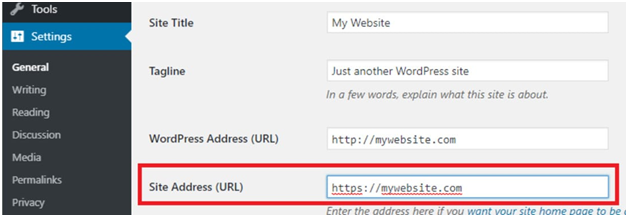
- A new screen appears in front of the user where the user can see Both address URLs. Now the user needs to click on the Site Address URL and change it according to the user requirement. Check out the image given below.
Enforce HTTPS via Cloudflare
After completing all the changes that have been taught above. Now users need to move towards the next step that is Enforce HTTPS via Cloudflare. Follow all the steps that are given below carefully.
- Users need to visit the Cloudflare profile again.
- After successful login to Cloudflare, website users need to select the domain.
- Now users need to choose “Crypto” options from all options that are present in the row.
- Now the user needs to turn on the ”HTTPS” option that is present over there. Check out the image given below.

- Users need to check these options which are given below.
- Opportunistic encryption
- Automatic HTTPS rewrites
How to create Page Rule in the Cloud Flare?
For creating a Page rule users need to understand the complete function. The page rule function is similar to the HTTPS option to be used in the ‘Crypto’ tab. But Page Rule is processed over the edge of Cloudflare so its processing is very quick. Now, let’s discuss step by step to activate Page Rule into the WordPress admin panel.
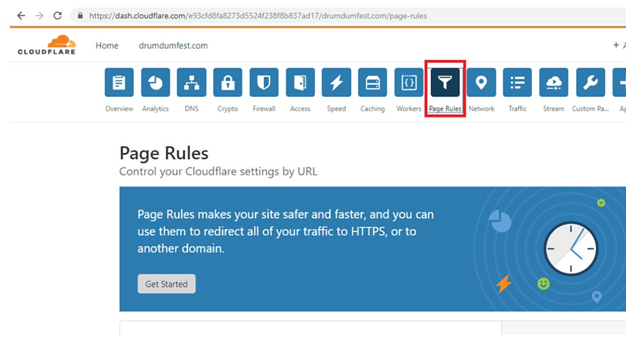
- Users need to login into the Cloudflare website for that user to follow all the steps that are given above. After successful login into the wordpress website, users need to click on the “Page rule ” icons.
- This Page Rule icon is present in the icon bar. Check out the image which is given below related to the Page rule icon.
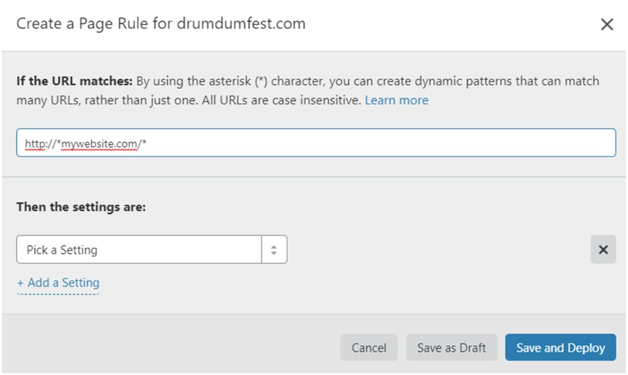
- After Clicking over the Page rule icon, users need to put the domain name into asterisks.
- In ‘Pick a setting’ the user needs to always choose “HTTPS”. Check out the image given below.
Resolving Mixed- Content issues
Over this step, users can redirect their website HTTP to HTTPS. From this version, the user needs to get connected with the complete HTTPS website. This is the final step where users can check their complete WordPress website content including images, videos, etc are to be redirected to HTTPS.


