
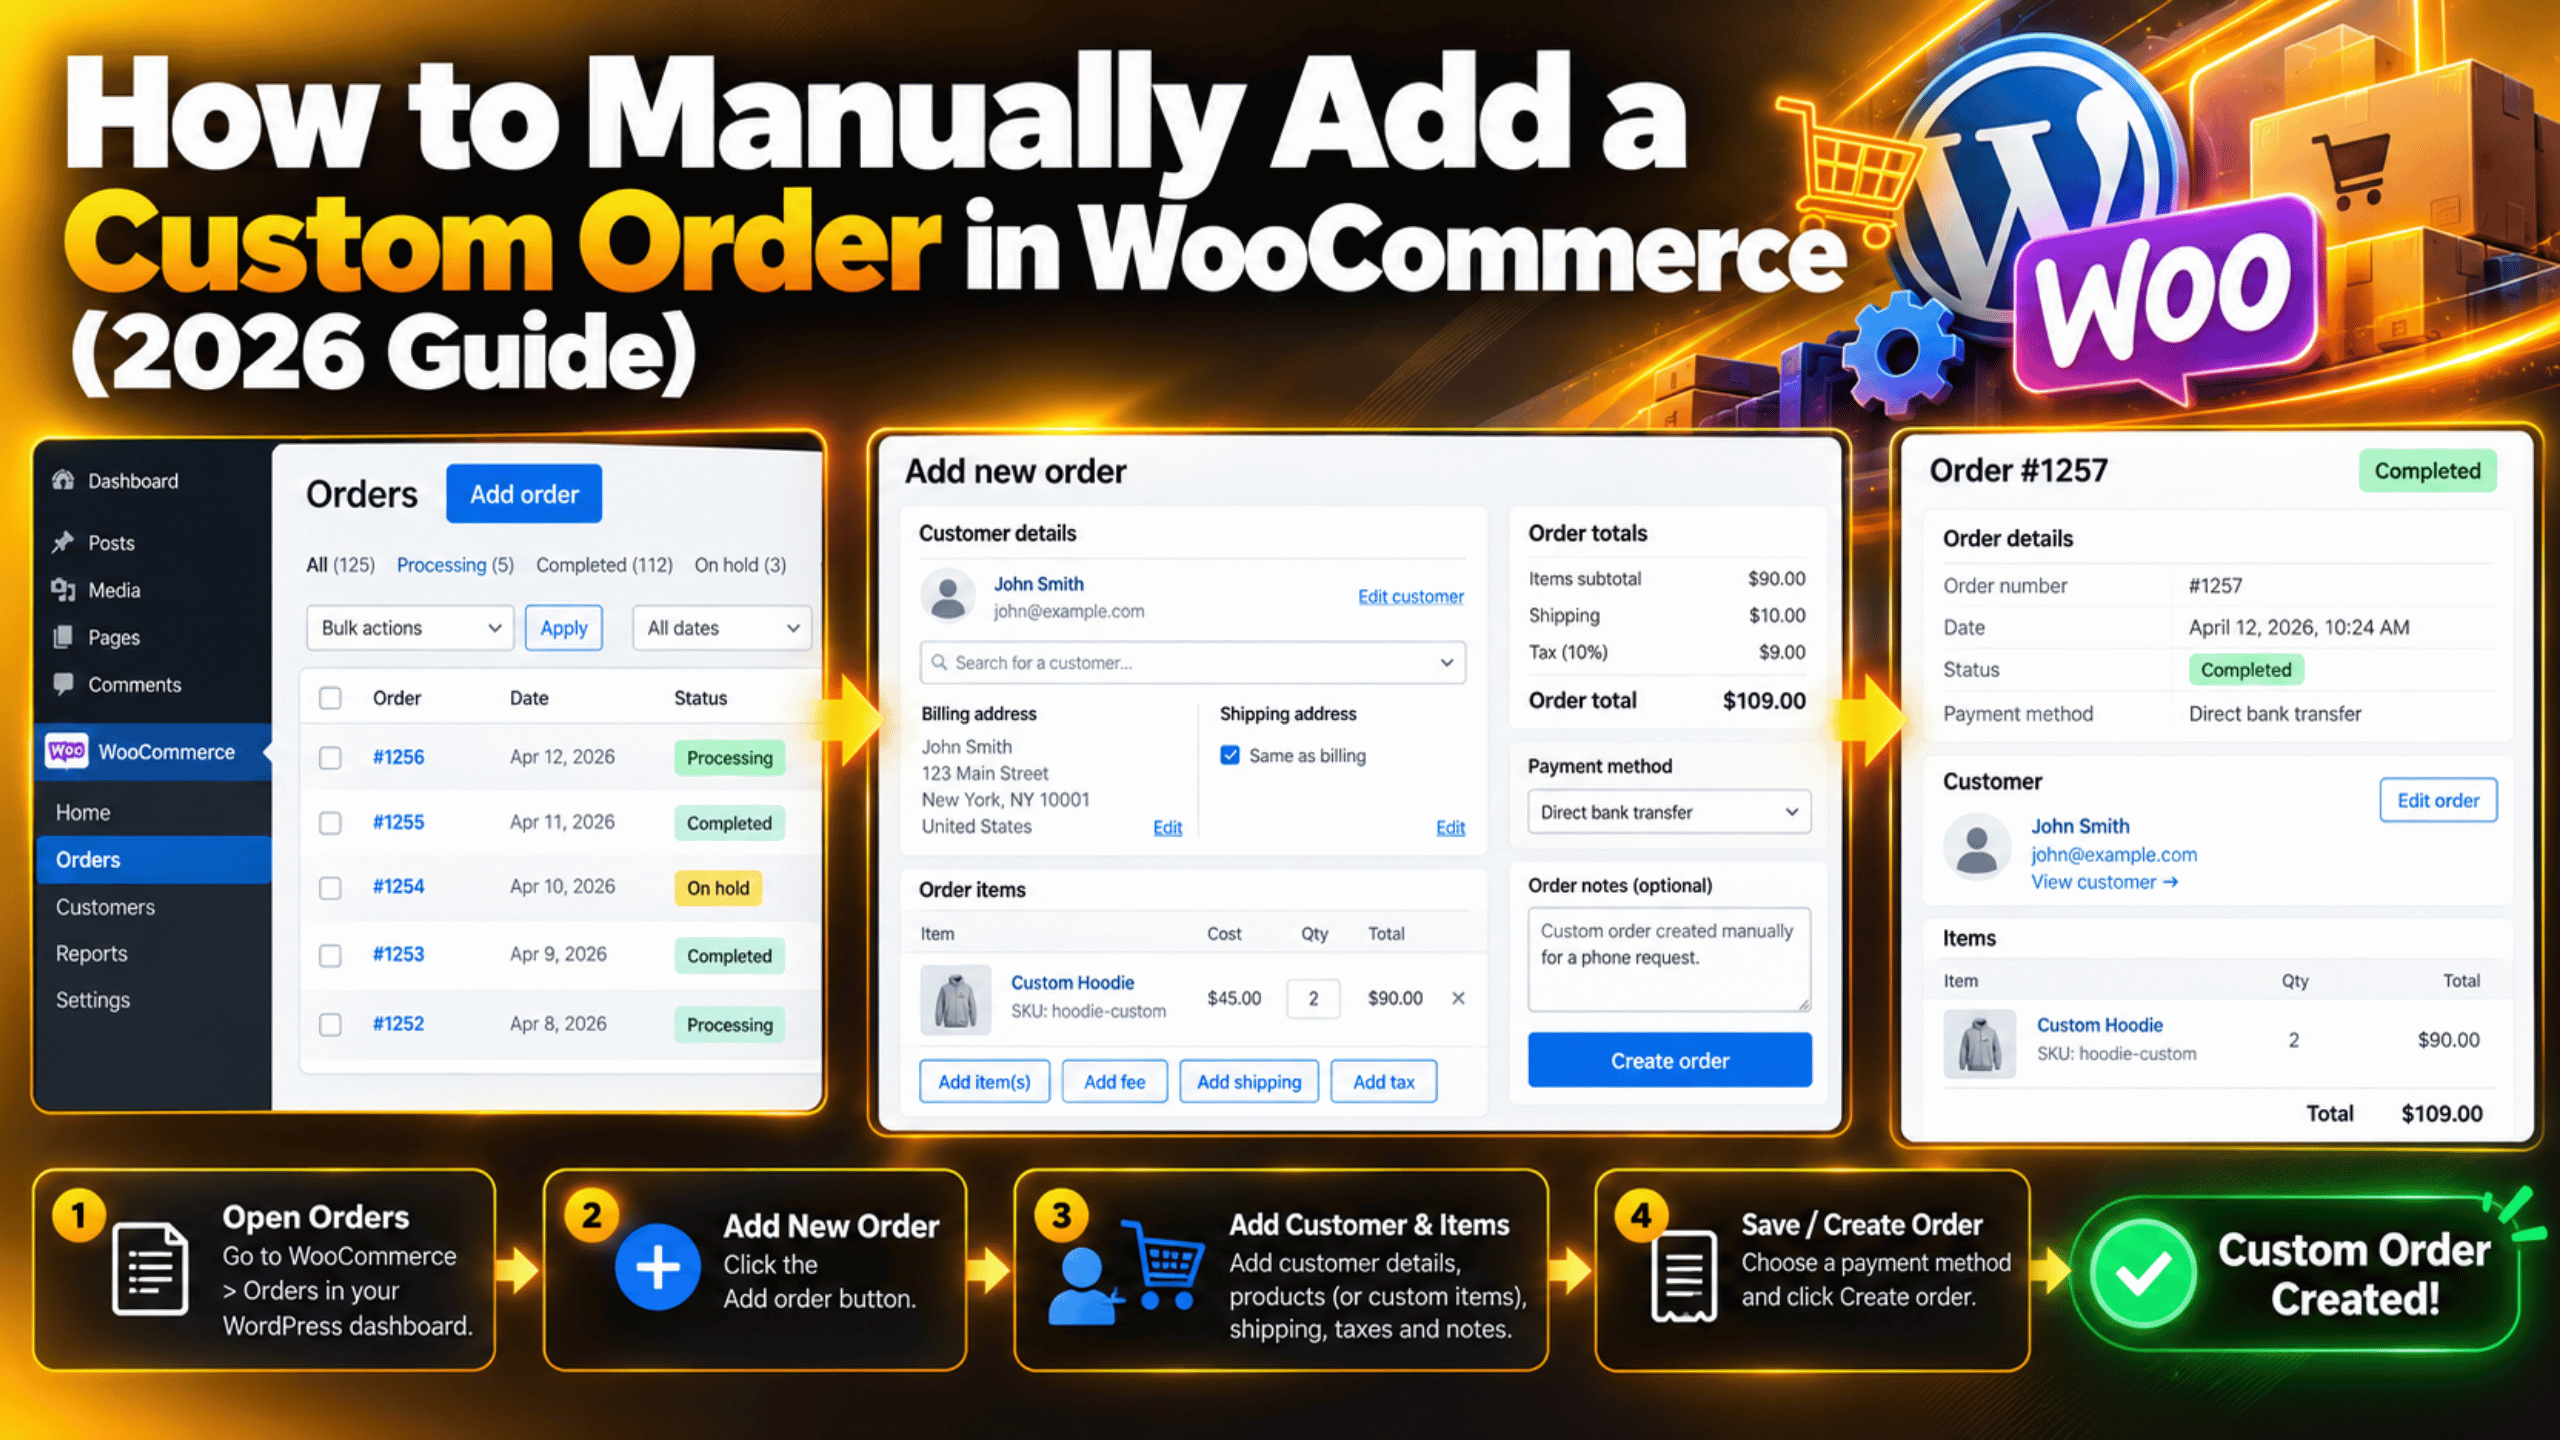
How to Manually Add a Custom Order in WooCommerce (2026 Guide)
Sometimes an order does not come from your checkout page. A customer phones in. A buyer pays by bank transfer. A client asks for a one-off quote with a special price. In each case you need an order record in your store, and WooCommerce lets you create one by hand.
This guide shows where the Add order screen lives, how to fill in each part, and how to handle payment, tax, shipping and stock. The steps match current WooCommerce versions, including stores that use High-Performance Order Storage (HPOS), the newer way WooCommerce keeps orders in its own database tables.
When You Need to Add an Order by Hand
A manual order is an order that a store admin creates inside the WordPress dashboard instead of the customer creating it at checkout. It appears in your order list like any other order. It can carry products, fees, shipping, tax and a payment status. The only difference is who typed it in.
Phone, email and in-person sales. Many small stores still take orders over the phone or at a market stall. Entering them by hand keeps all your sales in one place, so reports, stock levels and customer history stay accurate.
Offline payments and custom quotes. A customer may pay by cheque, cash or bank transfer. A client may also want a bundle at a negotiated price, or a service that is not in your catalogue. A manual order lets you record the payment and add a custom fee line without creating a new product.
Rebuilding failed or replacement orders. Sometimes a checkout breaks halfway and the customer pays, but no order is saved. If this happens often, our guide on fixing WooCommerce order confirmation issues can help you find the cause. You can also create a zero-cost order to ship a replacement parcel while keeping the original sale intact.
What You Need Before You Start
You need an account with the Administrator or Shop manager role, because other roles cannot create orders. Gather the customer name, email, phone number, billing address and shipping address. Know the products, quantities, agreed prices and how the customer will pay. Having this ready stops you from saving half-finished orders that clutter your list. Check that each product you plan to add is published and has the right stock status, because an unpublished product will not show up when you search for it on the order screen.
If you are trying the process for the first time, do it on a staging copy of your site rather than your live store. A staging copy is a private duplicate of your website where mistakes cannot affect real customers. Manual orders can reduce stock, send emails and change your sales reports. Take a full backup before you experiment. Our guide on how to back up and restore WordPress and WooCommerce walks you through it.
Step-by-Step: Create a Manual Order in WooCommerce
Follow these steps in order. The screen looks the same whether your store uses HPOS or the older post-based storage, although the web address in your browser differs slightly.
Open the Add Order Screen
Log in to your WordPress dashboard. In the left menu, click WooCommerce, then click Orders. At the top of the list, click the Add order button. WooCommerce opens a blank order screen with a new order number already assigned, so you do not need to type one.
The screen has three main areas. On the left you see the order details and the item table. On the right you see the order actions box and the order notes box. Take a moment to look at them before you type anything.
Set the Customer and Order Details
In the General box, you will see the order date, the status and the customer field. Click the Customer field and start typing a name or email. WooCommerce suggests matches from your user list. Pick the right one, then use the load address links to fill in the billing and shipping boxes.
If the buyer is not registered, choose Guest. Click the pencil icon next to Billing and type the name, address, email and phone number. If shipping is the same, click Copy billing address. Add an email even for phone orders. Without it, WooCommerce cannot send a confirmation or a payment link.
Add Products, Fees, Shipping and Coupons
Scroll to the item table and click Add item(s), then Add product(s). Type the product name or SKU, which is the stock code you gave the product. Pick it, set the quantity and click Add. For variable products, such as a shirt with sizes, choose the exact variation. To change a negotiated price, click the pencil icon on the line and edit the line total. The new price applies only to this order.
Not every charge is a product. Choose Add fee for a flat amount or a percentage, such as Custom design work. A negative fee works as a discount. Choose Add shipping to add a delivery line with a name and cost. For more on delivery options, read our beginner’s guide to WooCommerce shipping extensions. To use a discount code, click Apply coupon and enter it. If you have never set up codes, see how to create coupon code functionality in WooCommerce.
Calculate Tax and Totals
After you add all the lines, click Recalculate and confirm. WooCommerce works out the tax from the customer address and your tax settings. This step matters. If you skip it, the order total may show no tax at all. Enter the full address before you recalculate, and check your rates under WooCommerce → Settings → Tax.
A good result is an item table that shows a tax line and a grand total. If your prices already include tax, the total may not change after you recalculate. If the totals look wrong, fix the address or tax class and recalculate again.
Choose the Payment Method and Status
Find the Payment method drop-down and choose the method that matches how the customer paid, such as Direct bank transfer. Add a transaction ID if you have one, as this helps your accountant match the order to a bank entry later. Then set the Status, because it controls what happens next:
Pending payment means the customer still has to pay. Stock is not reduced yet. On hold means you are waiting for a payment to clear, and stock is reduced. Processing means payment is received and the order is ready to ship. Completed means the order is shipped and finished. Finally, click Create on the right to save the order.
How to Take Payment on a Manual Order
Many store owners expect a manual order to charge the customer’s card automatically. It does not. Creating an order only records the sale. You still have to collect the money, and there are three common ways to do it.


Send a payment link. Save the order as Pending payment. Open it again and you will see a Customer payment page link near the order number. Send that link to the customer. They choose a payment method and pay, and the order moves forward on its own. Our guide to payment gateway integration for B2B and B2C stores explains how gateways fit into this flow.
Record an offline payment. If the customer paid by transfer, cheque or cash, set the status to On hold until the money arrives. Then change it to Processing. Add a private order note with the date and reference number so there is a clear paper trail.
Email the invoice. In the Order actions box, choose Email invoice / order details to customer and click the arrow button. The customer gets an email with the summary and a pay link if payment is still due. Never ask a customer to send full card numbers by email or chat, because it is unsafe.
How Manual Orders Affect Stock, Reports and Emails
A manual order is a real order, so it touches several parts of your store. Knowing this prevents surprises.
Stock levels. WooCommerce reduces stock when the order reaches On hold, Processing or Completed. If stock does not change, open the product and check that Manage stock is on in its Inventory tab.
Sales reports. Orders marked Processing, Completed or On hold count toward your sales figures. Pending orders do not.
Customer emails. Saving an order may send an email to you and to the customer, depending on the status. Review which emails go out under WooCommerce → Settings → Emails. If you picked a registered customer, the order also appears in their My account area. A guest order does not.
Order notes. Use the notes box to record who created the order and why. This habit helps when several people work in the same store. Watch for fraud too. Confirm the buyer before you ship high-value goods, and read our article on how to prevent fake orders on WooCommerce for warning signs.
Common Problems and How to Fix Them
Most manual order issues have simple causes. Here are the ones that appear most often.
The Add order button is missing. Your role may not allow it. Only Administrators and Shop managers can create orders. Check your role under Users → All Users.
The product search finds nothing. The product may be unpublished or private. Publish it, or check that the title or SKU is spelled correctly.
Tax shows as zero. You probably forgot to click Recalculate, or the address is incomplete. Add the country, state and postcode, then recalculate. Also confirm that taxes are on under WooCommerce → Settings → General.
The customer did not get an email. Check the billing email for typos and look in spam. Then confirm the email type is enabled in the Emails settings. If your site sends no mail at all, the cause is usually your mail setup, and an SMTP service often solves it.
You made a duplicate order. Set the extra order to Cancelled rather than deleting it. A cancelled order restores stock and keeps a clear record.
If errors continue, deactivate extra plugins one at a time on a staging site to find a conflict. Always take a backup before you change plugins on a live store.
Get Expert Help With Your WooCommerce Store
Adding an order by hand is simple once you know the screen. Open WooCommerce, then Orders, then Add order. Pick the customer, add products and fees, recalculate tax, choose the payment method and status, and save. Send a payment link when the customer still needs to pay, and add a note so your team can follow what happened.
Review your order list weekly and look for orders stuck in Pending payment or On hold. Follow up with the customer or cancel the order so that stock and reports stay accurate. If your orders do not save, your emails do not send or your stock numbers look wrong, the cause may sit deeper in your setup. The team at 24×7 WP Support works on WordPress and WooCommerce issues every day. If you would like someone to take a look at your store, get in touch and describe what you see.






Brian is a WordPress support specialist and content contributor at 24×7 WP Support. He writes practical, easy-to-follow guides on WordPress troubleshooting, WooCommerce issues, plugin and theme errors, website security, migrations, performance optimization, and integrations. With a focus on solving real website problems, Brian helps business owners, bloggers, and online store managers keep their WordPress sites running smoothly.