
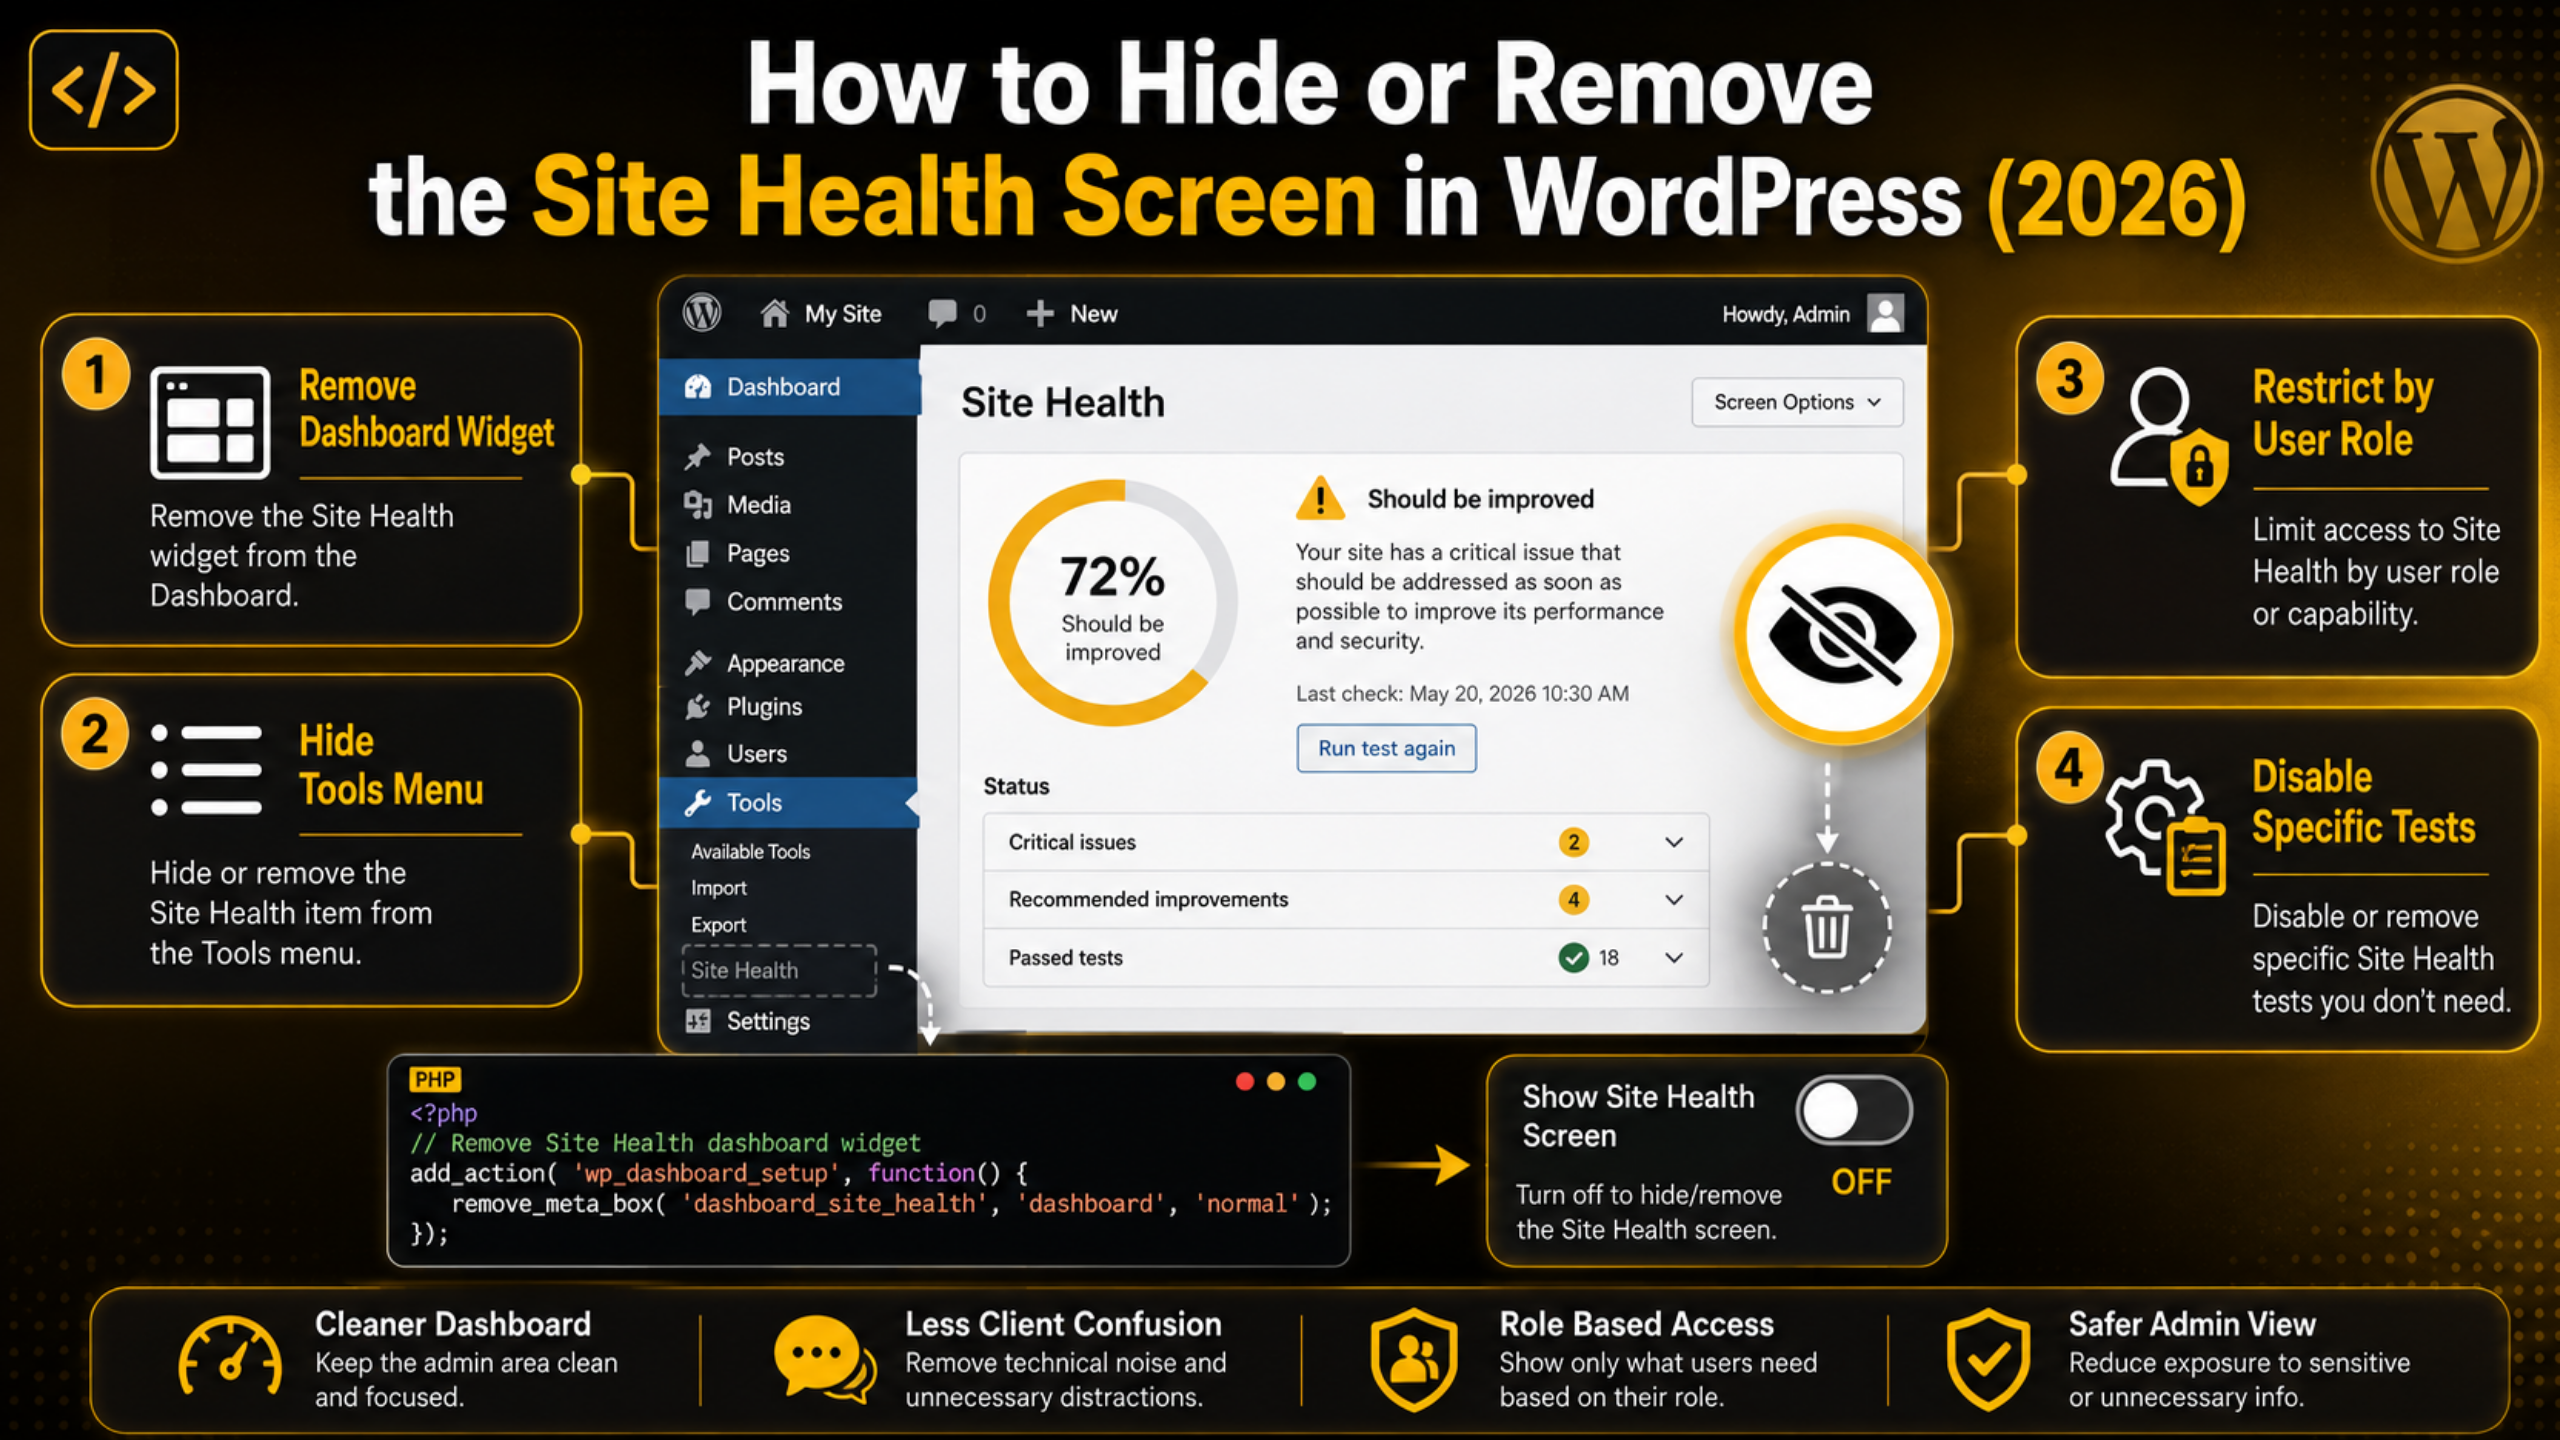
How to Hide or Remove the Site Health Screen in WordPress (2026)
The Site Health screen has shipped with WordPress since version 5.2. It grades your site, flags warnings, and lists dozens of technical details. That is useful for a developer. It is often confusing for a client who just wants to write a blog post.
A yellow “Should be improved” notice can spark a panic email. Worse, the Info tab exposes your PHP version, database size, server software, and full plugin list to anyone who can reach that page. Many site owners would rather that screen was not there at all.
This guide shows you exactly how to hide or remove Site Health. You will get working code for each method, the file to put it in, and the trade-offs of each choice. Every snippet below works on current WordPress releases in 2026.
What the Site Health Feature Actually Adds to Your Admin Area
Before you remove anything, you need to know what you are removing. Site Health is not one thing. It is three separate pieces, and each one needs its own fix.
The first piece is the Site Health Status widget. It sits on your main dashboard at Dashboard → Home. It shows a coloured circle and a short summary of passed and failed tests. Its internal ID is dashboard_site_health.
The second piece is the Site Health page itself. You reach it at Tools → Site Health. The file behind it is site-health.php. It has two tabs: Status and Info. The Info tab is the one that lists your server details.
The third piece is the set of tests that produce the score. WordPress runs some tests instantly and others in the background over AJAX. Plugins can add their own tests to this list too.
You can remove any one of these on its own. Hiding the widget does not hide the page. Hiding the page does not stop the tests from running. Decide which piece is actually causing the problem, then pick the matching method below.
Method 1: Remove the Site Health Widget From the Dashboard
This is the change most people actually want. It clears the coloured warning box off the main dashboard without touching anything else. The Site Health page stays available to you under Tools.
WordPress registers the widget during the wp_dashboard_setup action. You remove it with remove_meta_box(). Add this snippet to your theme’s functions.php file or to a small plugin:
add_action( 'wp_dashboard_setup', 'wps_remove_site_health_widget', 20 );
function wps_remove_site_health_widget() {
    remove_meta_box( 'dashboard_site_health', 'dashboard', 'normal' );
}
The priority of 20 matters. WordPress adds the widget at the default priority of 10. Your code has to run after that, or there is nothing there to remove yet. If the widget still shows up, raise the number to 99 and try again.
Reload the dashboard once the code is saved. The box should be gone for every user. If it is gone for you but still visible for someone else, they may have dragged it into a different column. Change 'normal' to 'side' and add a second remove_meta_box() call to cover both.
One warning. Do not try to hide the widget with CSS such as #dashboard_site_health { display: none; }. The widget still loads, the tests still run, and anyone can reveal it with browser tools. Removing it in PHP is faster and actually works.
Method 2: Remove the Tools → Site Health Menu Item
Sometimes the widget is fine but the menu item is the problem. A client clicks Tools, sees Site Health, opens it, and then asks why their site “has errors”. Taking the link out of the menu solves that.
The Site Health page is registered as a submenu of Tools. You remove the link with remove_submenu_page() on the admin_menu hook:
add_action( 'admin_menu', 'wps_remove_site_health_page', 999 );
function wps_remove_site_health_page() {
    remove_submenu_page( 'tools.php', 'site-health.php' );
}
Use a high priority such as 999 here. Plugins add and reorder menu items on this same hook. Running last means your removal is not undone by something else.
Be clear about what this does. It only hides the link. The page still exists. Anyone who types /wp-admin/site-health.php into the address bar will still load it. That is fine if you are only tidying the menu for convenience.
If you need the page genuinely blocked, use Method 3 instead. Hiding a menu item is a cosmetic change, not a security control. The same logic applies to any admin menu you trim, which is why it helps to understand how to limit dashboard access in WordPress properly.
Method 3: Block Site Health by Capability for Non-Admins
This is the strongest and cleanest option. WordPress gates the whole Site Health feature behind a single meta capability called view_site_health_checks. Take that capability away and the widget, the menu item, and direct URL access all disappear together.
Filter map_meta_cap and deny the capability to anyone who is not an administrator:
add_filter( 'map_meta_cap', 'wps_restrict_site_health', 10, 4 );
function wps_restrict_site_health( $caps, $cap, $user_id, $args ) {
    if ( 'view_site_health_checks' === $cap ) {
        $user = get_userdata( $user_id );
        if ( ! $user || ! in_array( 'administrator', (array) $user->roles, true ) ) {
            $caps[] = 'do_not_allow';
        }
    }
    return $caps;
}
The do_not_allow value is a real WordPress convention. No role holds it, so adding it to the required list makes the check fail. A blocked user who visits the URL directly gets a permission error instead of the page.
You can flip this rule around just as easily. To hide Site Health from every user including yourself, delete the role check and always append do_not_allow. To allow one specific person, compare $user_id against their ID before denying.
Because this method works through the capability system, it behaves predictably with editors, authors, and any custom roles you have created. If you are unsure which role a user holds, our guide to WordPress user roles and permissions walks through each level.
Method 4: Silence Individual Tests Instead of Hiding Everything
Removing the whole screen is a blunt fix. Often only one or two warnings are the real annoyance, and the rest of the report is worth keeping. In that case, remove just the tests you do not need.


WordPress passes the full test list through the site_status_tests filter. The list is an array with two keys: direct for instant tests and async for background ones. Unset the entries you want gone:
add_filter( 'site_status_tests', 'wps_trim_site_health_tests' );
function wps_trim_site_health_tests( $tests ) {
    unset( $tests['direct']['plugin_theme_auto_updates'] );
    unset( $tests['async']['background_updates'] );
    return $tests;
}
To find the right key, open the Status tab and expand the warning. The test slug usually matches the wording of the heading. Common keys include php_version, https_status, scheduled_events, and rest_availability.
Choose carefully here. A warning about an outdated PHP version is worth acting on rather than hiding, since it affects both speed and security. Check where you stand first with our short guide on how to check your WordPress PHP version.
Site Health also caches its result for a short period. After you remove a test, the score may not update straight away. Reload the Status tab once or twice and the stale entry will clear.
Where to Put the Code So It Survives Updates
Your snippet has to live somewhere that a theme or core update will not overwrite. There are three sensible homes, and one of them is a mistake many people make.
The mistake is editing the functions.php file of a parent theme. The next theme update wipes it. If you want to use a theme file, use a child theme instead, which keeps your code separate and safe. Our explainer on what a WordPress child theme is covers the setup in a few minutes.
The better option is a must-use plugin. Create a folder called mu-plugins inside wp-content if it does not already exist. Add a file named site-health-tweaks.php, open it with <?php, and paste your snippet below. WordPress loads every file in that folder automatically. There is nothing to activate and nobody can deactivate it by accident.
A normal plugin also works well if you want an on and off switch. Create wp-content/plugins/site-health-tweaks/site-health-tweaks.php, add a plugin header comment with a name, then activate it from the Plugins screen. Turning the feature back on later is then a single click.
Whichever route you pick, edit the file over SFTP or through your host’s file manager. Avoid the built-in theme and plugin editors. A typo there can lock you out of the admin area entirely.
Should You Hide Site Health at All?
Hiding a warning does not fix the problem behind it. That is worth saying plainly before you paste any of this code. Site Health exists because those checks catch real issues, and some of them matter a great deal.
There is a strong case for hiding it on client sites. A non-technical owner cannot act on a loopback request failure. All the warning does is create worry and a support ticket. Removing it from their view while you monitor it yourself is a reasonable and common practice.
There is a weaker case for hiding it on your own site. If the score is orange, something on the site genuinely needs attention. A missing scheduled event can stop backups, and a failed REST route can break your editor. Those are worth an hour of your time.
A middle path often works best. Use Method 3 to restrict the screen to administrators, and keep checking it yourself on a set schedule. Pair it with a broader performance review, since several Site Health flags overlap with the causes covered in our guide to fixing a slow WordPress admin dashboard.
Restoring Site Health and Fixing Common Problems
Every method here is fully reversible. Delete the snippet, save the file, and reload the admin area. The widget, the menu item, and the tests all come straight back. Nothing is written to the database, so there is nothing to clean up afterwards.
If the widget refuses to disappear, the usual cause is priority. Your wp_dashboard_setup callback is running before WordPress has registered the box. Change the priority from 20 to 99 and reload.
If the menu item is still there, another plugin is likely adding it back after your code runs. Raise the admin_menu priority to 9999. If it persists, deactivate plugins one at a time to find the one responsible.
If you see a white screen after saving, you have a PHP syntax error. Connect over SFTP, delete or rename the file you just edited, and the site will load again. Check for a missing semicolon or an unclosed brace before pasting it back.
Finally, remember that a caching plugin or a server-side page cache can hold on to an old version of the dashboard. Clear both caches before you decide the code did not work.
Get Expert Help With Your WordPress Admin Area
Trimming the admin area for a client is a small job with a lot of small traps. One misplaced character in functions.php can take a site offline, and a hidden warning can quietly turn into a real outage months later.
Our team handles this kind of work every day. We tidy admin dashboards, lock down capabilities by role, resolve the warnings behind a poor Site Health score, and keep the whole site maintained so those warnings stop coming back. You get the clean dashboard your client wants and the monitoring your site needs.
Visit 24×7 WP Support to talk to a WordPress expert. We are available around the clock, and the first conversation costs you nothing.

Brian is a WordPress support specialist and content contributor at 24×7 WP Support. He writes practical, easy-to-follow guides on WordPress troubleshooting, WooCommerce issues, plugin and theme errors, website security, migrations, performance optimization, and integrations. With a focus on solving real website problems, Brian helps business owners, bloggers, and online store managers keep their WordPress sites running smoothly.
