A Complete Guide on How to Edit WordPress Pages/Plugin/Files
Last updated on August 11th, 2021 at 05:32 am
Meeting your client’s expectations by building a perfect WordPress site is the best feeling ever. It is because you have put lots of efforts in research, you have sacrificed lots of precious time, and you have addressed their needs.
But, what if the client demands immediate edits before the project is delivered or right after that?
Don’t dishearten yourself, as we are presenting a convenient guide on how to make edits without many efforts.
There is no central editor tool available in the market for editing. For example, the web pages are edited in WordPress whenever the core file like .htaccess takes place in the control panel. Hence, you can consider this article as a guide that helps you to edit WordPress site effectively. Here you will learn to :
- Edit WordPress Pages and Posts
- Edit WordPress Images
- Edit WordPress Headers
- Edit WordPress Footers
- Edit WordPress Themes
- Edit WordPress Plugins
- Edit WordPress Core Files
Edit the WordPress Pages and the Posts
Are you someone looking to improve the design of your website? Then stop worrying about the hottest trends, and it’s time for cutting back for the sake of excellent mobile experience.
The back-end or “administration area” of your WordPress site is where content is created and edited. The default location is http:/yourWebsite.com / wp-admin for your back-end (replace “yourWebsite.com” with your website address). Enter the username and password specified by your web developer when setting up WordPress.
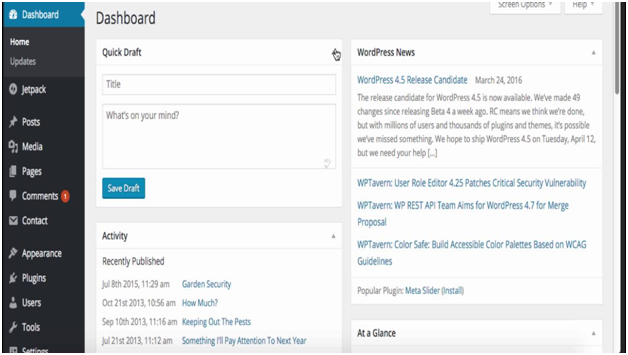
- Once you login, you can see the dashboard of the administration and the menu on the left. Under Pages or, for forums, under Articles, the material should be ordered.
- In terms of editing, posts and pages are virtually the same; in this article, the focus of the images and discussion is on Pages.
- To see a list of available websites, click on All Websites or sub-menu.
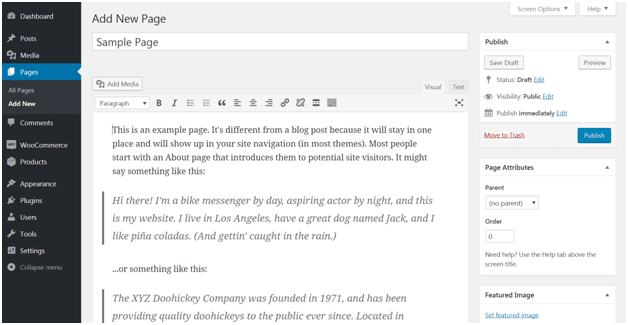
- To create a new page, click the Add New sub-menu.
- For editing the page or the post which you have created, you need to navigate it to the corresponding admin menu. Also, you need to locate the one which must be updated.
- One must also see that some basic theme styles, footer, or header cannot be edited.
- There are two ways to modify the material from WordPress: text and visual.
- Visual mode is an approximation of the presentation of published content and contains bold, italic, strikethrough, and more formatting keys.
- The additional row of buttons is shown by the far right button, Toolbar Toggle.
- To add style to the range, highlight content, and press a button.
- With these controls, feel free to play around— you can’t break anything, and you can always delete or save the experiments.
- Text mode shows all the HTML code controlling format, fonts, media tools, etc.
- This is an advanced editing mode, and this view may be confusing if you are not familiar with HTML.
The Classic Editor
Previously, the WordPress editor was known as a Classic Editor.
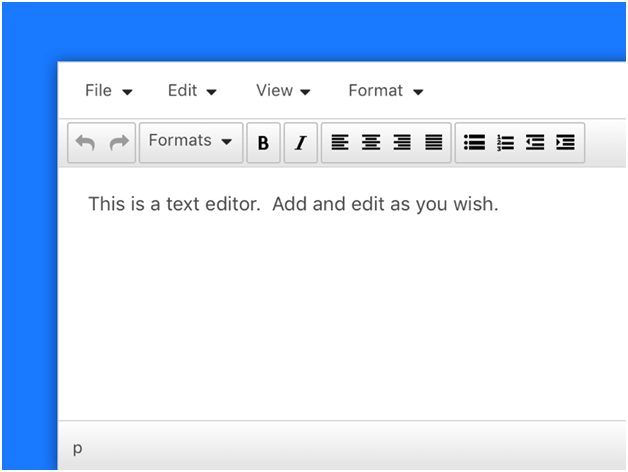
The Classic editor makes use of a WYSIWYG editor box. The content is edited and created from one panel. Classic Editor is an official WordPress plugin that will rebuild the previous WordPress editor (“classic”) and the “Edit Post” screen. It allows the use of plugins that extend the screen, adds meta boxes of some old-style, and also depends upon the previous editor.
The (Gutenberg) WordPress Editor
The WordPress community is expecting more and more new, fascinating, and creative stuff with each passing year. Guntenberg’s emergence marked it in this respect in the year 2019.
Gutenberg is the default block editor for the latest WordPress 5.0. It means that your new content editor will immediately become Gutenberg when you update WordPress. Why is it automatic? Because previously, WordPress’s default editor was TinyMCE, which wasn’t bad, but still had restrictions on more comprehensive options. So, the Gutenberg comes as the default content editor in the new WordPress 5.0 update. But it’s also possible if someone wants to stay with the old one.
Gutenberg is the block editor, and as it comes from the name-block is the website’s main component. In other words, Gutenberg’s central concept is that the site includes various types of blocks, and that’s all. Only blocks that can be added by clicking on the”+” icon, as a user.
Use of Page Builders as Editors
The best way of editing the WordPress pages and the WordPress posts is via Page Builders. Many people make use of these visual editor tools that are filled with drag-and-drop functionality.
Beaver Builder is a lightweight drag and drop page builder that runs on your WordPress website’s front end. You will love to take charge of your website, whether you’re a novice or a professional. Stop writing HTML or use short cryptic codes to combat. Construction of stunning, professional WordPress pages with Beaver Builder is as simple as drag and drop.
You will set up beautiful websites in no time once you learn the ropes, and it’s an easy job. It beats searching, downloading, installing, and setting up WordPress themes, as all from one easy-to-use interface can be completely customized.
It’s super easy to install, learn and use the Beaver Builder, and since there’s just so much you can do with little effort, playing with Beaver Builder runs on Bootstrap is a lot of fun, and there are zero bloats, even with the multiple modules and so on.
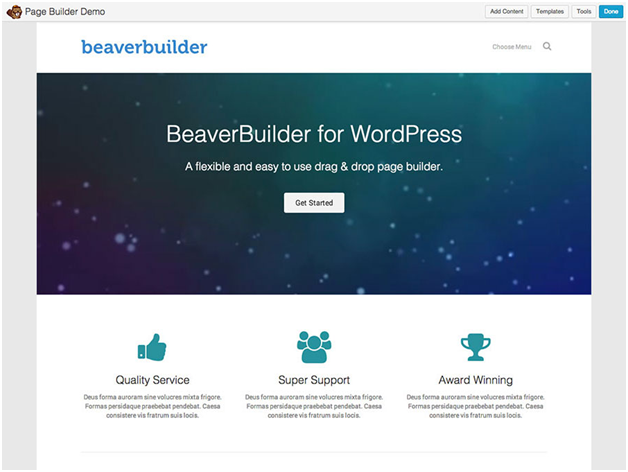
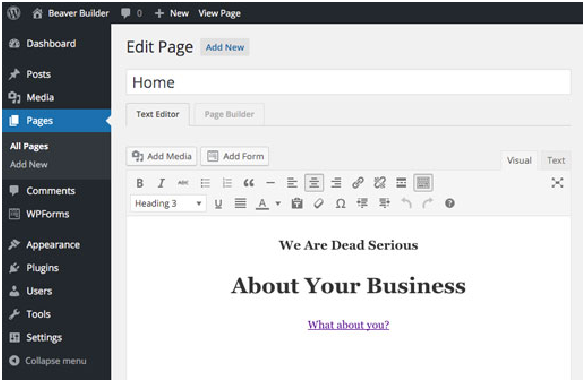
Here’s how the edition of WordPress pages with the help of Beaver Builder plugin looks like:
Next comes the Elementor WordPress page editor. An Elementor page builder is not only used by developers, but also by solopreneurs running their websites. In addition to being easy to use, Elementor has an active community where you can get help, advice, and support.
Here’s what it’s like to edit WordPress pages with the Elementor page builder plugin:
Elementor lets you edit your content, its style, and implementing advanced customizations. Additionally, as you go on editing, you can watch your page updated in real-time.
Use of Jetpack in WordPress
Jetpack is one of WordPress blogger-popular and widely used plugins. It has lots of features with free versions such as traffic stats, spam filters, photo CDN. The paid versions always provide advanced features such as security and filter backup, restore SEO, marketing, and the rest be assured.
For the WordPress developers and designers, it would be difficult to edit the copy on your own. One can hire a proofreader for the edition work but the best option here is to add Jetpack to your sites. With Jetpack, it is not possible to restructure or reword the content for improving its readability or SEO, but Jetpack is capable of catching various misspellings and can do proofreading.
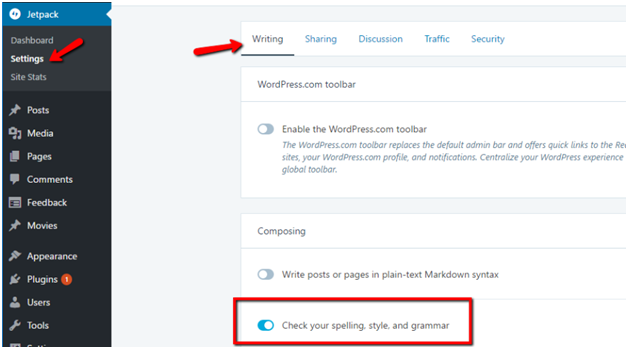
After you install a Jetpack, there appears a spell check icon in the WYSIWYG toolbar:
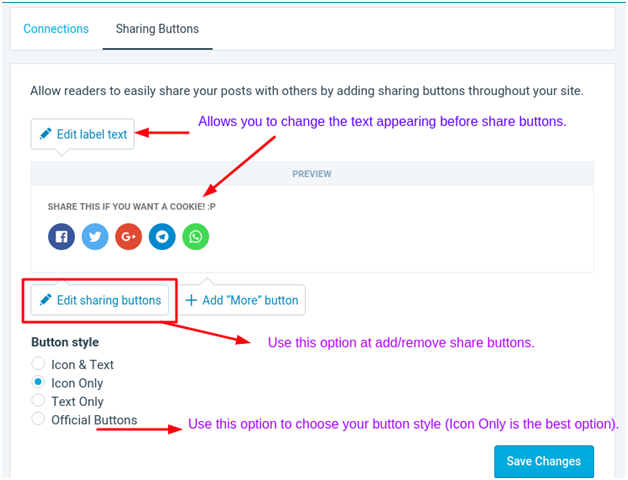
Once you click, Jetpack scans the whole text and also underlines the words that need a recheck. If you want to see the recommended settings, then you can click on the highlighted words, and the Jetpack gives you the options.
Similar to autocorrect, the spell checker in Jetpack has a strict vocabulary.
The tool is a thorough guide that explains to you what you can do with the images in WordPress. Let us focus on the editing piece of images.
Editing Images
Only uploading images is not enough for editing the images in WordPress.
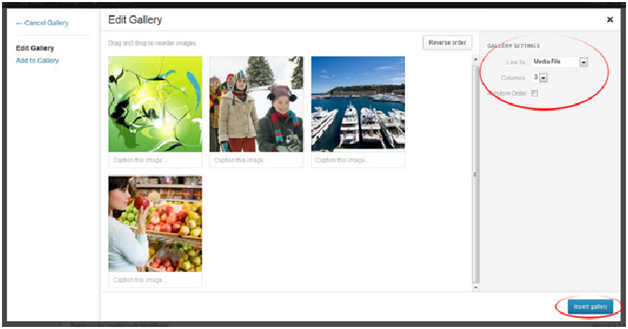
Here one can manipulate the image beyond adding the caption or the alt text. You can see current pictures uploaded under the Edit Gallery tab, or click on Insert Image to add a new image. WordPress has a convenient drag-and-drop interface, or click Select Files to browse a file dialog. Multiple files can be drag-and-drop at the same time.
The image editor in WordPress is shown below:
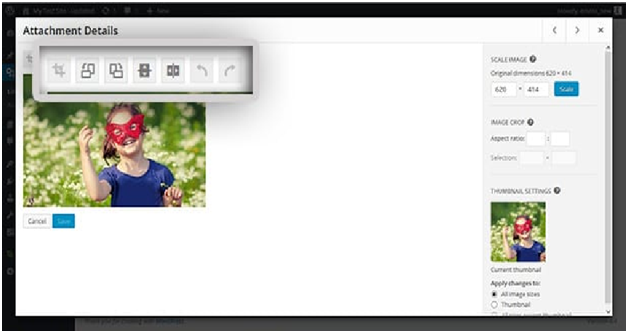
Although the editor is not a robust image editing tool similar to Photoshop, you can do below things here:
- Make changes in the dimensions
- Crop the images
- Rotate all the images
- Flip the images
Editing the Headers
WordPress uses a simple templating method where a piece of code stored in the header.php template file contains all header information. Footer content is also stored in the file footer.php. Mostly the code in these files is plain HTML with PHP code bits (template tags) that dynamically display the metadata.
In the header.php file, you don’t have to touch code to change the header. Most of the themes come with the admin panels that are easy to use for customizing the headers, footers, and the other areas of the page.
Few basic changes in the header and footer can be made with the help of plugins. Examples here include Footer Code, AddFunc Head, Mega Menu, HTML, and simple Header Footer.
Appearance > Customize
On the Appearance admin menu, one can customize your theme design. One can find lots of options based on which theme you can use. There are two parts to the standard WordPress header: the top part is the meta-header part where you can attach meta-data tags for SEO purposes. This also provides access to the stylesheets of the theme. The lower part of the header includes all of the branding information .
Header.php
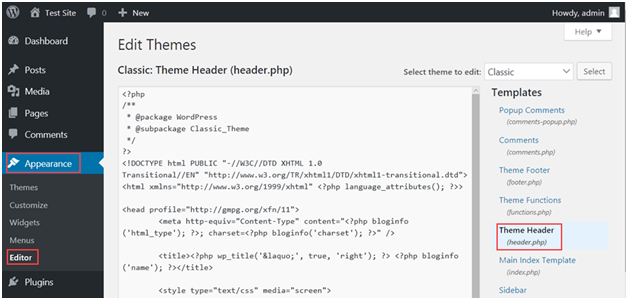
The WordPress theme editor allows making adjustments to the header, and one can find it under Appearance > Theme Editor. There are various style sheets and files that enable you to edit the theme settings. You can locate the particular file “header.php”.
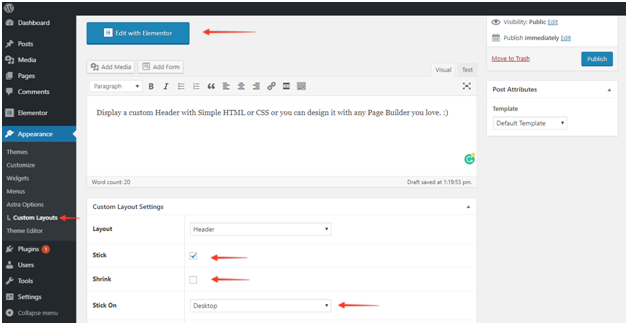
If you are pro in coding, then you must surely give it a try. If not, then you can check for template options that are available on the page builder or theme. The Elementor Pro contains a small number of the header block templates which are offered to the users.
Also you should have some knowledge on how to edit WordPress source code.
Editing the Footers
There are also two key parts of the classic footer: the top section includes the sitemap, social links, privacy policy, legal disclaimers and other important information about your website, while the bottom section contains copyright information and date. But, instead of two horizontal rows, you can split your footer into several columns.
Editing footers in WordPress is similar to editing the headers in WordPress.
- Firstly, you need to log into the WordPress dashboard.
- Then, on the left-hand side, click on the editor link on the Appearance section of the navigation
- Next is to click on the footer link for editing the footer.php on the right-hand side of the screen
- Then locate the footer code. The footer code displays the footer text at its bottom.
Customizing the WordPress Page
Customization is one of the biggest reasons why WordPress is such a powerful and accessible platform to create websites. The software is quite versatile, whether you are installing plugins for apps or hand-coding components. You must make sure the changes done are in a proper format. Too many plugins could be added, or improper coding practices could lead to a website being compromised. How often are you activating new themes? What different features would you like to see in a theme rather than the customizing code?
The process by which you edit WordPress is not always as straightforward as many things in this content management system. It could be a bit difficult to keep track of where to look for each having various parts of the website, its integrations, and its editable database.
Wrapping Up
Training to use page templates is an essential step on your path to mastering WordPress. That can make it very easy to customize your website. By inserting widget areas to displaying unique post types to showing a list of contributors to your website, there are virtually endless possibilities.
Whether you’re using conditional tags, using the WordPress template hierarchy, or creating page-specific template files is up to you and the future plans you are looking to implement. Start small and work your way to more complicated stuff. It’s not long before every part of your WordPress website responds to every call you make.


