How To Add Meta Tags In WordPress
Last updated on August 10th, 2021 at 01:56 pm
Considering the fact that you have a running WordPress website, you would definitely want to grab user attention and monetize your website, right?
Now, when we talk about grabbing traffic towards a WordPress website, the first thing that hits the mind is SEO. Websites that are SEO relevant tend to have a higher rank and so are bound to attain better user traffic. While you have had embedded all of the necessary steps to update your website SEO, skipping the inception of meta tags from your website tends to lower the possibility of being indexed by the search engine web crawlers.
So, adding meta-tags to the website is a must. But what are these?
What are WordPress meta tags?
The short descriptions that you see below the title of your WP blog or the website in the search engine are meta-tags. For example, suppose you opened Google and there in the search bar, you entered the topic top 10 WordPress security plugin. Beneath every link, you will find 2-3 lines of information added about the site. This is what we call as meta tags.
Meta tags will have everything related to the website. From the keywords to authors, document types, copyrights and all, the meta tags render information about all. The length of meta tags is limited to 300 characters. So, you can add as much information as needed.
Ok, so we know what meta tags are but why would you need them in the WordPress website?
Why do you need meta tags in WordPress?
If you ever had the chance to know about on-page SEO, odds are you might very well be aware of how meta tags affect the SEO of the website. If not, let me help you out.
Meta tags as we know have information related to the website and the Google bots or the search engine web crawlers have the tendency to scan through the blog post title and the meta tags for keywords and information.
The more you optimize the better the SEO and higher is the page rankings. In short, as many as keywords the bots find in the meta-information, they deem the website relevant to the search query and hence, order the ranking.
It is an excellent way to keep your WordPress content optimized and to the point. Make sure that the information embedded within the meta tags are short and crisp. Do not stuff them with unnecessary keywords. Also, adding a keyword to the start of the information is always better than adding them at the end.
You can also embed call to action information within the meta tags to better optimize them and increase the likelihood of your website ranking at the top.
Convinced, so now we can move ahead and see how we can add meta tags on the WordPress website.
How to add meta tags in WordPress?
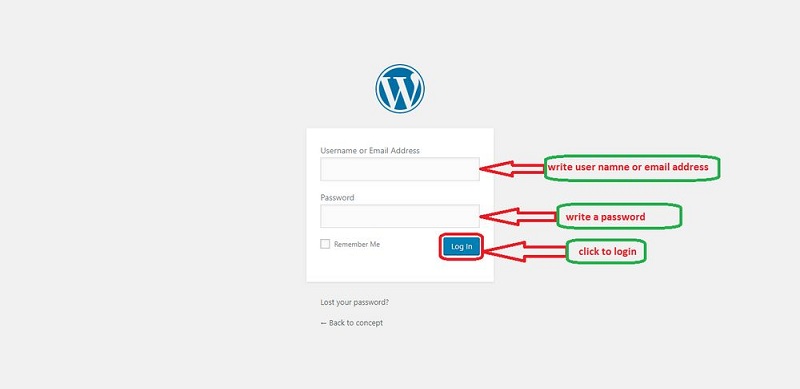
- Start with logging in to the WordPress website.

- Enter the login credentials and validate your identity.
- Navigate to the left of the screen and then click on appearances and then select editor.
- Next, you will need to click open the header file of the WordPress website.
- Any of the file that has the title of header or header.php.
- Under the template section at the right of the screen, you will find the header file.
- This is the one that has the option to edit or modify the meta tags of the WordPress website.
Now that you have the access to the header file, you would now need to edit the same in order to add the meta-information on the WordPress website.
- Click open the header file. Now, locate the head tag in the file. This will have all the information related to the meta tags. The meta tags have the approved syntax of the Swift types as:
<meta class=”swiftly” name=”[field name]” data-type=”[field type]” content=”[field content]”>
Example: in case you aren’t sure as to how this works we have an example designed for you.
Here is the example of meta tags as used by us, 24*7 WP Support. You can copy-paste the code given below. Do not forget to edit the file based on the themes embedded within the WordPress website.
// 24*7 WP Support <meta class=”swiftype” name=”name” data-type=”string” content=”<?php echo get_the_page_meta(’email’, $post->post_page); ?>”>
Once done, you have now successfully added meta tag information on the WordPress website. You can also use plugins to create meta tag information for your website. In case, you aren’t compatible with the coding stuff, the SEO plugin will help you add meta tags on the site. All you got to do is install the plugin and activate it.
So, adopt the method that serves your interest best. It will surely improve your search engine ranking and site performance.

