Guide to Editing Source Code of your WordPress Website PHP, MySQL, HTML, JavaScript & CSS
Last updated on August 10th, 2021 at 12:10 pm
WordPress is at the core of more than 34% of websites of the internet, and its popularity doesn’t seem to reduce in the near future. What makes it amazing is its power to adapt changes and grow. That’s the cause why everyone – from small bloggers to startups, medium-sized businesses, e-commerce businesses, and enterprises – is satisfied with its -performance and capabilities.
While launching or updating a website, developers and business owners want to customize its functionality and appearance suitably. Well, it’s easy in the case of WordPress. You can do it using free, premium and custom-developed plugins/themes, or by updating the PHP, MySQL, CSS, JavaScript and HTML code/script.
In this article, we are going to cover the same in-depth. However, please keep it in mind that doing so is only possible in case of self-hosted WordPress websites. So, if your digital entity is running on WordPress.com, this how-to guide won’t help you.
Tutorial Prerequisites
Before we get into the more technical stuff, we would like to tell you a few things that need not editing the source code of your WordPress or WooCommerce website.
- When Updates arrive
So sometimes, your WordPress website starts showing warnings related to plugin update, theme update or PHP version update. The older version of any of these may cause missing functionalities, error messages or broken elements. In such a scenario, you need not touch the source code, but update the desired module from your dashboard itself.
- Theme Customization
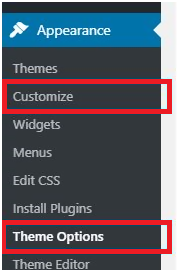
Most of the WordPress themes come with advanced editing capabilities and need no editing in the source code when you’ve to change their appearance. So, before thinking of making changes in the WP source code, do explore the Appearance > Customization and Appearance > Theme Options tabs of your WordPress admin panel. Changes are that your layout-related concern will be sorted out from any of these options itself.
When Do You Need to Change Source Code in WordPress?
- When you need to add the HTML code to a page, which is not as per your theme.
- When you want your website to have differently-designed elements and sections than your theme’s elements.
- When you want to change the database’s strings or values.
- When you want to extend your website’s capabilities or change the way of posts, pages, etc.
And, so on…
So, the next question that arrives in your mind is… what all can be changed?
The most precise answer to it will be – EVERYTHING. Yes. From the PHP code to CSS, JavaScript, HTML scripts and MySQL files – WordPress lets you update everything. So, the customization flexibility of this super-powerful CMS is 100% undoubtedly.
Now, we are about to begin by telling you how to edit the source code in WordPress using PHP, MySQL, HTML, and JavaScript. However, before beginning to edit these files, you must learn –
1. Updating/uploading files using an FTP solution.
2. Creating a Child theme.
These are mandatorily for you to learn if you don’t want to avoid mishaps. Remember that it’s your website. Any wrong step will break the code and render sections weirdly, which you won’t want. [Skip the next 2 sections in you know these 2 things already]
Updating the Core Files of your WordPress website – The right way
Remember: You can also use your hosting login for updating and uploading the files to the WordPress website, but it’ll be a troublesome thing to do.
WordPress Editors and options assure enough flexibility for the designers, but it doesn’t grant you the freedom of editing all the files. For editing any file you want, or to add new files manually to your website, you will need an FTP client. FileZilla Client is the best option for this, as it’s free, open-source and pretty easy to use.

Once you’ve downloaded the software, you’ll need credentials to get access to your website’s files. Therefore, open your cPanel and find the ‘FTP Connections’ (or a similar option) under the ‘Files’ section.
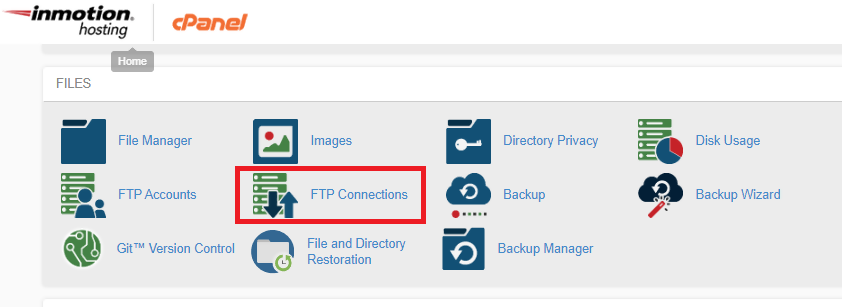
From here, you will be able to fill this form –
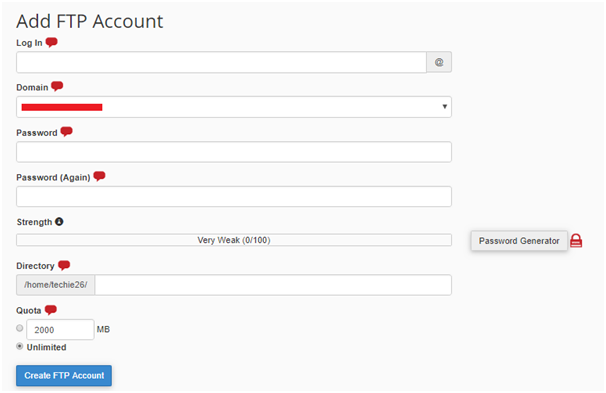
Create an FTP account using this and go back to the FileZilla window.
Next step is to add a site by clicking on ‘New Site’ and filling the credentials alongside the site details in this form –
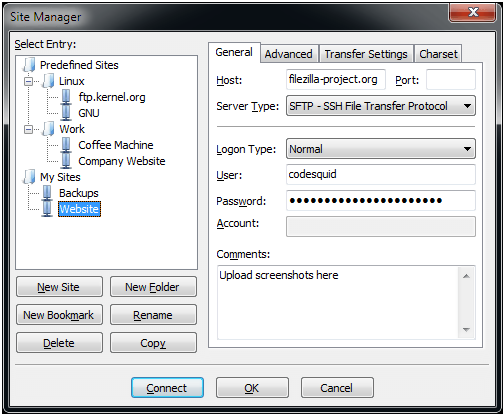
Click on ‘connect’ to establish the connection. If everything went well, you will see your hosted files & folders rendering in FileZilla.
Note: Always upload a file from your local system to the server after renaming the file on the server. This way, you will get a backup ready to be restored, in case something went wrong. Not doing so with replace the original file on the server and hence, the previous version will get deleted.
Creating a Child Theme in WordPress
While a lot can be done from the front panel of WordPress, custom code should always be added to child themes.
Why?
The reason is simple. You don’t want to lose your capability to update your theme when new versions arrive, right?
Updating a theme sometimes restores its core files, removing all the changes you’ve added to these files. So, in order to keep updating the core theme and tweaking its code or other files, adding a child theme is the best way. This theme inherits the core theme’s functionalities and keeps you customizations untamed when main theme is updated.
To create a child theme for your existing WordPress theme –
- Go to ‘wp-contents/themes/’ folder and add a folder here. Name it anything, let’s say – X – Child Theme. [We are considering that DemoTheme is our main theme here.]
- Now, create a file named ‘style.css’ in any text editor and add this code to it –
/*
Theme Name: X – Child Theme
Theme URI:
Description:
Author:
Author URI:
Template:
Version: 1.0.0
*/
@import url(“../DemoTheme/style.css”);
Note: Add the required details in every field after the colon. In front of the template section, we have to add the name of the parent theme. So, add DemoTheme here.
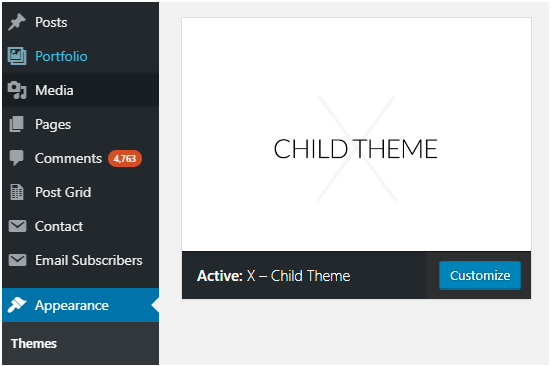
3. Upload this file (style.css) to the X – Child Theme folder and check Appearances > Themes section of your admin dashboard.
It should appear in the list of themes, available for use.
4. Now, add a ‘funtions.php’ file to your theme folder. Functions.php is for adding the extended functionality related code to your child theme. For the time being, just add an opening PHP tag i.e. –
<?php
Note: These 2 files (style.css and functions.php are mandatory for your child theme as they inherit the style and functionality of parent theme for your website, respectively.)
Guide to Editing Source Code in WordPress
All the prerequisites that you needed to know are over now. So, at this point, we are considering that you’ve read all the tricks and processes we covered above. The tutorial will cover direct steps for the source code editing of your WordPress website from here – Using the dashboard, as well as, using FTP login.
Editing HTML in WordPress
When you need to edit HTML Code of any of your Pages
There are 2 ways to open the pages of your WordPress website in the editor, from where the HTML code can be edited –
Method 1
Login to your WordPress admin dashboard and open the URL of the page to be edited. Let’s say, you want to edit the home page itself, then open it in the same browser. You will see an option, named ‘Edit page’, in the top bar. Click on it.

Method 2
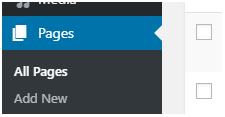
Click on the ‘All Pages’ link from the ‘Pages’ section.
Now, you must have a paginated list of all the website pages opened in front of you. Either search for the desired page manually or use the search box, present on the right screen of your screen.
The row, containing the page’s name, will resemble this screenshot –

Click on the ‘Edit’ button.
Both these methods will take you to either WYSIWYG editor or the latest, Gutenberg editor.
For WYSIWYG Editor
If your site is still using WYSIWYG editor, you will see an editor section, similar to this –

Now, you can edit the HTML of this page visually or make changes in the raw code.
For visual editing, click on the tags’ names, add/change the text simultaneously and remove/change the parts as per your needs.
For editing the raw HTML code, switch to ‘Text’ [see the right corner] and make the desired changes and additions on the page.
Once you’re done, save the changes. Now, on opening this page, your website should render the changes live.
For Gutenberg Editor
Gutenberg is the updated WordPress editor for simplifying your work. For editing your existing content through Gutenberg editor, click on the three dots that appear on hovering the section.
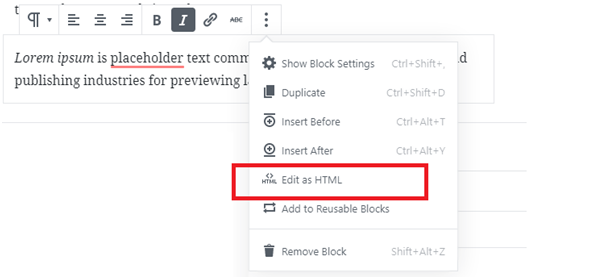
Next, click on ‘Edit as HTML.’
Doing this will let you make changes in the HTML code of the opened page. Save the updated version of this page to reflect the edits on your live website.
Editing CSS in WordPress
WordPress CSS is responsible for the visual appeal of your website, and therefore, making any change in it modifies the appearance of your site to an extent – depending upon which element is being touched. We’ve given whole this explanation to make you aware of the fact that editing CSS may have an adverse effect on your website’s design too, if done wrongly.
Now, these are the 2 methods for Editing WordPress CSS –
Method 1 –
For making minor changes in the text color schemes, fonts, height or width of sections, etc., you will find a few options, directly on the frontend of your WordPress website. Most of the famous WordPress themes (premium ones, at least) come with these options nowadays. If your theme has this option, you won’t need putting in any extra effort. To figure out the same, go to Appearance > Customize or Appearance > Theme Options section.
Method 2 –
Look for the Appearance Tab and check if it has a sub-menu named Edit CSS.
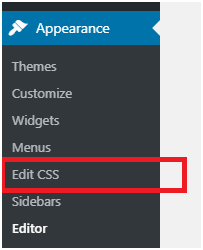
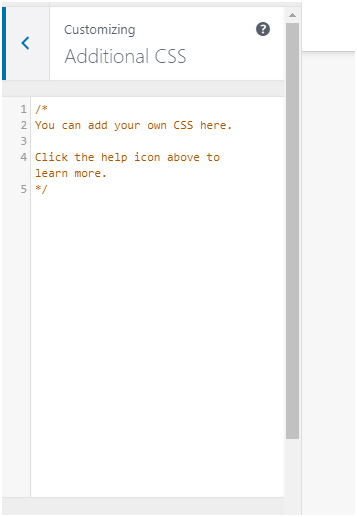
Once you’ll click this link, you will be redirected to a page with space for adding the extra CSS code. The look of this editor page varies with themes, and may differ from the screenshot we’re adding –
Method 3 –
This is the typical web designer’s way of editing the CSS of WordPress websites. And the process is simple. All you need to do is – Go to the Child Theme Folder you’ve created and add your CSS script file to ‘style.css’.
While creating the style.css file above, we’d added this code –
@import url(“../DemoTheme/style.css”);
Do not forget to add it in your style.css file if you haven’t, because otherwise, it will override the style.css file of your theme. It means, only the child folder’s CSS will be considered. Hence, the importing of your old ‘style’ file needs to be done manually.
Method 4 – [Read it if you use Visual Composer Plugin, or planning to use it]
Visual Composer is a comprehensive visual editing solution for those, who prefer working on the layout without touching the code. It has a powerful frontend that lets WordPress or WooCommerce website owners design and modify their pages.
You can add or modify CSS using the visual composer; it’s pretty easy.
The plugin lets you add two types of custom CSS to your elements –
1. Local CSS
Let’s say you have a button and you want to apply the design changes through CSS to that button only. Local CSS will be used in this case. You can consider it a way of adding inline CSS to your pages.
2. Global CSS
For applying changes to an element or a section through the website, global CSS will be used. It is similar to adding CSS script in your style.css file.
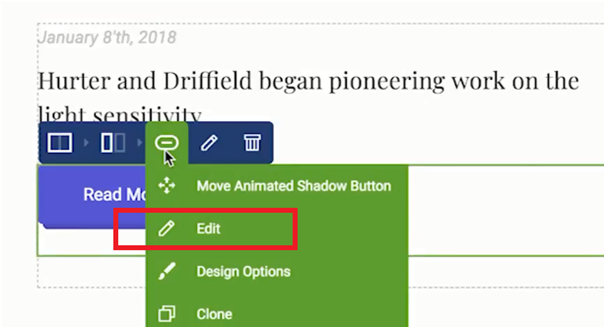
To add CSS to your sections/elements/pages, open them in the Visual Composer editor and go to the section you want to add CSS to. Now, hover over the section and click on the ‘ – ’ sign. From dropdown, choose ‘Edit’.
Now, search for ‘Extra Class Name’, and add a phrase here. This phrase will direct to the class, you’ll create for your element, so keep in reasonable.
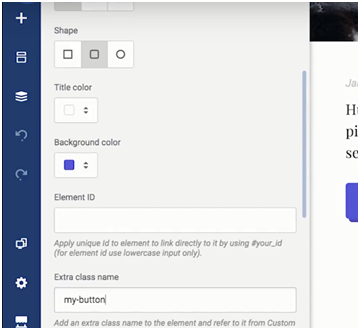
Now, go to the settings (see the ‘settings’ icon in left sticky sidebar of your page) and scroll to Custom CSS section.
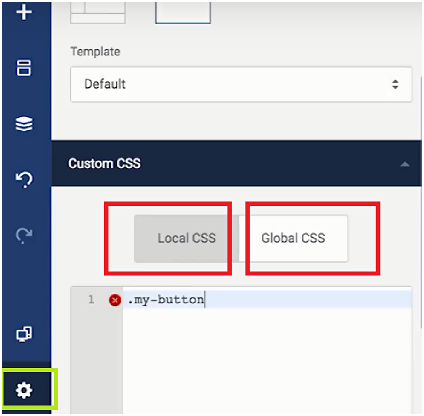
Here, add the CSS as per your need and save changes before exiting the web page.
Apart from Visual Composer plugin, there are many CSS live editor WordPress plugins that could be used for the same purpose. You may try these, or other free plugins, for CSS editing too.
Note – Yes, we have not explained how to edit the main CSS file of your WordPress theme, as it’s not the optimal method of adding website CSS. Each theme update will restore the theme CSS, causing the loss of your customized code. You don’t want that, right?
Editing MySQL in WordPress
Have you switched from an old domain name to a new domain name?
If yes, you might need to change the URLs in multiple places for your WordPress website. The easiest way to do so is making suitable changes in the MySQL database of your WordPress website.
Let’s explain the procedure of editing MySQL in WordPress for you here so that you could do it all smoothly –
- Open/download to the wp-config.php file using FileZilla and search for ‘DB_NAME’ in this file.
- In the line where you’ll find the ‘DB_NAME’ string, there must be the name of the WordPress database of your website. Copy this name.
- Now, go to your cPanel and click on PHPMyAdmin under the Databases section.
- Search for the copied name, in order to find the Database.
- Now, paste this query (where your old website URL is ‘old.com’ and new website URL is ‘new.com’) – UPDATE wp_options SET option_value = replace(option_value, ‘old.com’, ‘new.com’) WHERE option_name = ‘home’ OR option_name = ‘siteurl’;UPDATE wp_posts SET guid = replace(guid, ‘old.com’,’new.com’);UPDATE wp_posts SET post_content = replace(post_content, ‘old.com’, ‘new.com’);UPDATE wp_postmeta SET meta_value = replace(meta_value,’old.com’,’new.com’);
- To run it, click on ‘go’.
This action/process updates all the links redirecting to your old URL towards the new URL, making many things easy for you.
Note: You can run queries according to your required. We just gave an example here, in order to help you understand how MySQL is edited for your WordPress website. In the case of Database connection errors, prefer reaching out to experts.
Editing JavaScript in WordPress
Many times, we want to add custom JavaScript to our WordPress website. There are several ways of doing so. There also are ways to hook JavaScript and PHP code, but that’ll be too technical and we would suggest that you hire a professional team for that. We’re listing a very few of them here –
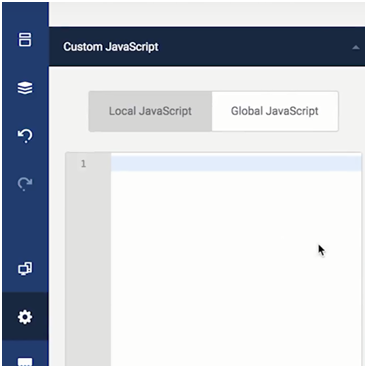
Method 1 – Using Visual Composer
Just as we added CSS using Visual Composer in a previous section, it can also be used for adding custom JavaScript to your website too. Again, go to settings and scroll to custom JavaScript section. From here, you can add local or global JavaScript easily.
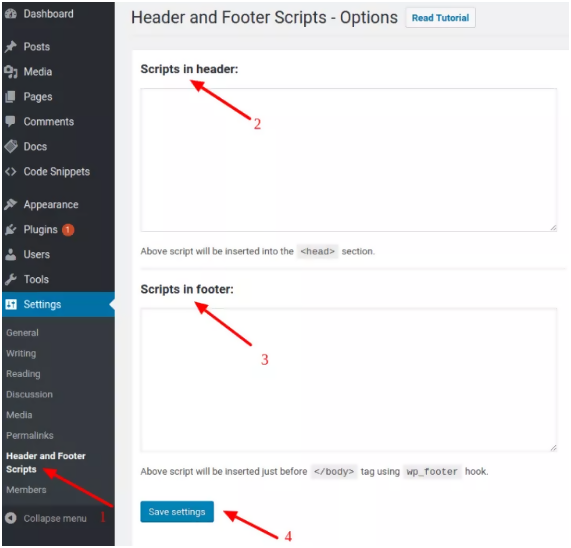
Method 2 – Using JS Editing Plugins
Not just Visual Composer, there are plenty of plugins, such as Header and Footer Scripts Plugin, through which you can add custom JavaScript to your files. As the name suggests, you can add JavaScript code in header and footer on your website.
For loading the script before the page loads, include the code in the section for header. And for loading it once the page is loaded, include it in the section for footer.
If there is a lot of code to add, you should create external JavaScript file, upload it in the WordPress folder and include it using this code –
<script type=”text/javascript” src=”jsfile.js”></script>
Here, jsfile.js is the name of your JavaScript file.
Note: You can also create your JavaScript files and include them in header or footer of your website manually. For this, just upload your JS code in WP directory and call it from the header or footer, as per the suitability. It is better to use plugins because you won’t need to use FTP or play with raw code of your website.
Editing PHP Source Code in WordPress
For any kind of functionality related change or modification in the way how sections/variables/dynamic parts are being rendered on your pages/posts, editing the PHP source code becomes essential in WordPress.
Alternatively, you may use plugins for making this happen. However, small changes or custom requirements cannot always be fulfilled by installing WordPress or WooCommerce plugins. So at one point in time or another, you will need to change the source code of your WordPress website.
Tip: If not using the frontend, avoid updating the core PHP files directly. Instead, copy those files in the child theme’s folder. For figuring out the location of this file’s placement, follow the same hierarchy as the parent theme for these files in the child theme. Now, you can edit the file without hassles.
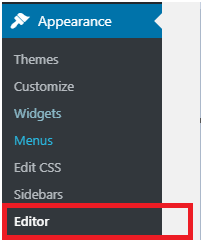
Using Frontend Code Editor
Not all, but many commonly-updated files can be edited from your website’s admin dashboard itself. For doing so, you need to click on the ‘Editor’ link under the Appearance section. Look at this image for your reference –
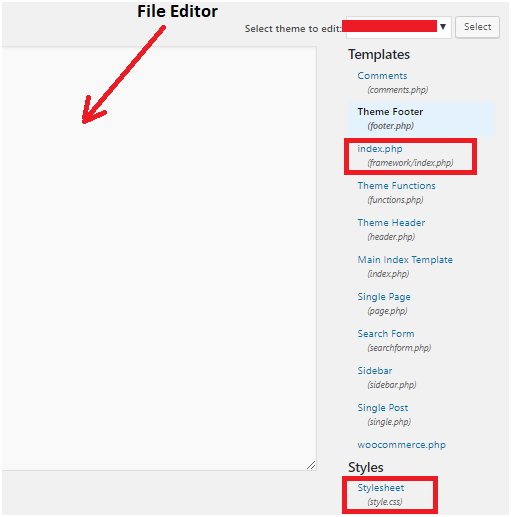
Opening the editor will take you to a new page. This page will have a list of filenames on the right side, a dropdown for choosing the theme to be updated above it, and a file opened for editing in the main section. Different themes give access to different files. However, main files, such as stylesheet file, theme functions file, header file, index file, posts file, single post file, pages file, single pages file, and so on can be edited from here.
From here, you can switch between the files and edit them as per your need. Again, editing the files through the WordPress frontend code editor does not create any backup of these files and could be updated if the theme is updated.
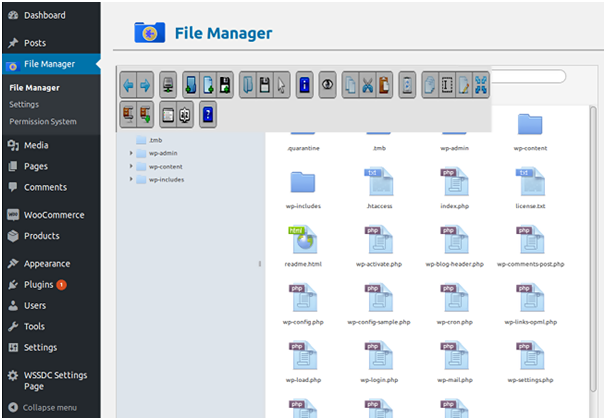
Using WordPress File Manager Plugin
The File Manager Plugin, present in WordPress directory can save you from the hassles on file uploading, downloading and more, in case FTP looks a complex thing to you.
Once installed, it lets you upload, download, rename, delete, edit, create, move and archive your directories and files.
For using it, check for the ‘File Manager’ link on your WordPress admin dashboard in the left sidebar. Click on the link and you will see the file manager.
While the plugin’s dashboard is self-explanatory and do not require explanation, do keep in mind to create backup [duplicate] of your files before editing them.
Remember that it’s risky using this plugin, because you are making edits to your website’s files from this. So, use it carefully. Do not touch the files that you do not understand. Edit only when you are sure that it won’t break things.
Additionally, you may checkout these file manager plugins too. These can also be used for making edits in the PHP, JavaScript, CSS and media files from the frontend of your WordPress website.
Using FTP Client
So, you already have the FileZilla client installed on your system if you were following our tutorial from the very beginning. For changing or editing the source code in WordPress using PHP, you will need it. Whether you make changes in the files of parent theme or child, using an FTP client is probably the best method.
Here are our steps to edit the PHP source code in WordPress using FTP client –
- Download the File to be Edited
First things first, we would suggest you learn a bit about the WordPress directory structure, in case you are naïve to it. Understanding the WP directory structure will give you a clear cut idea of which file needs to be edited in which scenario.
Now, go to the location of the file you want to edit and download it.
2. Make the necessary changes in the code
Edit the file offline and save it.
3. Rename your Old File
First, rename your old version of the file you are editing. You can decide a format or pattern for this renaming. For example – Add ‘-’ or ‘01’ or anything similar to these patterns in the files you are keeping as a backup. It is always good to add a postfix to the file names, because your backup file will remain near the newest file in the directory, making the backup process easy whenever required.
4. Upload the Edited PHP File in the WordPress Directory
Upload the edited file in the same location, from where you downloaded its old version before. Using the FTP client, it takes a few seconds or less.
Once the file is uploaded, test your WordPress website for the changes you are expecting in it.
An Example for Editing PHP Source Code of WordPress website
There could be hundreds of use cases for explaining how to edit the source code of a PHP file of your WordPress website. Let’s show you one example here –
When you’ve to change/add/remove some text/graphics in your WordPress Website
Sometimes, you want to make minor changes in your WordPress theme, for example, changing the text, appearing in the footer. How will you do that?
Well, for a WordPress website, this task isn’t really complicated. The process is –
- Find out the header.php file in the frontend code editor or in the WordPress directory.
- Open the file or download it (as per the choice made at the previous step).
- Search for the section of code to be edited. For example – if you want to change the footer text, search for that particular string appearing in the footer (or the variable, responsible for rendering that string).
- Make the desired changed and save the file.
- Upload the file on the live site, in case you were using FTP for this.
- Now, open the website in a browser and check if it worked.
Final Word
WordPress is a powerful CMS, and its power comes from the flexibility and extendibility it adds to your website. Using WordPress frontend editor and raw files, you can make small and big modifications in your websites easily. However, a bit of coding knowledge and understanding of WordPress is important for this so that you could handle the issues which arrive it the process.
On the other hand, editing source code of a WordPress Website – be it PHP, MySQL, HTML CSS or JavaScript – could look like a tough task for those who do not understand the technical side of WordPress much.
Though we’ve explained the procedures for editing the source code of your website, we would not suggest you make changes to the website if you are not confident about the same. Always, always hire WP experts for this purpose. You may reach out to our WordPress developers and support specialists too. We are available for assisting the WordPress and WooCommerce website owners 24×7.