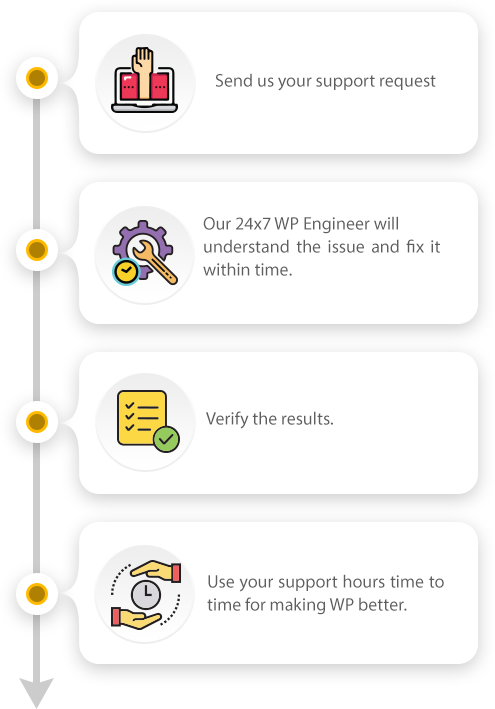
Call Us Toll Free - US & Canada : 888-818-9916 UK : 800-069-8778 AU : 1800-990-217
Move Transfer WordPress Website from One Host to Another

How to Move-Transfer WordPress Website from One Host to Another

Spread the love

Last updated on August 11th, 2021 at 05:25 am

Are you planning to change a host? Like, migrate to a different one?

Or maybe transfer your WordPress website?

A few years ago when you first started with your WordPress website, you were mandated to pick up a host that will help you take your website online. After a series of researches and discussions, you came up to a conclusion selecting one of the available hosting service providers, right?

So, why is it that now you need to slip the existing one and move to a whole different platform? Why do you think that removing your WordPress website from the current host would benefit your business at large?

And if you knew that the entire process of migrating a website to a different host turns the website vulnerable and you might even lose some of your important data. Not to forget the fact that migrating a website would turn your business unreachable for quite some time. It might so happen that while you are transferring your site, users get a page not found error, dramatically affecting the SEO rankings of your website.

So, if you are aware of the above and still wanting to make the move, the question here remains why?

Well, this is definitely an important thing to consider. In case, you are seriously thinking to move your WordPress website from one host to another, we will help you out but before that, it’s important to answer our first question.

Why do you need to migrate from one host to another?

Often, it so happens that you, as a website owner, aren’t happy with the services rendered by the WordPress hosting company. Either they are offering too much or too little. Either be the case, if you aren’t benefiting with the existing host and believe that the collaboration is doing more bad than good, it’s better to take the call and make a switch.

As mentioned earlier, the process of transfer is a bit complicated, let alone arduous. So, if you what to make this better, you can always ask your host to help you out with the above.

Apparently, the majority of the hosting service providers offer a free transfer of host. So, while you are paying them to be your new host, inquire if they too offer such a service. If not, keeping security and safety as your prime consideration, you can go ahead and hire professionals to carry out the job for you.

Nevertheless, if you think you are capable of doing it all about yourself and seek a little guidance, don’t worry we are happy to help.

This page will take you down the steps you need to incorporate when transferring a WordPress website from one host to another.

How to Transfer - Step By Step Process

Without wasting much time, let’s move ahead to uncover the steps you need to follow in order to transfer the site from one host to another.

Step 1: Backup of existing WordPress files

The first and the most important thing to do is create a backup of all the website files and folders. Factually, it is suggested that before you make a change, no matter how trivial, you should always have a backup created.

And here, we are concerned about the migration of a site. So creating a backup is the first place to start with. To do so,

  • Log in to the WordPress website through an FTP program.
  • Once you are there, copy all of the files that are displayed under the folder of the website directory.
  • You can save all of these files to an external hard drive or locally within your computer’s memory.
  • Make sure that all the files are copied, even the ones that remain hidden under generic situations. You can seek help from the help window of the FTP program.

Another way of backing up the site content is through a plugin. To remain on the safer side, we suggest the manual process.

Step 2: Database Export

Once you have had a backup of the website content, we next need to export all of the database files. To do so:

  • Log in to the cPanel of the website
  • Click-open PHPMyAdmin.
  • Move to the left side of the screen and select the database that has all of your installation files.
  • Select the files and then move to the navigation menu to click on export. Click ok on the default setting to start the process.
  • Once done, you will have a file downloaded on your computer.

Step 3: Creation of a new database

We are done with working on your old host. Now that we have a backup and then exported the database file, we need to create a new database in your new host.

The creation of a database is an important process as this is where you store all of your installation files and folder. Follow the steps given below to get started:

  • Login to the new host and connect to the cPanel.
  • Once you are logged in to the cPanel of the host, move around to find the option of the MySQL database.
  • Click on it and then click on create a new database. Enter a name for the database and click on save.
  • Next, click on create a new user.
  • After this grant privileges to this newly created SQL users and add it to your new database.

Once done, you can now move ahead. Don’t forget to have a copy of the above-added username, password, and database name.

Step 4: Modify the wp-config file

We have made some changes in the database and so that needs to be reflected in the wp-config file of your website.

  • Open the folder where we saved the website files in step 1.
  • Open the wp-config file and trace the area that has the username, database name, and password.
  • Edit the existing details by overwriting them with the newly created credentials in step 2.

Save the file to move forward.

Step 5: Database import

Here, we will import the exported database to the new server.

  • Go to the cPanel and then click on PHPMyAdmin.
  • Here, move to the left to select your new database.
  • Click on the import tab at the top navigation bar.
  • Click on a file to select the file you wish to import.
  • Once selected, select that checkbox that says SQL format and unselect the partial import option. Click on ok.
  • Once done, you will receive a message that says import finished.

Step 6: Adding Files

It’s time for the last few steps.

  • Login to the web host and click on the folder that will contain all of your website files.
  • Upload all of the files to the public_html folder.
  • Once the process is complete, you can now move ahead and delete the local copy of the files.

Finally, you would need to update the URL and link it to a new one. You can do it following the steps given in changing the site URL to ensure that users aren’t directed to your old site.

It seems a lot to be done? Make sure you do not skip any of the above. Be careful and your job is done.

Join the discussionSHARE YOUR THOUGHTS

Top 7 WooCommerce SEO Plugins for 2023 to Boost Your Google Ranking