
What Is a Lead Form in WordPress? Types, Fields and Setup (2026)
Introduction
A lead form is a short web form that turns a visitor into a contact you can follow up with. The visitor shares a name and an email address, and in return they get something. That might be a quote, a free guide, a call back, or a place on your mailing list. For many WordPress sites, this small form is the main way the site earns money.
This guide explains what a lead form is and how it works behind the scenes. You will see the main types, the fields worth asking for, and the steps to add one to your site. We also cover spam, privacy rules, and ways to improve results over time.
What Is a Lead Form in WordPress?
A lead is a person who has shown interest in what you offer. A lead form is the tool that captures that interest in a usable way. Instead of hoping a visitor will send an email, you give them a clear form with a few fields and a button. When they press submit, WordPress stores their details and tells you about it.
A lead form is not the same as a basic contact form, although the two look alike. A contact form is open ended. It says “write to us about anything”. A lead form has a clear goal. It asks for the details you need to start a sales or service conversation, and it usually offers a reward for filling it in.
WordPress does not ship with a full lead form tool. The block editor can show text and buttons, but it cannot process form entries. You add the feature with a form plugin, which is a small add-on that builds the form, checks the entries, saves them, and sends the emails. Many plugins offer a free version that is enough for a small site. You can compare options in our list of free contact form plugins for lead generation.
If the form is easy to find and quick to fill in, more visitors take the next step.
How a Lead Form Works Behind the Scenes
It helps to know what happens after a visitor presses the submit button. The process has five parts, and each one can go wrong in its own way.
First, the browser checks the entry. Basic rules run on the page itself. For example, the email field must look like an email address, and required fields cannot be empty.
Second, the server checks it again. The browser check can be bypassed, so WordPress checks every entry a second time. This is where spam filters run, such as hidden trap fields and CAPTCHA tests.
Third, the entry is saved. Most form plugins store each entry in your WordPress database. You can then view the list from the dashboard. This is important because email delivery is not always reliable. If an email goes missing, you still have the saved entry.
Fourth, emails are sent. You usually get a notification email. The visitor may get an automatic reply that confirms their request. These emails depend on your mail setup, so test them after you build the form.
Fifth, the lead moves on. Some plugins pass the entry to an email marketing service or a customer record system. Our overview of email marketing and sales integrations shows what this looks like for a store.
The Main Types of Lead Forms
Not every lead form looks the same. The right type depends on what you sell and how ready your visitors are to buy. Here are the types you will meet most often.
Quote or booking request form. This is common for service businesses. The visitor describes the job and asks for a price or a call. These forms usually have more fields, because you need detail to answer well.
Newsletter signup form. This is the lightest form. It asks for an email address, and sometimes a first name. Visitors accept it easily, but each lead is less ready to buy.
Content download form. A visitor enters their details to get a guide, checklist, or template. This type works well when you want to build a list of people who care about a topic.
Multi-step form. This splits a long form into short screens. Visitors often finish these more often than one long form, because each step feels small. A progress bar helps.
Popup and slide-in form. These appear after a delay, a scroll, or an exit move. They can capture many leads, but they can also annoy visitors. Use them with care, and make sure they close easily on a phone.
Which Fields to Include in a Lead Form
Every extra field lowers the number of people who finish the form. A good rule is to ask only for what you need to take the next step. If you only need to send a guide, ask for an email address. If you need to call someone back, ask for a phone number as well.
Here is a simple way to choose. Start with the single field you cannot do without. Then ask yourself what happens if you leave each other field out. If the answer is “nothing important”, remove it. You can ask for more detail later, once the person has become a customer.
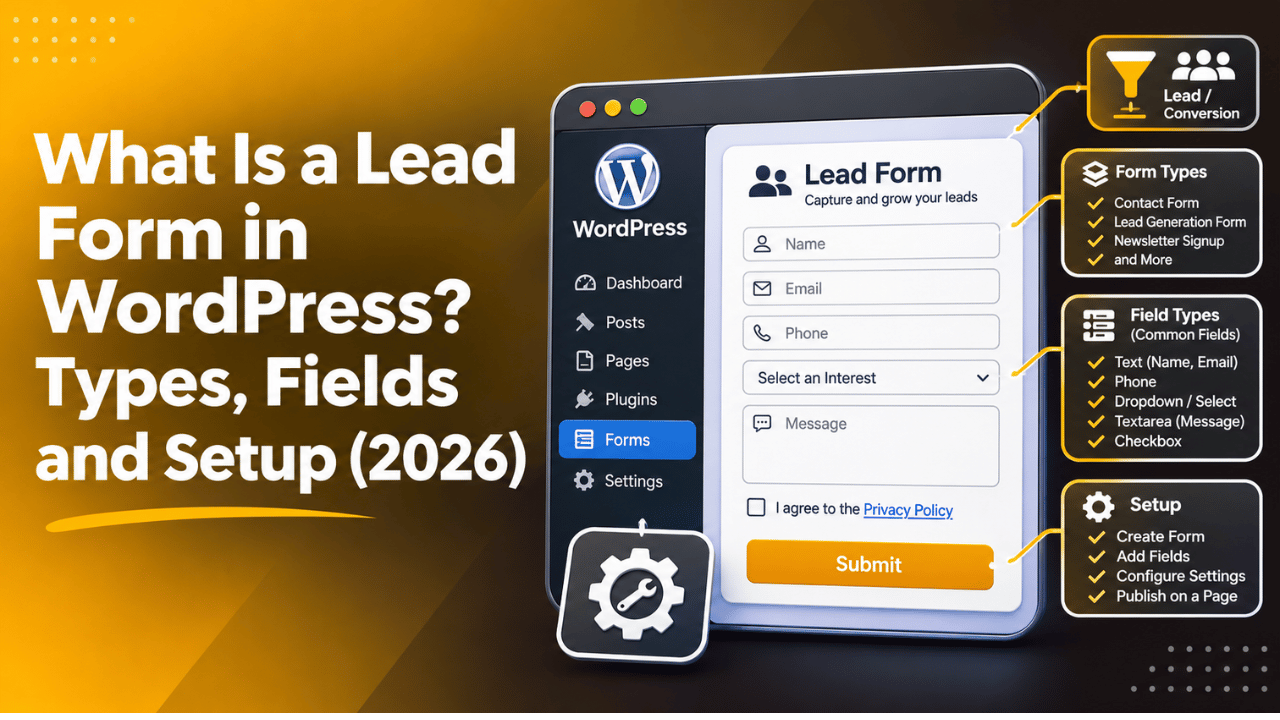
Name. One field for the full name is faster than two separate fields. Email. This is nearly always required, because it is how you reply. Phone. Ask only if you plan to call. Mark it optional if you can. Message or need. A short text box helps you prepare a useful reply. A dropdown. Choices such as “what do you need help with” help you sort leads quickly.
Make the button say what happens, such as “Get my free quote” instead of “Submit”. Keep the form to three to five fields for most uses.
How to Add a Lead Form to WordPress Step by Step
You do not need to write code to add a lead form. The steps below work for most form plugins. Menu names may differ a little between plugins.
Step 1: Install a form plugin. Go to Plugins → Add New in your dashboard. Search for a form plugin, install it, and activate it. Check that it is updated often and works with your version of WordPress. Our guide to easy form plugins and how to set them up can help you choose.


Step 2: Create a new form. Open the plugin’s menu and choose to add a form. Start from a template if the plugin offers one. Add your fields and set which ones are required.
Step 3: Set the notification email. Enter the address where leads should arrive. Add a subject line that includes the form name, so you can sort messages later. Add an automatic reply for the visitor if you wish.
Step 4: Add the form to a page. Go to Pages → Add New, or open an existing page. Add the plugin’s form block, or paste the shortcode the plugin gives you. Choose your form from the list.
Step 5: Test it. Publish or preview the page and send a test entry. Check that the entry shows in the dashboard and that both emails arrive. For a fuller walkthrough of building forms, see our guide to creating a custom form in WordPress.
Where to Place Lead Forms on Your Website
A great form in the wrong place gets few entries. Put your forms where visitors are ready to act. The right place depends on the page and its purpose.
On service and product pages. A visitor who reads about your service is already interested. Put a short form near the top and repeat the call to action near the bottom. They should not need to scroll back up to find it.
At the end of blog posts. Readers who finish an article are engaged. Offer a related guide or a newsletter signup right after the last paragraph. Keep the offer closely linked to the post topic.
On a dedicated landing page. For ads and email campaigns, send visitors to a page that has one purpose. Remove the menu and extra links, so the form is the main thing on the screen.
In the sidebar or footer. These spots are easy to add but get fewer entries. They work well for simple newsletter signups, not for long forms.
Whatever you choose, make sure the form loads fast and looks right on a phone. A slow or broken form loses leads without any warning.
Protecting Lead Forms From Spam and Respecting Privacy
As soon as a form goes live, spam bots will find it. Spam wastes your time and can bury real leads. Use more than one defence. A hidden trap field, which humans never see but bots fill in, stops many bots. A CAPTCHA test catches more, though it adds a small step for visitors. Our guide to blocking contact form spam in WordPress covers these methods in detail.
Privacy matters just as much. You are collecting personal data, so you must handle it with care. Tell visitors what you will do with their details. Link to your privacy policy next to the form. You can create and manage this page at Settings → Privacy.
In many regions, you also need clear consent. That usually means an unticked checkbox with a short line such as “I agree to be contacted about my request”. Do not tick it for the visitor. Store the consent along with the entry. Rules vary by country, so check what applies to you. Our overview of GDPR compliance tools for WordPress is a good starting point.
Finally, limit who can see the entries. They hold personal data. Give dashboard access only to people who need it, and delete old entries you no longer need.
How to Track and Improve Your Lead Form Results
Adding the form is only the start. The real gain comes from watching how it performs and making small changes. The key number is the conversion rate. This is the share of visitors who see the form and complete it. If 1,000 people view a form and 30 submit it, the rate is three percent.
Many form plugins show views and entries. If yours does not, you can track form submissions with your site analytics. Look at which pages bring the most entries and which bring none. Pages with many visitors and few entries are good places to improve.
Change one thing at a time. Try a shorter form, a clearer button label, or a different place on the page. Wait until enough visitors have seen each version before you decide. A few days of data can mislead you.
Speed of follow-up matters too. A lead who hears back within minutes is more likely to respond than one who waits a day. Set up a notification that reaches your phone, and decide who answers each type of lead. Finally, test your form every month. Plugin updates and theme changes can break it silently.
Need Help Setting Up Lead Forms?
A lead form is a short form with a clear goal. It captures a visitor’s details, stores them, and starts a conversation. Pick the right type for your offer, ask for as few fields as you can, and place the form where visitors are ready to act. Protect it from spam, respect privacy rules, and review the results often.
Lead forms pay off slowly. A small fix to one form, such as fewer fields or a clearer button, can lift results for months. Revisit each form every few weeks and keep what works.
Before you install new plugins or change settings on a live site, take a full backup. If you would like help building, testing, or fixing lead forms, the team at 24×7 WP Support works on these jobs every day. If you would like someone to take a look, get in touch and tell us what you see.
Related posts:

Most Popular WordPress Themes: Top Choices Used by Millions
What Is Padding in WordPress and How Does It Work in 2026?

Essential Continuity Planning for WordPress Agencies and E-Commerce Stores

Is WordPress GPL Licensed, and Are GPL Plugins Legal?

How to Fix ‘Style.css Missing’ Error in Divi Theme Installation

Brian is a WordPress support specialist and content contributor at 24×7 WP Support. He writes practical, easy-to-follow guides on WordPress troubleshooting, WooCommerce issues, plugin and theme errors, website security, migrations, performance optimization, and integrations. With a focus on solving real website problems, Brian helps business owners, bloggers, and online store managers keep their WordPress sites running smoothly.