How to Install and Uninstall WooCommerce from WordPress
Last updated on May 30th, 2024 at 06:44 am
Why Is WooCommerce the Best for Online Businesses?
If you’re thinking of creating an online store on WordPress, you should definitely consider using WooCommerce. The plugin has become the most preferred e-commerce solution for WordPress websites.
According to BuiltWith, WooCommerce Checkout is the most popular e-commerce technology on the internet. At the moment, it covers 26% of the total e-commerce usage distribution in the top one million sites, which is no small feat.
The reason why WooCommerce has become so popular is that it is free to use. Website owners can add unlimited products and product attributes to their stores and utilizes a website that’s responsive to all devices.
Furthermore, WooCommerce allows you to scale your website and expand your business as it becomes more successful. The various extensions available for the plugin can help you add new functionality to your store and utilize dedicated themes to enhance the appearance of your website.
Once you have installed the plugin, you get access to a wide variety of customization options. Having said that, the various features it provides can be a bit overwhelming, especially for beginners.
One of the reasons behind WooCommerce’s success is that it is extremely easy to use. Therefore, a business owner with limited technical knowledge can easily download, install, and configure the plugin and create a functional online store for their business.
How to Install WooCommerce
Knowing how to install WooCommerce and configure it for your store is a simple process. However, before you learn how to install WooCommerce, you must ensure that you have all the basic server requirements covered for your machine.
Since your online store is configured and hosted on a server, your server must be able to support the features of the plugin. Following are some of the requirements you must fulfill:
- A WordPress memory limit of 128 MB or greater
- HTTPS support
- PHP version 7 or higher
- MySQL version 5.6 or higher or MariaDB version 10.0 or higher
If your server does not fulfill these requirements, your online store will lag a lot and might not even work at all. Alternatively, you can consider using WooCommerce’s hosting plan for your website.
You have the option to choose any one of many hosting plans and add additional plugins and themes to enhance your online store even more. Besides that, these plans let you address the essential aspects of your website, such as security, performance, and updates. Once you have created a website and have a hosting plan ready, you can continue working on your online WooCommerce store.
Install and Activate the WooCommerce Plugin

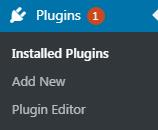
To start off, you need to install and activate the WooCommerce plugin. The process is fairly easy, and you can install it like any other plugin. To be safe, make sure to back up your website before installing the plugin. Next, go to the admin panel of your website and select “Plugins” on the sidebar menu.

Once you click on the option, you will be able to see options, such as “Installed Plugins”, if you already have a plugin installed. However, you need to click on “Add New” to add the WooCommerce plugin to your store.

After clicking the previous option, you will be lead to the WordPress plugin store where you will see a list of featured/recommended plugins. Enter WooCommerce in the search bar or follow this link to find it.
Once you find the WooCommerce plugin, click on the “Install Now” button and WordPress will fetch the plugin and install it on your computer. Wait for the plugin installation to complete, and once it does, move on to the final step, which is activating WooCommerce. Just click the “Activate Plugin” link that appears on your screen, and WordPress will let you know when the plugin activates.
Activating WooCommerce can affect your website in various ways. You can avail two user roles, such as (Customer and Shop Manager), and utilize widgets to display your products differently. Furthermore, you can also use custom post types, taxonomies, and menu items, along with shortcodes, to insert content into posts and pages.
On the other hand, if your website functions on a WordPress Multisite install, WooCommerce will work a little differently. Despite each website on the network sharing a database, they will save information on separate data tables.
Thus, each store on the multisite will have its own separate setup. As a result, you will not be able to share information, such as user accounts, products, or check out information between those stores. However, you can still share extensions and themes across these multiple WooCommerce sites.
Add the Store’s Basic Information
Once you have understood how to install WooCommerce, you can continue setting up the store on your website. The setup is easy, and you can do it in a few simple steps. Moreover, you have the option to change the settings that you configure at a later time.
The first page of the setup wizard requires you to enter general information about your store. For instance, you need to enter the store’s location. However, if your business does not have a brick-and-mortar shop and is entirely based online, then you have to select your country.
After that, you need to select which currency you will use in your store. The plugin allows you to use only one currency at any given time. However, you can still display the prices of your products in various currencies by using plugins, such as WooCommerce plugin Currency Switcher.
After that, the plugin asks the user the kind of products they plan on selling. These products can be physical, digital, or a variant of both. Having said that, there are other, more specific product types, which we’ll look at later.
After that, the plugin asks the user the kind of products they plan on selling. These products can be physical, digital, or a variant of both. Having said that, there are other, more specific product types, which we’ll look at later.
However, now, you can select the product types that seem to suit your products the best. Lastly, you must check a box on whether or not you’re planning on selling these items in person. After entering all the required information accurately, you can proceed to the next step.
Set Up Payment Options
In this next phase of the setup, you need to select the payment options for your store. You can select any payment option, as long as it fits your needs. However, your choice for payment options can be restricted, depending on your specified location and the options you have selected in the previous steps.
Nevertheless, options such as PayPal and Stripe are always available for store owners. If you sell items in-person or have a store located in the US, Canada, Australia, Japan, or the UK, then you can also use Square. For business owners in countries like the Netherlands, Germany, Norway, Denmark, Finland, Sweden, or Austria, Klarna is a good option.
Similarly, you can also choose services, such as Amazon Pay, for payment processing if you want to access global marketplaces. The Amazon Pay service on your store will help you to cater to purchases made on Amazon more effectively.
Once you decide which option you want to use, install those extensions on your store. If you want to configure any other payment method in the future, just uninstall these extensions and install the ones you want.
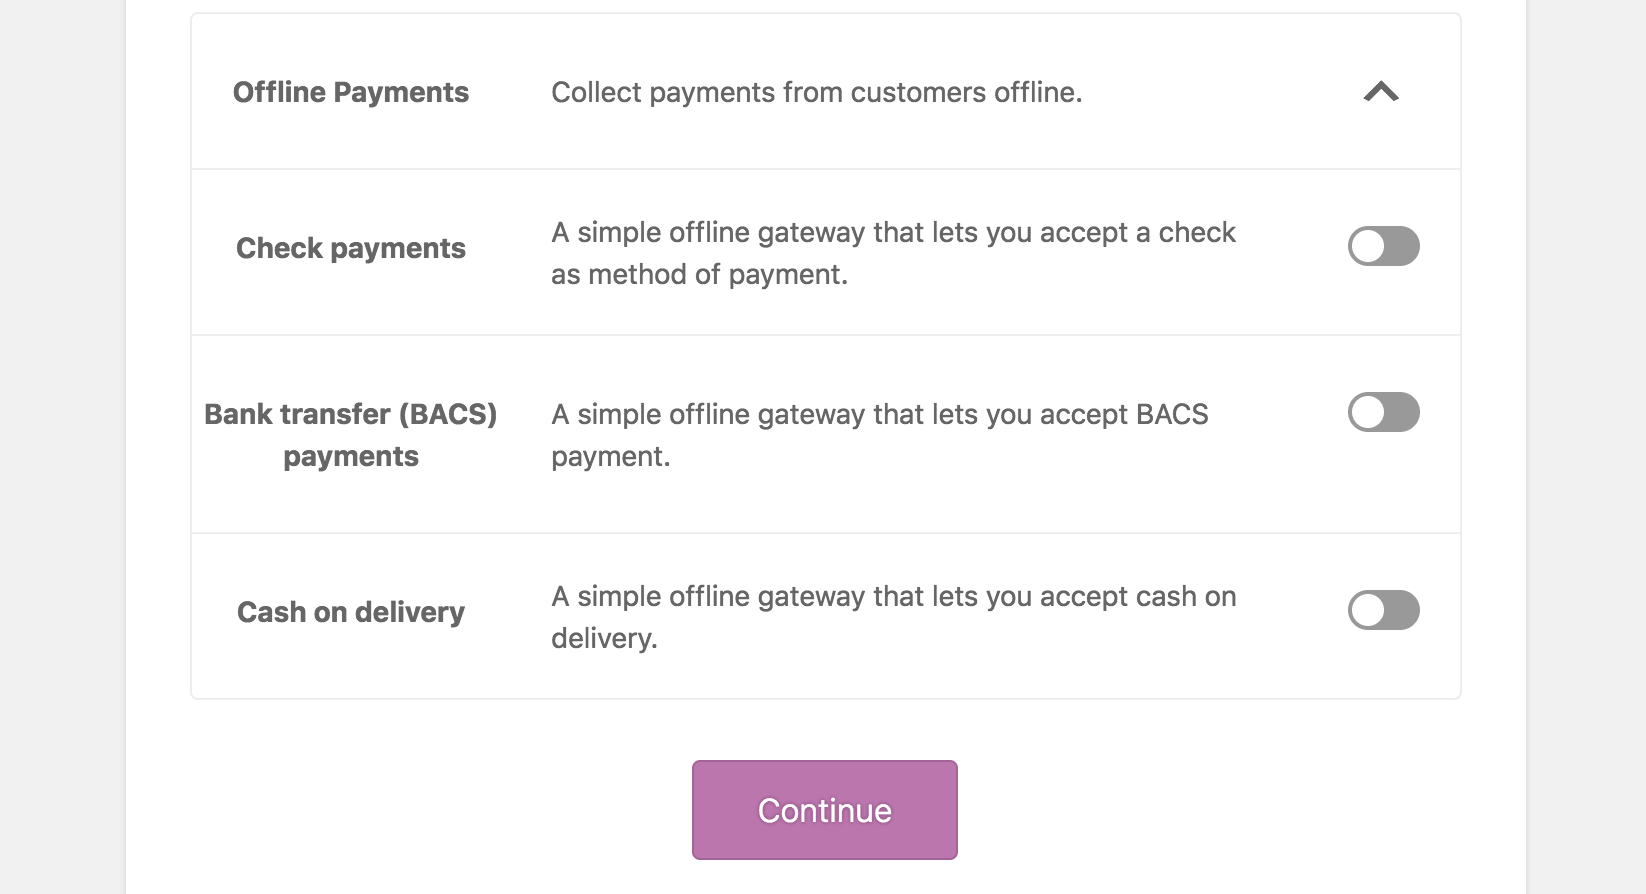
At the end of this phase, the section will ask you if you want to accept offline payments or not. If you choose this option, you will be able to see more detailed selections. You can choose the offline payment type that fits your needs and continue on to the next phase.

Configure Shipping Settings
Next, you need to complete shipping configuration settings for your WooCommerce store. In total, WooCommerce has around 44 shipping extensions for its platform. Like the previous step, the shipping extensions you see will depend on the location of your store.
For instance, if your store is located in the U.S., you will see the USPS extension and other available options for your store. Similarly, store owners in New Zealand and Canada can choose New Zealand Post and Canada Post, respectively. If you’re keen on using these services, it’s better to look at their specific settings on WooCommerce and settle on suitable rates for shipping your orders.
However, stores located elsewhere might only see options for specifying the weight and dimension of the units they are going to sell. In such a scenario, choose the units that represent your products the best and then select ‘Continue’ to proceed.
Complete the Installation Process
The final phase of the setup offers some additional options to get your store up and running. You may see two extra options to complete the setup of your store.
First, the procedure will ask you whether or not you want to install the Storefront theme. WooCommerce does that in order to persuade you to use its official WooCommerce theme. Since you’re planning to use WooCommerce for your website setup, we recommend you to use the Storefront theme, as it’s specifically built to support websites powered by WooCommerce.
Once you install WooCommerce’s official theme (or don’t), you can decide if you want WooCommerce to calculate tax rates automatically for you or not. Depending on your store’s location, you will be able to automate the process of calculating taxes for your business.
While this is useful, it’s better to consult a professional to calculate taxes for your business, just to be safe.
How to Uninstall WooCommerce
Although WooCommerce is one of the best e-commerce solutions available on the internet, some people may want to switch to another platform. They may want to know how to uninstall WooCommerce and use a platform that’s better suited for their region.
However, if you want to know how to uninstall WooCommerce, it’s not something as easy as deactivating or uninstalling a service. The WooCommerce platform contains actual data from your store. Furthermore, it also contains data, such as your settings, customer details, orders, and products. Therefore, there’s every chance that it will still be saved in the database.
To delete all this and uninstall WooCommerce successfully, follow these instructions:
- Open the WordPress install’s wp-config.php file on your website
- Scroll down to the part where you see “* That’s all, stop editing! Happy blogging. */”. Press “Enter” to insert a new line, and then add code below:
define (‘WC_REMOVE_ALL_DATA’, true); - Save your wp-config.php file
- Deactivate WooCommerce from the WP-admin > plugins
- Delete WooCommerce from the same section
- And you are done!
Following these steps will remove all information, including products, order data, etc from your WooCommerce site.
Nevertheless, if you don’t understand this technical jargon, we’d recommend you to trust a professional who knows how to edit wp-config.php files.
Conclusion
WooCommerce is an excellent option for business owners who want to switch to the online world. The plugin’s easy to use, and feature-filled setup makes it perfect for beginners and experienced WordPress users alike.

