
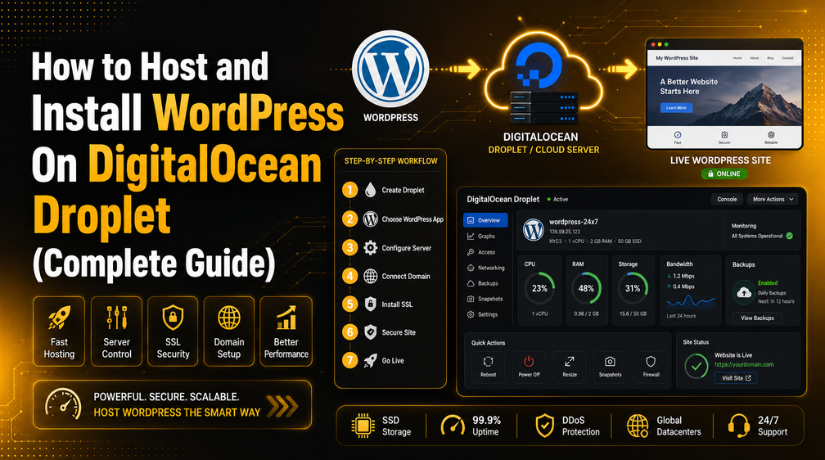
How to Host and Install WordPress On DigitalOcean Droplet (Complete Guide)
Introduction
WordPress needs reliable hosting to run smoothly. Many users start with shared hosting first. But growing websites often need better control. This is where DigitalOcean WordPress hosting can help. DigitalOcean lets you create a cloud server. This server is called a Droplet. You can use it to host your WordPress website. It gives more control than basic shared hosting. You can manage server resources, speed, and security.
This guide will explain WordPress on DigitalOcean in simple steps. It is useful for beginners, bloggers, agencies, and business owners. You will learn the basic meaning of a Droplet. Later parts will explain the full setup process. You will learn how to Install WordPress on DigitalOcean correctly. A proper setup helps avoid common hosting issues. It can prevent speed, SSL, and security problems.
What Is DigitalOcean Droplet?
A DigitalOcean Droplet is a cloud-based virtual server. It works like your own online hosting machine. This machine stores your website files and database. It also runs the software needed for WordPress. A Droplet includes server resources like RAM and storage. It also uses CPU power to load website pages. This makes WordPress droplet setup flexible and useful. You can install WordPress and manage server settings yourself. A Droplet is different from normal shared hosting.
Shared hosting gives limited control over server settings. A Droplet gives more freedom and better control. This is why many users prefer to host WordPress on VPS. VPS hosting is useful for growing WordPress websites. It helps when your site needs more resources.
Why Use DigitalOcean for WordPress Hosting Today?
Better Server Control
DigitalOcean gives you more control over your hosting setup. You can manage server size, PHP settings, storage, and security rules. This makes DigitalOcean WordPress hosting useful for growing websites.
Good Website Performance
A Droplet gives dedicated server resources for your website. This can help WordPress load faster than many shared hosting plans. Proper setup also improves speed and stability.
Easy WordPress Setup Option
DigitalOcean offers a simple WordPress setup option. Beginners can use it to Install WordPress on DigitalOcean faster. This makes the first setup easier.
Flexible Scaling
You can upgrade your Droplet when your website grows. This helps when traffic, plugins, or content increase. It is a good option to Host WordPress on VPS.
Developer-Friendly Hosting
DigitalOcean works well for developers and agencies. They can use SSH, server tools, firewalls, and custom settings. This makes the WordPress droplet setup more flexible.
Suitable for Many Website Types
You can host blogs, business sites, portfolios, and WooCommerce stores. The right Droplet plan depends on your website size. Bigger websites need more server resources.
Important Server Responsibility
DigitalOcean is not fully managed hosting. You must handle backups, updates, SSL, and security. Proper setup is important for safe WordPress on DigitalOcean hosting.
What You Need Before Installing WordPress on DigitalOcean
Before you Install WordPress on DigitalOcean, prepare the basic setup details. This saves time and avoids common setup errors. DigitalOcean gives you strong control over your server. So, you should start with the right information ready. A proper setup helps your website run smoothly.
Create an Active DigitalOcean Account With Billing Ready
You need an active DigitalOcean account before creating a Droplet. A Droplet is the server where WordPress will run. You also need a valid payment method added. DigitalOcean charges based on server size and usage.
Keep Your Domain Name Ready Before Server Setup
You need a domain name for your WordPress website. The domain connects visitors to your DigitalOcean server. You can buy a domain from any trusted registrar. After creating the Droplet, you will update DNS records.
Understand Basic Server Login Before Using a Droplet
You should know basic server login before starting setup. DigitalOcean uses SSH to connect with your Droplet. SSH helps you manage files, updates, and server settings. You can use a password or an SSH key.
Prepare Your WordPress Admin Details Before Installation
Keep your WordPress admin details ready before installation starts. These details are needed during the setup screen. You should prepare your website title and admin email. You also need a strong username and password.


Know the Basic Server Stack Required for WordPress
WordPress needs a few server tools to work properly. It needs a web server, PHP, and a database. Apache or Nginx can serve your website pages. PHP runs WordPress files and plugin functions. MySQL or MariaDB stores posts, pages, and settings.
Plan Your Backup Setup Before Making Big Changes
Backups are very important for every WordPress website. They help restore your site after mistakes or errors. You can use DigitalOcean backups, snapshots, or backup plugins. Create a backup before changing server settings.
How to Host and Install WordPress On DigitalOcean Droplet (Step By Step)
Step 1: Log in to Your DigitalOcean Account
- Open the DigitalOcean website in your browser.
- Log in using your DigitalOcean account details.
- After login, go to your main dashboard.
- Click the Create button from the top menu.
- Select the Droplets option from the dropdown.
- This starts your WordPress droplet setup process.
Step 2: Choose the WordPress One-Click App
- Go to the Marketplace section inside DigitalOcean.
- Search for WordPress in the Marketplace search box.
- Select the WordPress one-click app from the list.
- This is the easiest way to Install WordPress on DigitalOcean.
- It creates a server with WordPress tools already installed.
- This option saves time and reduces manual server work.
Step 3: Select the Best Droplet Plan
- Choose a Droplet plan based on your website needs.
- A small blog can start with a basic plan.
- A business website may need more server memory.
- A WooCommerce store needs stronger server resources.
- Heavy plugins also need better CPU and RAM.
- This helps your DigitalOcean WordPress hosting run smoothly.
- You can upgrade your Droplet later when traffic grows.
Step 4: Choose the Right Server Location
- Select the data center region during Droplet setup.
- Choose a location close to your main visitors.
- A nearby server can help pages load faster.
- Choose a USA region for a USA audience.
- Choose the nearest region for an Indian audience.
- The right location improves speed and user experience.
Step 5: Add SSH Key or Strong Password
- Choose your server login method during setup.
- DigitalOcean allows SSH key login or password login.
- SSH keys are safer than normal passwords.
- They help protect your server from login attacks.
- Use a strong password if you choose password login.
- This step is important when you host WordPress on VPS.
Step 6: Enable Backups and Monitoring
- Enable backups before creating your Droplet.
- Backups help restore your site after mistakes.
- Use snapshots before making major server changes.
- Enable monitoring to track server health.
- Monitoring shows CPU, memory, disk, and traffic usage.
- These options make your website safer and easier.
Step 7: Create Your WordPress Droplet
- Check all selected settings before final creation.
- Click the Create Droplet button.
- DigitalOcean will now create your WordPress server.
- Wait until the Droplet setup is complete.
- Copy the public IP address after creation.
- You will need this IP for domain setup.
Step 8: Connect Your Domain With the Droplet
- Open the DNS settings from your domain provider.
- Add an A record for your main domain.
- Point the A record to your Droplet IP.
- Add a CNAME record for the www version.
- This connects your domain with your Droplet.
- DNS updates may take some time to work.
- Once updated, your domain will open the server.
Step 9: Complete the WordPress Installation Screen
- Open your domain name in a browser.
- You should see the WordPress setup screen.
- Select your preferred website language.
- Add your website title carefully.
- Create a strong admin username and password.
- Avoid using “admin” as your username.
- Add your active email address for alerts.
- Save the details to complete WordPress installation.
Step 10: Log in to Your WordPress Dashboard
- Open your WordPress login page.
- Enter your admin username and password.
- Click the login button to access the dashboard.
- Check if the dashboard opens properly.
- From here, manage posts, pages, themes, and plugins.
- This confirms WordPress on DigitalOcean is working correctly.
Step 11: Install SSL for HTTPS Security
- Install SSL after your domain starts working.
- SSL changes your site from HTTP to HTTPS.
- HTTPS protects login forms and contact forms.
- It also helps visitors trust your website.
- You can use Let’s Encrypt or Cloudflare SSL.
- After setup, check that all pages use HTTPS.
Step 12: Secure Your WordPress Droplet
- Create a non-root user for server tasks.
- Use SSH keys instead of password login.
- Enable a firewall for better server protection.
- Allow only required ports on the server.
- Keep WordPress core, themes, and plugins updated.
- Remove unused themes and inactive plugins.
- Add a trusted security plugin for extra protection.
Step 13: Optimize Website Speed
- Install a caching plugin for faster loading.
- Compress large images before uploading them.
- Use WebP images when your website supports them.
- Remove plugins that you do not use.
- Choose a lightweight and clean WordPress theme.
- Add a CDN for visitors from different countries.
- This helps DigitalOcean WordPress hosting perform better.
Step 14: Test Your Website Properly
- Open your homepage and important inner pages.
- Check menus, buttons, forms, and links.
- Test images and layout on different devices.
- Check your website on mobile and desktop.
- Confirm that SSL works without errors.
- Test your website speed after setup.
- This completes your DigitalOcean droplet tutorial properly.
Common Problems While Installing WordPress on DigitalOcean
When you Install WordPress on DigitalOcean, some setup issues may appear. These issues are common for beginners and website owners. Most problems happen because of DNS, SSL, server, or permission settings. You can fix them easily with the right steps. This section explains common issues in a simple way.
Domain Name Is Not Opening After Droplet Setup
Sometimes the domain does not open after server setup. This usually happens because DNS records are not updated. Check if your A record points to the correct Droplet IP. Also check the CNAME record for the www version. DNS changes can take some time to work. Wait a few hours and test your domain again. If the issue remains, check records inside your domain account.
SSL Certificate Is Not Working Properly
SSL is important for every WordPress website today. It helps your website open with secure HTTPS. SSL may fail if the domain is not pointed correctly. It can also fail if port 443 is blocked. First, confirm that your domain opens on the Droplet IP. Then install SSL again using your chosen SSL method. Also check if your WordPress URLs use HTTPS.
WordPress Shows Database Connection Error
A database error means WordPress cannot connect to its database. This may happen because of wrong database details. Check your database name, username, password, and host. These details must match the WordPress configuration file. Also check if the database service is running properly. If one detail is wrong, WordPress cannot load.
SSH Login Is Not Working on Your Droplet
SSH login may fail for many simple reasons. You may use the wrong IP address or username. Your SSH key may also not match the server. Sometimes the firewall blocks the SSH port. First, check your Droplet IP inside DigitalOcean. Then confirm your username and SSH key. If you use password login, check the password carefully.
Website Is Loading Slowly After Installation
A slow website can happen after WordPress installation. The Droplet plan may be too small for your site. Heavy themes, large images, and many plugins also slow pages. Start by installing a good caching plugin. Compress your images before uploading them. Remove plugins that you do not need. Use a lightweight theme for better speed. Upgrade your Droplet if traffic grows quickly.
File Upload Permission Error in WordPress
Sometimes WordPress cannot upload images or files. This often happens because of wrong folder permissions. WordPress needs correct access to the uploads folder. Check file ownership and permissions on the server. The uploads folder must be writable by WordPress. Avoid giving full open permissions to all files. Wrong permissions can create serious security risks.
WordPress Admin Dashboard Is Not Opening
The WordPress admin area may stop opening sometimes. This can happen because of plugin conflicts or PHP errors. A low memory limit may also create dashboard issues. Start by disabling recently added plugins. Then check your theme and server error logs. You can also increase the PHP memory limit. If the site URL is wrong, fix it carefully.
Conclusion
Hosting WordPress on DigitalOcean is a good choice for users who want more control. It gives better flexibility than many shared hosting plans. You can choose your Droplet size, server location, and setup options. This makes DigitalOcean WordPress hosting useful for blogs, business websites, and growing stores.
However, DigitalOcean also needs proper server management. You must handle DNS, SSL, backups, security, updates, and speed optimization. A small setup mistake can cause downtime, slow speed, or login issues. So, always follow each step carefully before launching your website.
If you want to Install WordPress on DigitalOcean without technical stress, expert help can save time. 24x7wpsupport can help with complete WordPress setup and server configuration. Our team can create your Droplet, install WordPress, connect your domain, configure SSL, secure your server, and improve performance.
Need professional help with your WordPress droplet setup? Visit 24x7wpsupport today. Get expert WordPress support for hosting setup, technical fixes, speed improvement, and ongoing website care.
Related posts:
How to Troubleshoot and Fix a WordPress Critical Error Easily (Advanced Guide)
How to Integrate Magento with WordPress: Complete Step-by-Step Guide
How to Integrate WooCommerce with Amazon and eBay
Best GDPR Compliance Plugin for WordPress to Protect User Privacy (Complete Guide)
WordPress Missed Schedule

Brian is a WordPress support specialist and content contributor at 24×7 WP Support. He writes practical, easy-to-follow guides on WordPress troubleshooting, WooCommerce issues, plugin and theme errors, website security, migrations, performance optimization, and integrations. With a focus on solving real website problems, Brian helps business owners, bloggers, and online store managers keep their WordPress sites running smoothly.
