
How to Embed or Add a Media Player in WordPress (Complete Guide)
Introduction
Audio and video content now play a big role online. Website visitors often prefer quick visual or audio content. A simple text page may not explain everything clearly. That is why many website owners now use media players. A media player helps users watch videos or hear audio directly. You can embed media player in WordPress pages, posts, and product sections. This makes your content more useful and engaging for visitors. WordPress gives several ways to add media content easily. You can use blocks, embeds, shortcodes, or dedicated plugins.
Many users prefer plugins for better control and design. A plugin can help you add media player in WordPress without coding skills. It can also give advanced options like playlists and styling. You can use a WordPress audio player for podcasts or music. You can use a WordPress video player for demos and tutorials. This guide explains the basic meaning and key benefits first. It also helps beginners understand why media players matter.
What Is a Media Player in WordPress and How Does It Work?
A WordPress media player is a tool for playing media files. It allows visitors to play audio or video content easily. The player shows simple controls on your website page. These controls may include play, pause, volume, and progress buttons. You can place a media player inside many website areas. It can appear inside blog posts, service pages, or landing pages. You can also add it to course pages or product pages. Some websites place media players inside sidebars or widget areas.
A media player can play files from your website library. It can also play media from external platforms like YouTube. Many users embed video player WordPress pages using outside video links. This method keeps large media files away from your hosting server. You can also add audio player to WordPress for voice guides. This works well for podcasts, interviews, and music samples. A modern HTML5 media player WordPress setup works in most browsers. It supports smooth playback without old browser plugins.
Why Add a Media Player to Your WordPress Website for Better Engagement
A media player can improve user engagement on your website. Visitors may stay longer when content feels useful and interactive. Video and audio can make a simple page more interesting. A helpful video can explain the topic quickly and clearly. An audio guide can make long content easier to consume. Better engagement may also reduce quick exits from your page. When users find value, they explore more website sections. This can support blog traffic, product interest, and service inquiries.
Media Players Help Explain Products and Services Clearly
Media players help explain products and services in a practical way. Text can describe a product, but video can show it. A product video can show features, size, use, and results. This helps buyers understand the product before making decisions. Service websites can use explainer videos for better clarity. A short video can answer common visitor questions quickly. You can embed media player in WordPress service pages for this purpose. It helps users understand what you offer and how it works. Audio can also support service pages with guided explanations. This is useful for coaching, training, or consultation websites. Clear media content can reduce confusion and improve user confidence. It also makes your website look more complete and professional.
Media Players Support Courses, Podcasts, and Tutorials
Media players are very useful for learning-based websites. Course websites can use videos for lessons and training modules. Tutorial websites can show steps through screen recordings or demos. Podcasts can use audio players for easy episode playback. You can add audio player to WordPress for interviews and discussions. You can also create playlists for complete learning series. A playlist keeps related lessons or episodes in one place. This helps users follow content in the right order. A HTML5 media player WordPress setup can support modern playback needs. It works well across many browsers and screen sizes. For online learning, media makes content easier to follow. It also improves the overall learning experience for visitors.
Audio and Video Players Build More Trust With Visitors
Trust is very important for any business website. Media content can help build that trust faster. A founder video can make your brand feel more human. A customer testimonial video can show real user experience. A product demo can prove how your product works. A service explainer can answer doubts before users contact you. Visitors often trust real voices, faces, and examples. A WordPress video player helps display these trust signals clearly. A WordPress audio player can share interviews or expert talks. These media elements make your website feel more transparent. They also help visitors feel more confident about your brand. When users trust your content, they are more likely to act.
Media Players Improve WooCommerce Product Pages
WooCommerce product pages can benefit a lot from media players. Product images are helpful, but videos can explain more. A product video can show real usage and product details. It can also highlight size, quality, and special features. Audio previews are useful for music and digital products. They are also helpful for voice samples and training materials. You can embed video player WordPress product pages for better demos. This helps customers understand the product before buying it. A media player can also reduce repeated customer questions. Clear product media can improve user confidence and buying decisions. For online stores, this can support stronger product presentation. It also makes product pages more complete and useful.
Media Players Make WordPress Content More Accessible
Media players can make content easier for more users. Some visitors prefer watching instead of reading long content. Some users prefer listening because it saves time. Others may need captions or transcripts for better access. Videos should include captions whenever possible. Audio content should include a written transcript below it. These steps help users understand your content clearly. They also support visitors with hearing or listening limits. Clear controls also improve the user experience for everyone. Avoid media that starts suddenly with loud sound. Let visitors control playback based on their own choice. Accessible media makes your WordPress website more user-friendly.
Important Things to Know Before Adding a Media Player in WordPress
Before you add media player in WordPress, check a few important points. A media player can improve your content and user experience. But poor setup can slow your website or break layouts. You should choose the right media source, file format, and player type. You should also check hosting limits before uploading large files. A WordPress media player works best when files load fast. It should also work well on mobile, tablet, and desktop. These checks help you avoid common playback and speed issues. They also make your audio and video content more useful.
Choose Between Self-Hosted and Embedded Media Before Setup
You can use self-hosted media or embedded media in WordPress. Self-hosted media means you upload files to your Media Library. This works well for small audio files and short clips. You can use a WordPress audio player for MP3 files easily. You can also use a WordPress video player for small MP4 files. But large videos can use too much server space. They may also increase loading time during high traffic. Embedded media comes from platforms like YouTube or Vimeo. This means the video stays on the external platform. You can embed video player WordPress pages using the video URL. This method is better for large videos and public content.
Understand Hosting and Bandwidth Limits Before Uploading Media
Hosting limits are very important for media-heavy WordPress websites. Audio and video files can use more server resources. Large files need more storage space and bandwidth. Bandwidth means data used when visitors play your media. If many visitors watch videos, bandwidth usage can rise quickly. Shared hosting may not handle heavy video playback well. This can cause slow pages, buffering, or server errors. Before you embed media player in WordPress, review your hosting plan. Check storage, bandwidth, memory, and traffic limits carefully. For large videos, use YouTube, Vimeo, or CDN hosting. A CDN can deliver files from faster nearby servers.
Check File Size Before Uploading Audio or Video Files
File size can directly affect your WordPress website speed. Large media files take longer to load for visitors. They may also make your page heavy on mobile networks. Before uploading, compress your audio or video files properly. Keep quality clear, but avoid very large file sizes. MP3 is usually a good choice for audio files. MP4 is usually the best choice for video files. Short product demos should be trimmed before uploading online. Long videos should be hosted on external video platforms. You can also use poster images for video previews. A poster image loads faster than a full video file. This gives users a better first-page experience.
Use the Right Media Format for Better Playback
The right file format helps media play smoothly in browsers. Unsupported formats may fail on some devices or browsers. MP3 is the safest format for most audio content. It works well for podcasts, guides, and music previews. MP4 is the safest video format for most WordPress websites. It gives good quality and works across many modern devices. WebM can also help with faster web video delivery. But not every setup handles WebM in the same way. MOV files may work, but they are often very heavy. They can also create playback issues on some websites. When you add audio player to WordPress, use clean MP3 files. When adding video, use compressed MP4 files for better results.
Make Sure the Media Player Works Well on Mobile Devices
Most visitors now browse websites from mobile devices. So, your media player must work well on smaller screens. A player should resize properly on phones and tablets. It should not move outside the page layout. It should not hide controls or overlap nearby content. Avoid fixed widths because they can break mobile designs. Use responsive players that adjust to screen size automatically. Test every WordPress video player after adding it to pages. Also test each WordPress audio player on mobile browsers. Check the play button, volume control, and progress bar. Make sure users can tap controls without any problem. If you use page builders, review column and container settings.
Think About Website Speed Before Adding Many Players
Media players can affect page speed when used carelessly. A page with many videos may load very slowly. Heavy players can also add extra scripts and styles. This can increase loading time for every visitor. Before you add media player in WordPress, plan placement carefully. Add media only where it adds real value. Avoid placing too many players on one page. Use lazy loading for videos when possible. Lazy loading delays video loading until users reach it. This helps the page open faster at first. You can also use lightweight embeds for YouTube videos. Avoid autoplay because it can hurt speed and user comfort.
Check Accessibility Needs Before Publishing Media Content
Accessibility helps more visitors use your WordPress website easily. Videos should include captions whenever possible. Captions help users who cannot hear audio clearly. They also help people watching videos without sound. Audio content should include a written transcript below the player. A transcript helps users read the same information easily. It also supports search engines with more content context. Media controls should be clear and simple to use. Avoid hidden buttons, confusing icons, or very small controls. Do not allow media to start loudly without user action. Sudden sound can disturb visitors and create a poor experience.
Review Privacy and Third-Party Scripts Before Embedding Media
Third-party media platforms can load extra scripts on your website. YouTube, Vimeo, Spotify, and SoundCloud may add tracking scripts. These scripts can affect privacy, cookies, and page speed. Before you embed media player in WordPress, review privacy needs carefully. Use privacy-friendly embed options when they are available. For YouTube, privacy-enhanced embeds can reduce some tracking. Also check if the video is public or private. Private videos may not play correctly for every visitor. Some cookie consent tools may block media until approval. This can make embeds look broken before users accept cookies. Add clear messages if consent is needed for playback.
How to Embed or Add a Media Player in WordPress (Step By Step Guide)
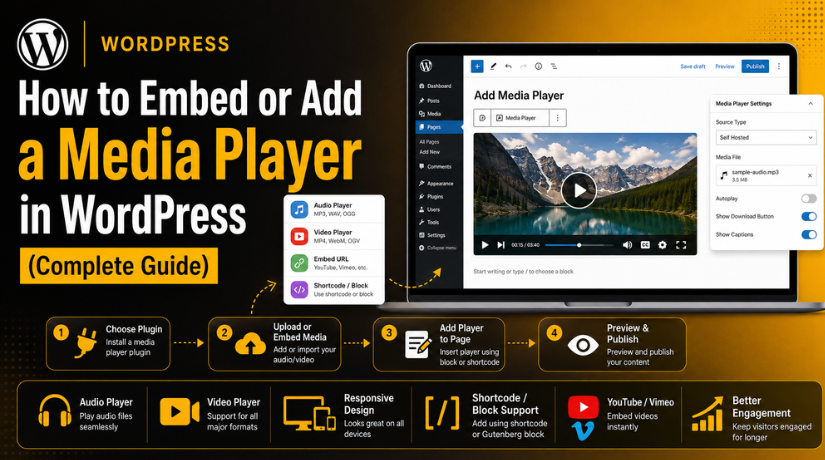
Adding a media player with a plugin is simple. This method works well for beginners and website owners. A plugin gives more control than default WordPress blocks. You can add audio, video, playlists, and custom controls easily. Follow these steps to add media player in WordPress using a plugin.
Step 1: Choose the Right WordPress Media Player Plugin
- Go to your WordPress dashboard.
- Click Plugins > Add New.
- Search for terms like:
- Media player
- Audio player
- Video player
- HTML5 player
- Check the plugin rating and user reviews.
- Check when the plugin was last updated.
- Confirm it supports your WordPress version.
- Make sure it supports your media type.
- Choose a responsive and lightweight plugin.
- Pick a plugin with shortcode or block support.
Step 2: Install and Activate the Media Player Plugin


- Click the Install Now button.
- Wait for WordPress to install the plugin.
- Click Activate after installation.
- Check if a new plugin menu appears.
- Open the plugin settings page.
- Review the basic player options.
- Check style, colors, controls, and layout settings.
- Disable features you do not need.
- Keep the setup simple and clean.
Step 3: Upload or Add Your Audio or Video File
- Open the plugin media settings.
- Choose whether to upload or embed media.
- Upload files from the WordPress Media Library.
- Use MP3 files for a WordPress audio player.
- Use MP4 files for a WordPress video player.
- Add YouTube or Vimeo links if supported.
- Use SoundCloud links for audio embeds if needed.
- Avoid uploading very large video files directly.
- Use external hosting for long videos.
- Optimize media files before adding them.
Step 4: Create a New Media Player Inside the Plugin
- Open the plugin dashboard or player section.
- Click Add New or Create Player.
- Add a clear title for your media player.
- Select your uploaded audio or video file.
- Paste the external media URL if needed.
- Choose the player design or skin.
- Add a poster image for video content.
- Add captions or subtitles when required.
- Add playlist files in the correct order.
- Review autoplay, loop, volume, and download settings.
- Avoid autoplay with sound.
- Save the media player settings.
Step 5: Copy the Shortcode or Select the Plugin Block
- Open the saved media player.
- Copy the shortcode provided by the plugin.
- Open the page or post editor.
- Add a Shortcode block if needed.
- Paste the shortcode into that block.
- Or click the plus icon in the editor.
- Search for the plugin’s media player block.
- Select the block and choose your player.
- This helps you embed media player in WordPress easily.
- Preview the player before publishing.
Step 6: Add the Media Player to Your Page or Post
- Open the page or post where media is needed.
- Place the player near related content.
- Add a short intro above the player.
- Tell users what they will watch or hear.
- For tutorials, place videos near matching steps.
- For podcasts, place audio near episode details.
- For WooCommerce, place videos near product descriptions.
- Keep the layout clean and simple.
- Avoid adding too many players on one page.
- Update or save the page after placement.
Step 7: Preview and Test the Media Player
- Click Preview before publishing the page.
- Check if the player appears correctly.
- Test the play and pause buttons.
- Check volume and progress controls.
- Test the player on desktop.
- Test the player on mobile and tablet.
- Check the page in Chrome, Firefox, Safari, and Edge.
- Make sure the media loads quickly.
- Clear website cache if the player does not show.
- Adjust plugin settings if the layout looks broken.
Step 8: Publish the Page and Monitor Performance
- Publish or update the page after testing.
- Open the live page in a private browser.
- Test the page while logged out of WordPress.
- Confirm that normal visitors can see the player.
- Check if the media plays smoothly.
- Review the page loading speed.
- Optimize files if the page feels slow.
- Enable lazy loading if available.
- Use external hosting for heavy videos.
- Keep the plugin updated regularly.
- Recheck the player after theme or plugin updates.
Common Media Player Problems and Fixes in WordPress
A WordPress media player can sometimes stop working correctly. This may happen because of plugin conflicts, cache settings, file issues, or theme styling. Most problems are easy to fix when you check them step by step. You should first confirm that the media file is working. Then check the plugin, shortcode, page layout, and cache settings. If you recently added a plugin, update, or theme change, review that first. A small change can affect your audio or video player. These fixes can help you repair common issues quickly. They also help you keep a smooth user experience.
Media Player Is Not Showing on the WordPress Page
Sometimes, the player does not appear after you add it. This usually happens because the shortcode is missing or incorrect. First, check the shortcode added to your page. Make sure you copied the full shortcode from the plugin. If you use the block editor, add it inside a Shortcode block. Also confirm that the media player plugin is active. A disabled plugin will not display the player. Clear your website cache after checking the plugin. Then open the page in a private browser window. If the player still does not show, test another theme. This helps you find theme-related display issues. You can also disable other plugins one by one. This helps you find any plugin conflict.
Audio or Video Is Not Playing After Adding the Player
Your media player may appear but not play the file. This often happens because the media URL is wrong. Open the file link directly in your browser. If the file does not open, upload it again. Also check whether the file exists in your Media Library. Use common formats like MP3 for audio files. Use MP4 for video files when possible. These formats work well with most browsers. If you add audio player to WordPress, use clean MP3 files. If you use a WordPress video player, use optimized MP4 files. Also check file permissions on your hosting account. Wrong permissions can block media playback. Re-upload damaged files and test the player again.
Media Player Looks Broken or Overlaps on Mobile Devices
A media player should look clean on every screen size. Sometimes, it looks perfect on desktop but breaks on mobile. This can happen because of fixed width settings. It can also happen because of theme or page builder CSS. First, check the player settings inside the plugin. Enable responsive layout if the option is available. Avoid using fixed width values like 800px. Use percentage-based width settings whenever possible. Also check page builder column and container settings. A narrow column can break player controls. If needed, add simple responsive CSS for the player. Test the page on mobile, tablet, and desktop again. A responsive HTML5 media player WordPress setup improves user experience.
Video Loads Slowly or Keeps Buffering on the Website
Slow video loading is a common WordPress media issue. Large video files can slow down the full page. They can also create buffering during playback. First, check the video file size. Compress the video before uploading it to WordPress. Use MP4 format for better balance and playback. Long videos should not be hosted on shared hosting. Use YouTube, Vimeo, or a CDN instead. This reduces pressure on your WordPress server. You can also enable lazy loading for video embeds. Lazy loading helps the page open faster at first. Avoid adding many videos on one page. Too many players can increase page weight. If needed, move extra videos to separate pages.
Embed or Player Block Is Not Working Properly
Sometimes, an embed link does not load inside WordPress. This can happen because the video is private. First, check the video privacy settings on YouTube or Vimeo. Make sure the video is public or allowed for embedding. Copy a fresh URL and paste it again. If you embed video player WordPress pages, use the correct share link. Avoid using links from private dashboards or editing screens. Browser extensions can also block some embedded players. Disable ad blockers during testing and refresh the page. Cookie consent tools may also block third-party media. In that case, add a clear consent message for users. This helps users understand why the embed is blocked.
Shortcode Displays as Plain Text Instead of Player
A shortcode should display the media player on the page. If it shows as plain text, WordPress is not processing it. First, make sure the plugin is installed and active. Then check whether the shortcode was pasted correctly. Use the Shortcode block in the WordPress block editor. Do not paste shortcodes into unsupported fields. Some theme areas may not process shortcodes automatically. If you use Elementor or another builder, use its shortcode widget. Also check whether the plugin supports that shortcode. A wrong shortcode cannot display your WordPress media player. After making changes, clear cache and preview the live page.
Media Player Conflicts With Theme Design or Page Layout
Theme styling can sometimes affect media player design. The player may look stretched, hidden, or misaligned. Buttons may also appear too small or misplaced. First, switch to a default WordPress theme for testing. If the player works there, your theme likely causes the issue. Check the theme’s CSS for media element styles. Also check any custom CSS added earlier. Page builders can also apply extra styling to sections. Review padding, margins, width, and overflow settings carefully. Use the plugin’s style options where possible. If needed, add custom CSS for the player wrapper.
Media Player Stops Working After Cache or Speed Optimization
Cache and speed plugins can sometimes break media players. They may delay or minify important player scripts. This can stop controls from loading correctly. First, clear all cache from your website. Also clear browser cache and CDN cache if used. Then test the player again in a private window. If it still fails, disable JavaScript delay temporarily. Also disable CSS and JavaScript minification for testing. If the player starts working, exclude its files from optimization. Most cache plugins allow script exclusion rules. Add the media plugin script URLs to the exclusion list. Then re-enable optimization step by step.
Captions or Subtitles Are Not Showing in the Video Player
Captions help users understand video content more clearly. If captions do not show, check the caption file first. Many players support VTT subtitle files. Make sure your subtitle file uses the correct format. Also confirm that the file path is correct. Upload the caption file again if needed. Then check the plugin’s subtitle settings. Some plugins require you to enable captions manually. Also check the video player control bar. Captions may be hidden under a small settings icon. Test the video in different browsers after saving changes. Captions improve accessibility and make content more user-friendly.
Media Player Controls Are Missing or Not Clickable
Player controls are important for a smooth experience. Visitors need play, pause, volume, and progress options. If controls are missing, check the plugin settings first. Some plugins allow controls to be disabled. Turn controls on and save your settings again. If controls appear but do not work, check script conflicts. Cache plugins can block media player JavaScript files. Theme CSS can also hide control buttons by mistake. Test the player with optimization disabled for a short check. Also update your plugin, theme, and WordPress version. Outdated files can cause player control issues. After fixing the issue, test all controls on mobile too.
Conclusion
Adding a media player in WordPress is simple and useful. It helps visitors watch videos or listen to audio easily. You can use a plugin for better design and control. A plugin can help you embed media player in WordPress without coding. It can also support playlists, captions, shortcodes, and custom layouts. Still, you must check file size, format, speed, and mobile layout. A good WordPress audio player improves podcasts and voice content. A good WordPress video player improves tutorials and product demos. Always test your media player before publishing the page. Check desktop, mobile, browser support, and page speed. A clean setup gives users a smooth and helpful experience.
If you need help, contact 24x7wpsupport today. Our WordPress experts can help you add media player in WordPress correctly. We can install plugins, fix playback issues, and optimize media speed. We can also help with embed video player WordPress setup, audio players, plugin conflicts, and mobile layout problems. Our team can configure your HTML5 media player WordPress setup for better performance. We also help with WooCommerce product videos and website speed improvement. Visit 24x7wpsupport and get expert WordPress support for your media player setup.

Brian is a WordPress support specialist and content contributor at 24×7 WP Support. He writes practical, easy-to-follow guides on WordPress troubleshooting, WooCommerce issues, plugin and theme errors, website security, migrations, performance optimization, and integrations. With a focus on solving real website problems, Brian helps business owners, bloggers, and online store managers keep their WordPress sites running smoothly.
