
How to Adding Multiple Column Content in WordPress Post (without HTML)
Last updated on August 11th, 2021 at 08:02 am
As we know that adding multiple column content in the new WordPress editor that is Guttenberg or it is also known as a block editor. The main reason that people create the column in their blog post all pages of the website is to engage users. In today’s digital platform magazines and newspapers, websites are created on multi-column layouts. With the help of this user can see a lot of information in a small space.
According to our experts, those multi-column grids are useful for providing more information in the appropriate space. While a single column layout is most commonly used in all websites. In this article, we are going to cover information on the topic of how to create multicolumn content in any WordPress website without using HTML code.
Adding multiple column content in WordPress
This is the easiest way through which we can add multiple columns to any WordPress website. As we know that WordPress editor has its default blog editor that is Guttenberg this is also known as a block editor. So, adding multicolumn in any post or page with the help of the Gutenberg editor. Follow the steps which are given below user will completely get information about how to add multi-column content in a WordPress website without HTML.
- First of all, the user needs to enter in WordPress dashboard by entering the username and password in the required space. Then the user needs to click on the submit option.
- User click on the dashboard then a context menu emerges on the screen where the user clicks on post after that add a new post.
- A new screen emerges on the screen. Now the user must click on ” add icon” which is present on the left top corner of the screen.
- Then a context menu arises on the screen after that user must select the “columns” option which is present in the context menu. You can see in the image which is given below.
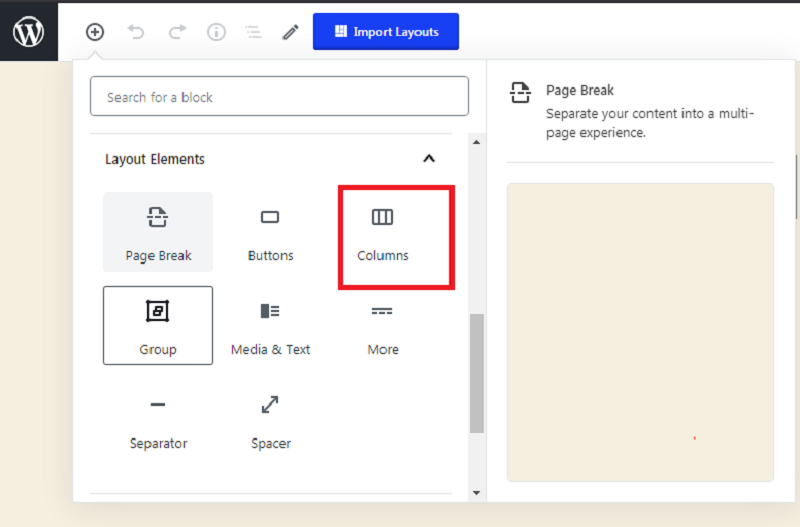
- After that, a column format appears on the post or a page that the user has been chosen. Now the user can see in the image given below.
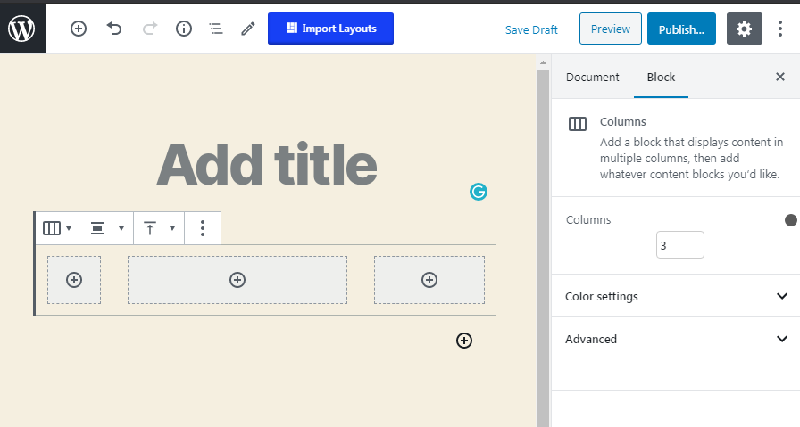
- On the left side of a cursor blinking where the user can write anything. On the right side, the user can also so see “Add icon” from where the user can add another column.
- Users can also see on the right side of the screen there is a block set. User can use this block set to customize or edit post which is present on the screen.
- Users can increase the number of columns according to their need but by default, there will be two columns added in the starting. Users can add 6 columns in a single row.
- Now the column is ready to use your user can see all columns present on the screen. Users can start editing these columns and the user can click the tab key for moving to the next column.
How to add media and other content into the column?
Not only text can be written inside the column but the user can also add any type of media according to their need inside any column. So then in this article, we are also going to learn how to add any type of media or other content into columns. Users can add a lot of things to the columns such as images, embedded videos and images, and many more things. Users can also add any type of blog inside any column. Let’s have a look at how to add media or other content into columns?
- The user needs to click on” add icon” which is present on the right side of the column. after that user, click adds new block icon inside it and enter block name by typing in the search box. For more information user can refer to the image which is given below.
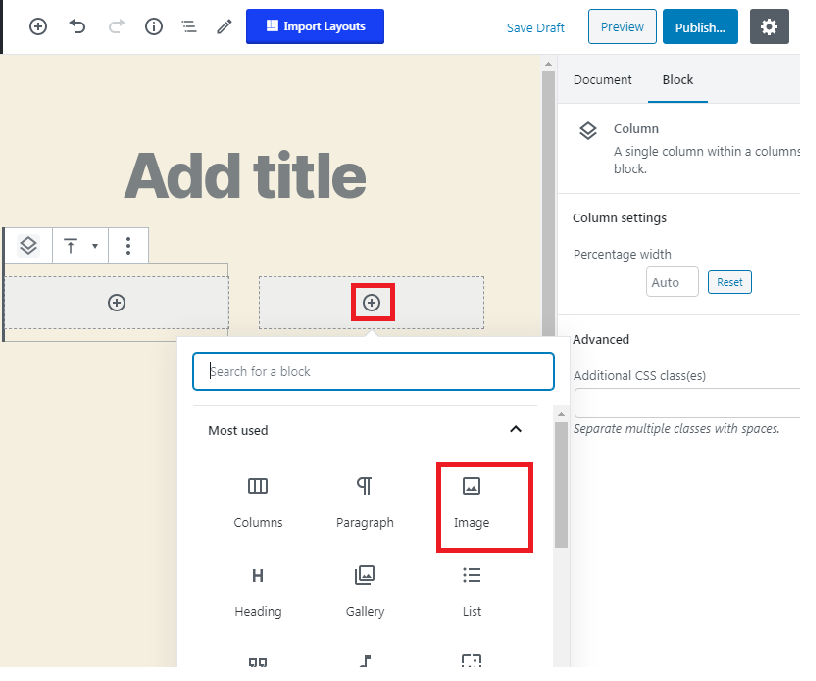
- Now, the user, I will see that the selected block appears inside the column now user can use that block. for more information user can refer to the image which is given below.
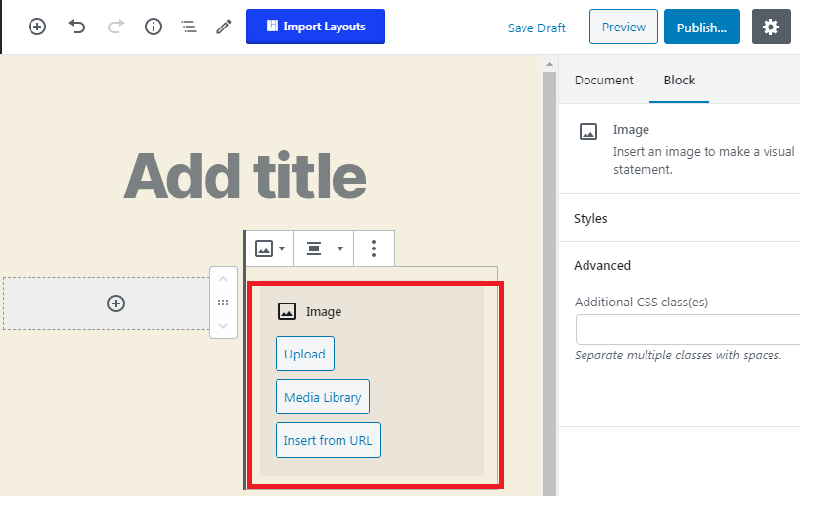
- We have set an example of twenty nineteen themes how it will look when we insert image block in the third column as you can see in the image which is given below.
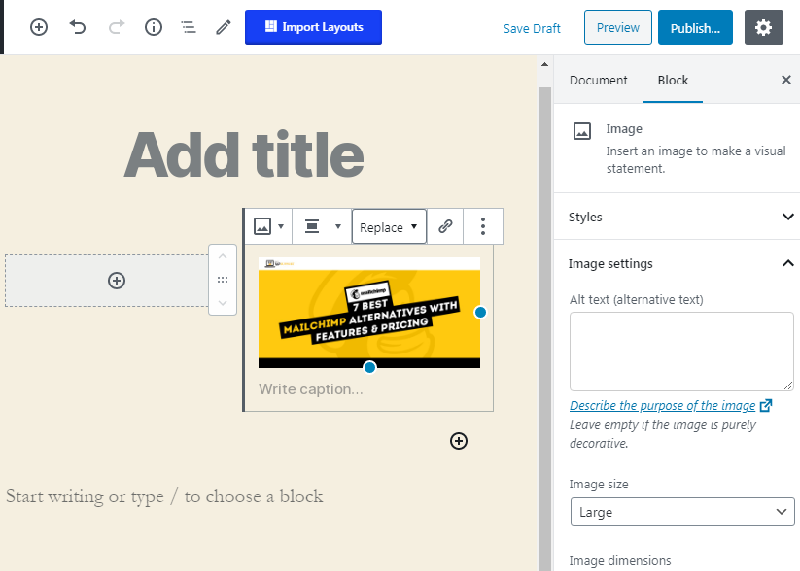
How to add Media & text inside the column?
In this, we are going to learn how we are going to add the image with a text block inside the columns. The new user can prefer these steps which are given below.
- Users must reach the point where they can create columns inside the post or page. After that user must click on “add icon” which is present on the top right corner of the screen.
- After clicking on the icon user will search items inside a search box that is “media and text” for better convenient information users can see the image given below.
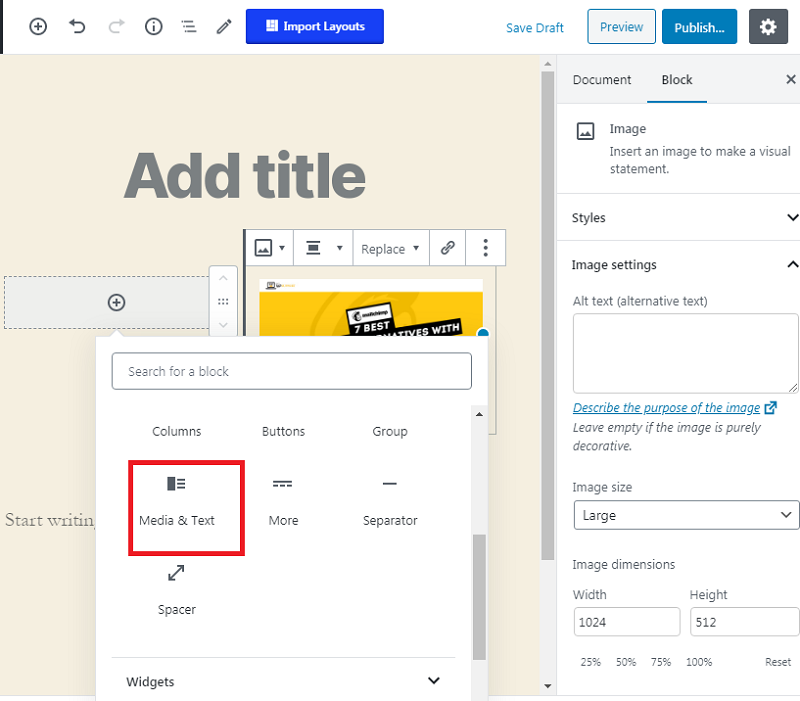
- Now user clicks on media and text option. After that in the next column, the block is placed. So the user can use this block according to their requirements.
How to add multiple columns in old WordPress classical editor?
We already know that after WordPress 5.0 WordPress updated its editor from classic editor to Gutenberg editor. In this article above discuss how to add multiple column content in WordPress post without using HTML with the help of the Gutenberg editor now we are going to discuss the same thing with the help of classic editor for the old version of WordPress editor. We are going to discuss with the classic editor because many users who are using WordPress and still using the classic editor. The new user can follow the steps which are given below
- Users must log in to the WordPress dashboard by entering username and password after that user must click on the submit option.
- After successfully logged in into the dashboard user must click on plugins that are present on the left side of the screen.
- Now the user must click on add new plugin. A new screen appears in front of the user. In that screen, the user must enter a keyword “lightweight grid columns” in the search box and hit enter.
- Now the user must install lightweight grid columns plugin and side by side activate this plugin also.
- After successfully activating this plugin user can create a new post and click on the “add columns” button. This add column button present on the visual editor toolbar. For better understanding user can see the image which is given below.
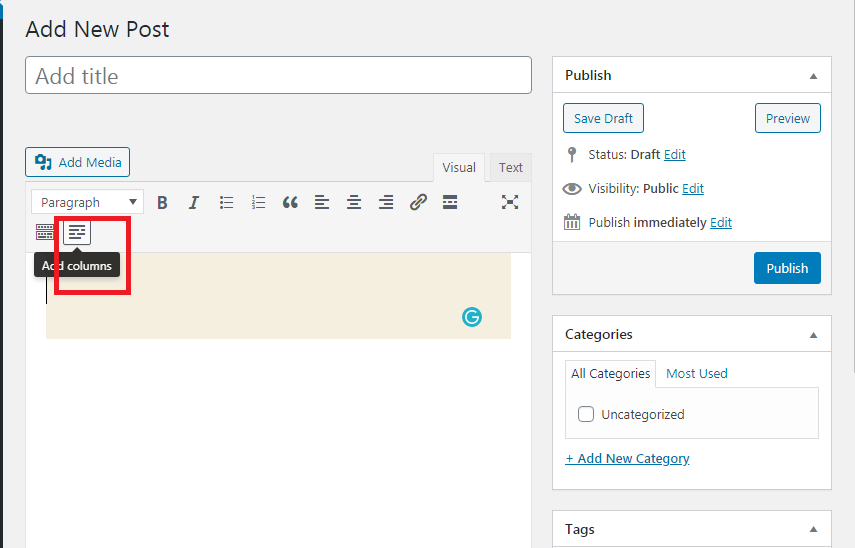
- Now user can see a popup window appear on the screen. In this popup window, the user can set the area acquired by the column and many more things.
- Now the user enters all details according to their requirement. Don’t forget to click ok button.
This how the user can create multiple columns in the WordPress website by the classic editor.
Do we hope that you like this article which is based on How to add multi-column content in WordPress post (without HTML)? At last, we are always curious to know your feedback, so please send your valuable feedback into the comment box, and we are always welcome to your queries and. Our expert resolves your all queries in a very short time period so if you have any queries related to this article we are always welcome you in the comment box and comment there.

