
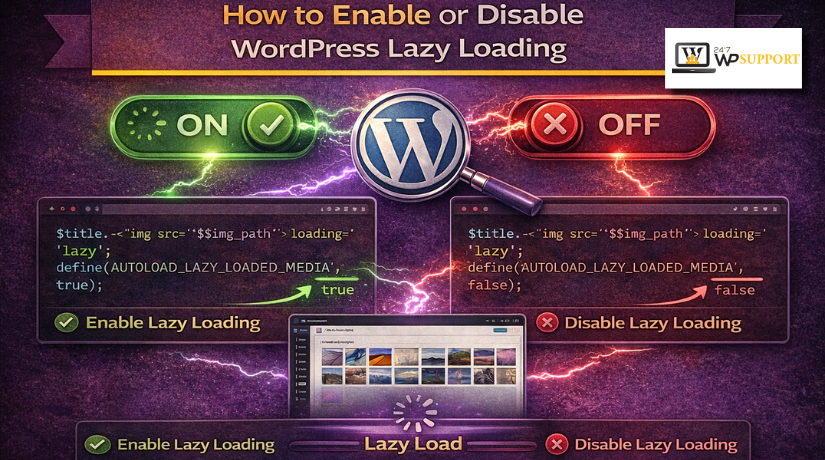
How to Enable or Disable WordPress Lazy Loading (Complete Guide)
Introduction
Website speed matters for every WordPress site today. Visitors expect pages to open fast and feel smooth. Heavy images often slow the first screen badly. This is where lazy loading becomes useful. It delays some media until the visitor scrolls near it. That means fewer files load at the start. It can help improve WordPress page speed on many pages. It can also reduce wasted data for mobile users. WordPress added native image lazy loading in version 5.5, and its newer loading optimization system now works with attributes like loading, decoding, and fetchpriority for supported media output.
Many site owners still search this topic for good reasons. Some want to enable lazy loading WordPress already supports. Others want more control through a plugin. Some need to learn how to disable lazy loading in WordPress because the main image appears late. Others face issues like lazy loading and not working WordPress pages correctly. So, this guide is not only about speed. It is also about using the feature in the right way. When lazy loading is set well, it supports better WordPress image optimization. When it is set badly, it can hurt the first screen experience. WordPress provides built-in logic and filters for this behavior, including wp_lazy_loading_enabled() and the broader loading optimization attribute system.
In this guide, you will understand what lazy loading means in WordPress and why so many website owners use it today. WordPress core applies loading-related attributes to supported content and allows developers to control or change that behavior through official filters.
What Is Lazy Loading in WordPress?
Lazy loading in WordPress means images or iframes do not load right away. They wait until the visitor gets close to them. This lowers the number of files loaded during the first page view. It can make the page feel lighter at the start. For example, a long blog post may have ten images. Without lazy loading, the browser may request many images early. With lazy loading, lower images can wait until needed. This is why WordPress lazy loading images can help pages with lots of media. WordPress core modifies post content to add modern image attributes such as srcset, sizes, and loading for images, and loading for iframes.
Modern WordPress does more than only add loading=”lazy”. Its loading optimization system can also return decoding=”async” and fetchpriority=”high” when needed for better loading behavior. This matters because today’s performance work is more than one small setting. WordPress now uses wp_get_loading_optimization_attributes() to decide which loading-related attributes to add in many cases. Older handling around default loading values has been updated, and wp_get_loading_attr_default() is deprecated since 6.3. That means current WordPress image optimization follows a more complete system than older lazy loading setups did.
Main Uses of Lazy Loading in WordPress for Speed and Better Experience
1. Lazy Loading Helps Improve Initial Page Speed
One main use of lazy loading is faster initial page loading. It stops lower-page images from loading at once. This reduces the work during the first page visit. As a result, the visible part of the page can appear faster. This helps users start reading or browsing sooner. It is a simple way to improve WordPress page speed on image-heavy pages.
2. Lazy Loading Reduces Unnecessary Image Requests
Many pages contain images that users may never scroll down to see. Lazy loading delays those images until they are needed. This means the browser does not request every file at the start. It helps reduce extra loading pressure on the page. This is very useful for long blog posts, service pages, and galleries with many visuals.
3. Lazy Loading Saves Bandwidth for Visitors
Lazy loading can also save internet data for users. This is helpful for visitors using mobile networks or slow connections. If a person leaves the page early, lower images may never load. That means less data is used during the visit. This improves the browsing experience and makes the site feel lighter.
4. Lazy Loading Supports Better WordPress Image Optimization
Lazy loading works well with other image improvement methods. It does not replace image compression or correct image sizing. Instead, it adds one more layer of performance support. When combined with proper WordPress image optimization, it can make pages load more smoothly. This makes the website more efficient and easier to use.
5. Lazy Loading Improves the Experience on Long Content Pages
Long pages often contain many screenshots, featured images, or visual sections. Loading everything together can slow the page badly. Lazy loading helps manage this type of content better. It allows top content to load first and lower content later. This keeps the page cleaner during the first load. It is very useful for tutorials, blogs, and landing pages.
6. Lazy Loading Helps Media-Heavy WordPress Sites Perform Better
Some websites depend heavily on images, videos, and embedded content. These sites often need more loading control. Lazy loading helps by delaying offscreen media until the visitor gets closer to it. This gives the browser more space to load important content first. It is especially useful for portfolio sites, news sites, and WooCommerce category pages.
7. Lazy Loading Can Make Mobile Browsing Feel Smoother
Mobile users often deal with smaller screens and slower speeds. They also scroll through pages differently than desktop users. Lazy loading helps mobile pages feel less heavy at the start. It reduces early loading stress and improves visual flow. This makes the page feel more user-friendly on phones and tablets.
8. Lazy Loading Helps Focus on Important Above-the-Fold Content
A good page should load the most important content first. Lazy loading helps do that by delaying lower-page images. This gives more attention to the top section of the page. Visitors can see key text, buttons, and banners sooner. That is why lazy loading is often used to improve both speed and user experience.
Important Things You Need to Check Before You Enable Lazy Loading in WordPress
Before you enable lazy loading WordPress settings, check your site first. This step helps avoid speed loss and display problems later. Many site owners skip this part and face trouble. In some cases, lazy loading of WordPress pages is not the real issue. The real problem is poor setup, plugin overlap, or wrong image rules. A careful check helps you choose the right method from the start. WordPress core can already add loading-related attributes to supported images and iframes, so some sites may already be using native lazy loading before any plugin is installed.
Check Whether Lazy Loading Is Already Active on Your WordPress Site
The first step is checking if lazy loading already runs. Many modern WordPress websites already use this feature by default. If you install another plugin without checking first, conflicts may happen. Open your page source and inspect your image tags. If you see loading=”lazy” on images or iframes, lazy loading is likely active. This simple check can save time and prevent duplicate settings later. WordPress core uses built-in functions and filters to decide when to add the loading attribute to supported tags.
Review Your Installed Plugins and Other Speed Optimization Tools Carefully
The next step is reviewing your current plugin stack. Some cache plugins already include lazy loading features. Some image plugins also add lazy loading on their own. A CDN or page builder may also change image loading. If more than one system controls images, results can become unstable. This can affect page speed, layout, and image timing. Before you Enable or Disable WordPress Lazy Loading, check every performance tool carefully. Official plugin pages show that many speed tools now include lazy loading for images, videos, and iframes.
Identify Which Images Appear First in the Visible Top Area
Not every image should load late on a page. Some images need to appear right away. These usually include the hero banner, logo, featured image, or main product image. These top images often shape the first visitor experience. If they load too late, the page can feel slow. That is why you must identify above-the-fold images first. This step is very important before any lazy load change. WordPress now uses a broader loading optimization system that can return loading, decoding, and fetchpriority attributes depending on the image and context.
Check Your Current Core Web Vitals and Real Page Speed Before Changes
Do not enable anything without checking your current speed first. You need a clear starting point before making performance changes. Test your homepage, blog page, and product pages first. Note how fast the first screen appears on mobile. Also check if images already load in a good way. This helps you compare results after lazy loading starts. It also helps you decide whether you need more image tuning. Lazy loading is only one part of WordPress image optimization, not the whole solution. WordPress core describes lazy loading as one performance tool among other loading and image improvements.
Review Sliders Galleries and Other Layout Sections That Depend on Fast Images
Some website sections react badly to lazy loading. Sliders, carousels, popups, tabs, and gallery blocks can break. In those areas, images may appear too late or not at all. You may also see blank spaces before the image loads. This is why layout-sensitive sections need testing first. If your site depends on visual effects, test these parts carefully. A plugin may support standard images well but still miss custom layouts. Official plugin pages note that some lazy loading tools cannot cover custom image output added through theme or plugin code.
Check Whether Your Theme and Page Builder Handle Images Properly
Themes and builders do not all output images the same way. Some use normal image tags from WordPress core. Others use custom code, background images, or script-based media blocks. This difference matters because lazy loading works best with supported output. If your builder uses custom image sections, test those sections first. A feature may work on blog images but fail on banners. This is another reason users think lazy loading not working WordPress pages is a plugin bug, when it may be a theme issue instead. WordPress core adds loading attributes through supported functions and content filters, but custom output may need extra handling.
Test Lazy Loading Changes on a Staging Site or With a Full Backup First
Do not make global image changes without safety steps. A backup or staging site gives you room to test. If a layout breaks, you can roll back safely. This matters more on stores, lead pages, and active blogs. One small image issue can affect sales or user trust. Testing first helps you avoid that risk. It also gives you time to compare old and new results clearly. This is the best way to make smart changes before you improve WordPress page speed on a live site.
How to Enable WordPress Lazy Loading (Step By Step Guide)
If you want to enable lazy loading WordPress settings easily, a plugin is the simplest method. This works well for beginners because most plugins give ready settings inside the dashboard. WordPress core already supports lazy loading for supported img and iframe tags, so the plugin method is most useful when you want easier controls, exclusions, or support for more media types.
Step 1: Check Whether Lazy Loading Is Already Active
- Open any page on your website.
- Right-click and view the page source.
- Search for loading=”lazy” inside image tags.
- Check iframe tags as well.
- If this attribute is already there, lazy loading may already be active.
- This step helps avoid duplicate settings.
Step 2: Choose One Trusted Lazy Loading Plugin
- Go to the WordPress dashboard.
- Open the Plugins section.
- Search for a trusted lazy loading plugin.
- Choose only one plugin for this feature.
- Do not use multiple lazy loading tools together.
- This helps avoid conflicts and display issues.
Step 3: Install and Activate the Plugin
- Click Install Now on the selected plugin.
- After installation, click Activate.
- Wait until the plugin becomes active.
- Check where its settings appear in the dashboard.
- Most plugins show settings under performance, media, or optimization.
Step 4: Open the Plugin Settings
- Open the plugin settings page.
- Look for media, images, or lazy loading options.
- Read the available settings carefully.
- Make sure you understand what each option controls.
- Start with basic image lazy loading first.
Step 5: Enable Lazy Loading for Images
- Turn on the option for image lazy loading.
- Save the setting after enabling it.
- Make sure the plugin applies lazy loading to normal images.
- This is the main setting needed for most websites.
- It helps reduce image load on the first screen.
Step 6: Enable Lazy Loading for Iframes or Videos if Needed
- Check whether your plugin supports iframes or videos.
- Enable these only if your website uses them.
- This is useful for YouTube videos, maps, or embedded content.
- Do not turn on every option without checking your site needs.
Step 7: Exclude Important Above-the-Fold Images
- Identify your hero banner image.
- Check your site logo.
- Review the featured image at the top of posts.
- Check the main product image on product pages.
- Exclude these images if they need to load immediately.
- This helps protect the first visible section of the page.
Step 8: Save Changes and Clear Cache
- Click the Save Changes button.
- Clear your plugin cache if you use caching.
- Clear server cache if available.
- Clear CDN cache if your website uses a CDN.
- Reload the page after clearing everything.
- This helps show the latest frontend result.
Step 9: Test Important Pages on the Frontend
- Open the homepage first.
- Check one blog post with several images.
- Open the shop page if you run WooCommerce.
- Test one product page.
- Check pages with sliders, galleries, maps, or videos.
- Watch for blank spaces, delayed images, or broken sections.
Step 10: Review the Results and Adjust Settings
- Check whether the page feels faster.
- See if images load smoothly while scrolling.
- Check whether top images appear on time.
- If needed, add more exclusions.
- If some layout breaks, turn off lazy loading for that part only.
- Keep the setup simple and controlled.
Step 11: Keep Only One Lazy Loading System Active
- Check whether WordPress core already adds lazy loading.
- Check whether your theme adds its own lazy loading.
- Check whether your CDN changes image loading.
- Disable extra lazy loading systems if they overlap.
- Keep only one main lazy loading method active.
- This gives cleaner and safer results.
Step 12: Recheck the Website After Updates


- Test your pages after plugin updates.
- Test again after theme updates.
- Recheck after WordPress core updates.
- Make sure important images still load correctly.
- Small changes in updates can affect media behavior.
- Regular checking helps keep your setup stable.
How to Disable WordPress Lazy Loading (Step By Step Guide)
If you want to disable lazy loading in WordPress, do not rush. WordPress can add lazy-loading behavior to supported img and iframe tags, and plugins may add their own layer too. The safest method is to find the active source first, then disable it in a controlled order.
Step 1: Check Whether Lazy Loading Is Really Active
- Open one important page on your website.
- Right-click and view the page source.
- Search for loading=”lazy” in image tags.
- Check iframe tags too.
- If you find that attribute, lazy loading is active somewhere.
- This confirms you are fixing the right issue.
Step 2: Find Out What Is Adding Lazy Loading
- Check whether WordPress core is adding it.
- Check your cache or speed plugin settings.
- Check your theme settings if it has image tools.
- Check your CDN if it rewrites image loading.
- Do not disable things blindly before you know the source.
- This step helps avoid mixed results later.
Step 3: Disable Lazy Loading from the Plugin Settings First
- Open the plugin that controls lazy loading.
- Look for image, iframe, video, or media settings.
- Turn off lazy loading from that plugin first.
- Save the changes properly.
- This is usually the easiest method for beginners.
- Some plugins also let you disable WordPress core lazy load from inside their settings.
Step 4: Disable Native WordPress Lazy Loading Sitewide with Code
- Use this step only if you need a full sitewide disabled.
- Add the code to your child theme or a snippets plugin.
- This uses WordPress’s official lazy-loading filter.
- It tells WordPress not to add the loading attribute.
- add_filter( ‘wp_lazy_loading_enabled’, ‘__return_false’ );
- This is the core-level method for disabling native lazy loading.
Step 5: Disable Lazy Loading Only for Important Images When Possible
- Do not turn everything off unless you must.
- Start with the hero image first.
- Then check the logo and featured image.
- Also review the main product image on WooCommerce pages.
- Selective disabling is often safer than full disabling.
- It keeps lower-page images optimized while protecting the top section.
Step 6: Clear All Cache After Every Change
- Clear your plugin cache.
- Clear server cache if your host uses it.
- Clear CDN cache if your site uses a CDN.
- Reload the page after that.
- Old cache can make it look like nothing changed.
- This step is very important during testing.
Step 7: Test the Most Important Pages Carefully
- Test the homepage first.
- Test one blog post with images.
- Test the shop page if you use WooCommerce.
- Test one product page.
- Check pages with sliders, maps, videos, or galleries.
- Watch for late images, blank spaces, and broken layouts.
Step 8: Confirm That Only One Lazy Loading System Remains
- Recheck your plugin stack once more.
- Make sure two systems are not active together.
- Core, plugin, theme, and CDN overlap can cause problems.
- Keep one clear setup whenever possible.
- This makes troubleshooting much easier later.
Step 9: Inspect the Page Again After Disabling It
- Open the page source again.
- Search for loading=”lazy” one more time.
- Compare the old and new output.
- This helps verify that your change worked.
- WordPress content filtering is one place where loading attributes can be added automatically.
Step 10: Recheck the Website After Future Updates
- Test again after plugin updates.
- Test again after theme updates.
- Test again after major WordPress updates.
- Media behavior can change over time.
- A quick check helps you catch issues early.
Common Problems Caused by Lazy Loading in WordPress and Fixes
Lazy loading can help improve WordPress page speed, but it can also cause issues when the setup is wrong. Most problems come from duplicate lazy loading systems, unsupported custom layouts, or incorrect exclusions. If lazy loading and not working WordPress pages correctly is your current issue, the solution is usually careful testing, not random setting changes. Official WordPress and plugin documentation both show that image handling depends on how media is output, filtered, and controlled on the page.
Images Loading Too Late in the First Visible Area of the Page
This is one of the most common problems. The page text may appear first, but the main image loads later. That makes the design feel incomplete during the first few seconds. This usually happens when an important above-the-fold image gets lazy loaded by mistake. It can affect banners, featured images, and main product photos. WordPress has specifically adjusted core behavior over time because lazy loading early content images can hurt loading priority and LCP.
Layout Shift and Unstable Design After Images Start Loading
Another common issue is layout shift. This happens when space is not held correctly before images load. The content may jump after the image appears. That movement looks bad and can hurt user trust. WordPress has long tied image loading improvements to better handling of image dimensions and layout stability, since slow-loading media can cause visible shifting.
Sliders and Galleries Not Working Correctly After Lazy Loading Is Enabled
Sliders and galleries can also break with lazy loading. Some slides may stay blank at first. Some thumbnails may appear too late. In some cases, the transition effect also looks broken. This often happens when the slider plugin uses its own image logic or loads media through custom code. Plugin documentation notes that custom theme or plugin functions may prevent lazy loading from being applied correctly in certain sections.
Plugin CDN or Theme Conflicts That Cause Mixed Image Loading Results
Conflicts are another major reason for trouble. A cache plugin may add one lazy loading system. A theme may add another. A CDN may rewrite image delivery again. When these systems overlap, WordPress lazy loading images can become unstable. You may see duplicate placeholders, missing images, or delayed rendering. This is why using one main lazy loading system is usually safer than mixing several tools together. Plugin support guidance also commonly points to other plugins or themes as a source of interference when lazy loading stops working correctly.
Background Images Not Responding the Same Way as Normal Image Tags
Background images often confuse site owners. A standard image tag can receive lazy-loading attributes more easily. A CSS background image works differently. Some plugins support those backgrounds, but not all do. That is why a banner background may ignore your normal image settings. If a theme builds banners through custom code or CSS, extra testing is needed before assuming the plugin is broken. Plugin documentation specifically notes that custom functions and custom output can prevent lazy loading from being applied automatically.
Embedded Videos and Maps Causing Delay or Placeholder Problems on the Page
Videos and maps can also cause trouble. They often use iframes or special embed markup. A plugin may delay them too aggressively. That can create blank areas or slow interaction on the page. On the other hand, these heavy embeds are also good lazy-loading candidates when they are placed lower on the page. WordPress core adds loading attributes to iframe tags in supported post content, and popular lazy-loading plugins also advertise iframe and video support for this reason.
Step by Step Troubleshooting Process for Lazy Loading Problems in WordPress
Start by checking who is adding lazy loading on your site. It may be WordPress core, a plugin, the theme, or a CDN. Then inspect the image HTML on the affected page. Look for loading=”lazy” and compare working sections with broken sections. After that, turn off one lazy loading system at a time. Clear cache after every test. Then retest the homepage, one post page, and one product page. This step-by-step method is usually the fastest way to find the real issue when lazy loading not working WordPress pages creates confusion. WordPress core applies loading-related changes through official filters and content tag processing, so checking the actual rendered markup is an important first step.
When You Should Temporarily Disable Lazy Loading During Testing and Debugging
Temporary disabling can be useful during testing. It helps you confirm whether lazy loading is really causing the problem. If the layout becomes normal after disabling it, then you know where to focus next. After that, you can re-enable it carefully with better exclusions. This method is much safer than leaving random settings active and hoping the issue disappears. It is especially useful on stores, landing pages, and media-heavy layouts where first impressions matter most.
Best Practices for WordPress Lazy Loading That Help Speed Without Hurting User Experience
Lazy loading works best when you use it with balance. It should help pages load faster without making top images appear late. WordPress now handles loading optimization through a broader system that can add loading, decoding, and fetchpriority attributes where needed, so modern setup is not only about turning one option on or off.
Keep Lazy Loading Enabled for Images and Media That Appear Lower on the Page
The best place to use lazy loading is below the first visible section. Lower blog images, gallery items, and embedded media are strong examples. These files do not need to load at the first second. Delaying them helps reduce early page weight and can improve WordPress page speed in a safer way. WordPress content filtering can add loading attributes to supported img and iframe tags, which is why this works well on many normal content areas.
Do Not Lazy Load Important Above the Fold Images That Users See First
The top section of the page needs special care. Your hero banner, logo, featured image, or main product image should usually load quickly. If these images are delayed, the page can feel broken or unfinished. That is why smart WordPress image optimization does not treat every image the same way. WordPress loading optimization also considers priority-related attributes, and no element should use both loading=”lazy” and fetchpriority=”high” together.
Use Only One Main Lazy Loading System to Avoid Conflicts and Mixed Results
One of the safest best practices is using only one main lazy loading method. If WordPress core adds lazy loading and a plugin also does the same work, image behavior can become messy. A theme or CDN can create another layer too. This often leads to the common complaint of lazy loading not working WordPress pages properly. Keep one clear system active so testing becomes easier and results stay stable. WordPress core already provides the native filter that controls whether the loading attribute is added to supported tags.
Combine Lazy Loading with Other Image Optimization Methods for Better Results
Lazy loading is helpful, but it is not a complete speed solution by itself. You still need proper image sizes, compression, and responsive image support. WordPress content filtering already supports useful image attributes like srcset and sizes, so lazy loading should work as part of a larger image plan. When these methods work together, you get better speed and a smoother page. This is a smarter way to improve WordPress page speed than relying on one setting alone.
Test Lazy Loading on Real Pages Instead of Checking Only the Homepage
A homepage test is not enough. You should also check blog posts, product pages, landing pages, and media-heavy sections. Some layouts behave well on one page but fail on another. Sliders, galleries, and embedded videos often need extra care. WordPress can add loading-related attributes through several supported functions and content filters, so page-by-page testing gives a more reliable picture of what is really happening on the site.
Focus on Real User Experience Instead of Chasing Only Speed Scores
A better score looks nice, but user experience matters more. If the page score improves while the hero image appears late, the result is not truly better. Good lazy loading should make the page feel faster, cleaner, and more stable. Visitors should see the main content quickly and lower media should load smoothly while scrolling. This is the right way to Enable or Disable WordPress Lazy Loading with practical goals in mind. WordPress loading optimization is built to improve performance, but it still depends on correct use in the right context.
Recheck Your Lazy Loading Setup After Plugin Theme or WordPress Updates
Your setup should not be left unchecked forever. A plugin update can change media handling. A theme update can change how images are printed in the markup. A WordPress update can refine loading behavior again. Rechecking important pages after updates helps catch image delays, broken layouts, or wrong loading rules early. Since WordPress continues to use and refine its official loading optimization functions, regular testing is a smart long-term habit.
Conclusion
WordPress lazy loading can help your website load faster and feel smoother. It works best when you use it with care. Lower-page images should load later to reduce page weight. Important top images should load quickly without delay. That is why the best setup is not always full enabled or full disabled. A smart balance gives better speed and a better user experience. Before making changes, always check your current setup, test important pages, and avoid using multiple lazy loading tools together. If lazy loading is set correctly, it can support better WordPress image optimization and help improve overall site performance.
If you need help with WordPress lazy loading, 24x7wpsupport is here to help. We can check your current setup, fix image loading issues, remove plugin conflicts, and improve your website speed safely. Whether you want to enable lazy loading, disable it for important images, or solve layout and performance problems, our team can handle it for you. Contact 24x7wpsupport today and get expert WordPress support for a faster and smoother website.

Brian is a WordPress support specialist and content contributor at 24×7 WP Support. He writes practical, easy-to-follow guides on WordPress troubleshooting, WooCommerce issues, plugin and theme errors, website security, migrations, performance optimization, and integrations. With a focus on solving real website problems, Brian helps business owners, bloggers, and online store managers keep their WordPress sites running smoothly.
