
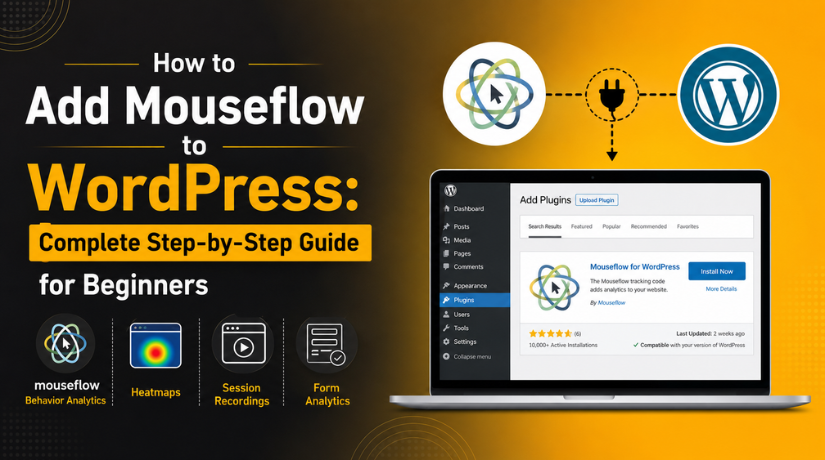
How to Add Mouseflow to WordPress: Complete Step-by-Step Guide for Beginners
Introduction
Many WordPress website owners check traffic numbers every week. They know how many people visit their website. But they often miss one important detail. They do not know how visitors actually use each page. This is where Mouseflow WordPress tracking becomes useful. It helps website owners see real user actions clearly.
Normal analytics tools show visits, bounce rate, and traffic sources. These numbers are helpful, but they do not show everything. They cannot show where users click, scroll, pause, or leave. Mouseflow analytics helps fill this important gap. It gives visual reports about visitor behavior on your website.
When you Add Mouseflow to WordPress, you can understand user actions better. You can see which sections get attention. You can also find ignored buttons, weak forms, and confusing layouts. This makes website improvement easier for beginners and business owners.
For beginners, Mouseflow integration WordPress setup is not very hard. You can use the Mouseflow plugin WordPress option for simple installation. This method does not need advanced coding knowledge. It helps users start tracking website behavior with less effort.
This guide explains Mouseflow in a simple way. You will learn what Mouseflow is and how it helps. You will also understand why it is useful for WordPress websites. Before starting the setup, it is important to understand its value.
What Is Mouseflow and How Does It Help WordPress Websites?
Mouseflow is a website behavior analytics tool. It helps you understand how people use your website. It records visitor actions like clicks, scrolls, movements, and page visits. These insights help you improve weak areas on your site.
For WordPress users, Mouseflow works like a visual tracking system. It shows what visitors do after opening your pages. You can watch session recordings and study heatmap reports. This makes WordPress user behavior tracking easier and more useful.
A normal analytics report may show that users leave quickly. But it may not explain the real reason. Mouseflow can show if users ignore the main button. It can also show if users stop before reading important content. These details help you fix problems faster.
A WordPress heatmap tool like Mouseflow helps show user attention. Heatmaps use visual signals to show clicks, scrolls, and activity. This helps you understand which page sections perform well. It also shows which parts need better placement or design.
Mouseflow is helpful for improving user experience on WordPress websites. It can show if visitors struggle with menus or forms. It can also help find confusing content sections. This makes website updates more focused and effective.
What Is Mouseflow Used For on a WordPress Website?
Mouseflow is used to understand real visitor behavior on your website. It helps you see what users do after landing on a page. Many website owners only check page views and traffic sources. But those numbers do not explain visitor actions clearly. Mouseflow analytics gives deeper details about clicks, scrolls, forms, and movement. This helps you improve pages with real behavior data. When you use Mouseflow WordPress tracking, you can find problems faster. You can see where users stop, leave, or face confusion. This makes website updates more useful and result-focused.
Understanding Real Visitor Behavior On WordPress Website
Mouseflow helps you understand how visitors move through your website. You can see which pages they open first. You can also see where they click, pause, scroll, or exit. This makes visitor behavior easy to understand for beginners. A normal analytics report may show that users left the page. But Mouseflow can show what happened before they left.
For example, visitors may stop before reaching your contact form. They may click a non-clickable image or confused page section. They may ignore your main call-to-action button completely. These small actions can affect your leads and sales. With Mouseflow analytics, you can find these weak points clearly. Then you can fix the layout, content, or button placement.
Improving Landing Pages With Mouseflow Analytics
Landing pages need clear structure and strong user flow. Visitors should quickly understand your offer and next step. If your landing page is confusing, users may leave fast. Mouseflow can help you find what stops visitors from taking action. It shows whether users scroll to important sections or leave early.
A WordPress heatmap tool can show where users click most. It can also show which sections get less attention. This helps you decide where to place buttons, offers, forms, and trust signals. If users do not reach your pricing or service section, you can move it higher. If users ignore a button, you can improve its text or design.
Fixing Contact Form Issues and Lead Generation Problems
Contact forms are very important for service websites. But many forms lose leads because they feel difficult. Visitors may stop filling the form because it has too many fields. They may also leave if the form is slow or confusing. Mouseflow can help you find these form-related problems clearly.
Form analytics can show where users stop during form submission. It can also show which fields create more friction. For example, users may leave when asked for unnecessary details. They may also skip fields that are unclear or poorly labeled. These insights help you make forms shorter and easier.
Improving WooCommerce Product and Checkout Pages
Mouseflow is also useful for WooCommerce websites. Online stores need a smooth shopping and checkout experience. If users face confusion, they may leave without buying. Mouseflow helps store owners review product, cart, and checkout behavior. This can help reduce drop-offs and improve conversions.
You can check how users interact with product pages. They may click images, size options, reviews, or add-to-cart buttons. If users ignore important product details, you can improve placement. If users leave from cart, you can review shipping, coupon, or price confusion. If checkout has issues, form analytics can help find weak fields.
Finding Website Design Problems Using a WordPress Heatmap Tool
Website design should guide users toward important actions. But sometimes the design looks good and still performs poorly. Users may not understand where to click or what to read. A WordPress heatmap tool helps find these design problems quickly. It shows the areas that receive the most user attention.
Heatmaps can show if users click important buttons or not. They can also show if users focus on the wrong areas. If many users click a non-clickable element, that section may confuse them. If users do not scroll enough, your page content may need improvement. These insights help improve layout, spacing, headings, and calls to action.
Precautions Before Adding Mouseflow to WordPress
Before you add Mouseflow to WordPress, you should follow some basic precautions. These steps help you avoid setup errors and tracking problems. They also protect your website from plugin conflicts and privacy mistakes. Beginners should not install any tracking tool without checking these points first.
Mouseflow is easy to use, but correct setup still matters. A wrong setup can create duplicate data or missing recordings. It can also affect page scripts if installed incorrectly. These precautions will help you complete the setup safely. They also make Mouseflow plugin WordPress installation smoother for beginners.
Take a Full Website Backup Before Installing Mouseflow
Always take a website backup before adding a new plugin. A backup helps protect your website from unexpected issues. Most setups work smoothly, but problems can still happen. A plugin conflict or script error may affect your website layout. With a backup, you can restore your website quickly.
You should back up files and the database together. Many hosting panels offer backup options. WordPress backup plugins can also help with this process. This step is simple but very important. It gives you safety before starting Mouseflow integration WordPress setup.
Check Plugin Compatibility Before Installing Mouseflow
Before installing the Mouseflow plugin, check your website setup. Make sure your WordPress version, theme, and plugins are updated. Outdated tools can create conflicts with tracking scripts. You should also check if your caching or security plugin blocks scripts.
The Mouseflow plugin WordPress method is beginner-friendly. But every WordPress site has a different setup. Some websites use optimization plugins that combine or delay JavaScript. These settings may stop Mouseflow from tracking correctly. So, review your plugin setup before installation.
If your website already has many tracking tools, check them carefully. Too many scripts can make tracking messy and confusing. Use only the tools that are truly needed.
Avoid Adding the Mouseflow Tracking Code Twice
Duplicate tracking is a common beginner mistake. It happens when the code is added through multiple methods. For example, you may add code through a plugin and theme file. You may also add it through Google Tag Manager and a script plugin. This can create wrong tracking data inside Mouseflow.
Before setup, decide one clear installation method. If you use the plugin, avoid adding the code manually. If you use Google Tag Manager, do not use another script method. One tracking method is enough for most WordPress websites.
Duplicate code can affect session recordings and heatmap reports. It may also make your data harder to understand. Always check your website source or plugin settings if unsure.
Review Privacy Policy and Cookie Consent Settings
Mouseflow tracks visitor actions on your website. So, privacy settings should be handled carefully. Your privacy policy should explain that behavior tracking tools are used. It should also mention cookies, analytics, and visitor interaction tracking.
Some regions require user consent before tracking behavior data. If your website gets visitors from those regions, review consent rules. You may need a cookie banner or consent management tool. This helps your website follow privacy expectations more safely.
Privacy is important for trust and compliance. Do not ignore this step before adding tracking tools. A clear privacy policy also helps visitors understand your tracking practices.


Mask Sensitive Information Before Recording Sessions
You should avoid recording sensitive visitor information. This includes passwords, payment details, phone numbers, email addresses, and personal form details. Mouseflow settings should be checked for masking options. Sensitive fields should remain hidden in recordings and reports.
This step is very important for contact forms and checkout pages. WooCommerce websites should be extra careful with checkout fields. Recording private customer details can create trust and privacy problems. Always review form fields before enabling full tracking.
Good tracking should improve your website without exposing user information. Keep useful behavior data, but protect personal data carefully.
Clear Website Cache After Adding Mouseflow
Caching can delay new tracking scripts from loading. After adding Mouseflow, clear your website cache completely. You should clear plugin cache, hosting cache, and CDN cache if used. This helps the new script appear on the live website.
Many WordPress sites use speed optimization plugins. These tools may delay, combine, or minify JavaScript files. If tracking does not work, cache may be the reason. Clear cache first before assuming the setup is wrong.
How to Add Mouseflow to WordPress Easily (Step By Step Guide)
The easiest way to Add Mouseflow to WordPress is by using a plugin. This method is simple for beginners. You do not need coding skills for this setup. The Mouseflow plugin WordPress method helps you connect Mouseflow with your website. After setup, Mouseflow can track clicks, scrolls, and visitor actions. You can then use Mouseflow analytics to understand user behavior. This helps you improve your website pages with real data.
Step 1: Create or Log In to Your Mouseflow Account
- First, go to the official Mouseflow website.
- Create a new account if you are a new user.
- Log in directly if you already have an account.
- Your Mouseflow account will store your website tracking data.
- It will show heatmaps, recordings, funnels, and form reports.
- This dashboard will help you review Mouseflow WordPress data later.
Step 2: Add Your Website in Mouseflow
- After login, open your Mouseflow dashboard.
- Add your WordPress website inside Mouseflow.
- Enter your website URL carefully.
- Make sure the domain name is correct.
- Use the same URL as your live website.
- This helps Mouseflow track the correct website.
- After adding your site, Mouseflow will create a tracking setup.
- This setup will give you the Mouseflow tracking code.
Step 3: Copy the Mouseflow Tracking Code
- Now copy the Mouseflow tracking code from your dashboard.
- This code connects Mouseflow with your WordPress website.
- Copy the full code without changing anything.
- Do not remove or edit any code part.
- If the code is incomplete, tracking may not work.
- Keep this code ready for the next WordPress step.
Step 4: Open Your WordPress Dashboard
- Now log in to your WordPress dashboard.
- You need admin access to install the plugin.
- Open your WordPress login page.
- Enter your username and password.
- After login, you will see the dashboard.
- Make sure your website is working properly.
- If you do not have admin access, contact the site owner.
Step 5: Install the Mouseflow WordPress Plugin
- Go to your WordPress dashboard menu.
- Click Plugins from the left-side menu.
- Click Add New to open the plugin directory.
- Type Mouseflow in the plugin search box.
- Find the official Mouseflow plugin.
- Click Install Now to install the plugin.
- After installation, click Activate.
- This will enable the Mouseflow plugin WordPress setup.
Step 6: Paste the Tracking Code in Plugin Settings
- After activation, open the Mouseflow plugin settings.
- Find the field for the tracking code.
- Paste your copied Mouseflow code into this field.
- Check the code once before saving it.
- Make sure the full code is added correctly.
- This step completes the main Mouseflow integration WordPress connection.
Step 7: Save the Plugin Settings
- After pasting the code, click the save button.
- This step is very important.
- If you do not save, tracking will not start.
- Wait for the success message after saving.
- This means WordPress has saved your Mouseflow code.
- Now your website is ready for tracking.
Step 8: Confirm Tracking in Mouseflow
- Go back to your Mouseflow dashboard.
- Check whether Mouseflow has detected your website.
- Sometimes it may take a little time.
- If tracking is not active, do not worry.
- Cache or script delay may cause this issue.
- Clear your website cache and check again.
- Once active, Mouseflow analytics will start collecting visitor data.
Step 9: Clear Your WordPress Website Cache
- After setup, clear your website cache.
- Cache may show an old website version.
- This can stop the tracking code from loading.
- Clear cache from your WordPress cache plugin first.
- Clear hosting cache if your host provides it.
- Clear CDN cache if your website uses a CDN.
- This helps Mouseflow load properly on your website.
Step 10: Test Mouseflow Tracking on Your Website
- Open your website in an incognito browser window.
- Visit a few important website pages.
- Scroll through the pages like a normal visitor.
- Click buttons, menus, and internal links.
- Submit a safe test form if needed.
- Do not enter private details during testing.
- Go back to Mouseflow and check for activity.
- It may take some time to show recordings.
- This test confirms WordPress user behavior tracking is working.
Step 11: Check Your First Mouseflow Reports
- After tracking starts, wait for visitor activity.
- Mouseflow reports need some traffic to show useful data.
- Start by checking session recordings first.
- Recordings show how visitors move on your website.
- Then check heatmaps for clicks and scrolls.
- Heatmaps make Mouseflow a helpful WordPress heatmap tool.
- Do not make big changes after one recording.
- Review many recordings before changing your design.
- Look for repeated actions and common user problems.
Step 12: Start With Important Pages First
- You do not need to check every page first.
- Start with your most important website pages.
- These pages usually bring leads, sales, or inquiries.
- Check your homepage and main service pages first.
- Also check your contact page carefully.
- If you have WooCommerce, check product pages too.
- Also review cart and checkout pages.
- This helps you use Mouseflow analytics in a better way.
Step 13: Keep Your Mouseflow Setup Simple
- Keep your Mouseflow setup clean after installation.
- Do not add the Mouseflow code again elsewhere.
- Avoid adding code through plugins and themes together.
- Do not use two tracking methods at the same time.
- Duplicate code can create wrong tracking data.
- Use only one tracking method for your website.
- This keeps Mouseflow WordPress reports clean and easy.
Common Mouseflow Installation Problems and Easy Fixes
Adding Mouseflow WordPress tracking is usually simple for beginners. Still, some setup problems can happen after installation. These problems are common and easy to fix. Most issues happen because of cache, wrong code, plugin conflict, or duplicate setup. If you face any issue after you Add Mouseflow to WordPress, do not panic. Check each problem step by step. This will help you fix tracking faster and keep your data clean. A proper setup helps Mouseflow analytics collect better visitor behavior data.
Mouseflow Tracking Is Not Active
Sometimes Mouseflow tracking does not become active after setup. This is one of the most common beginner issues. It may happen when the tracking code is not added correctly. It may also happen when the code is not saved properly. In some cases, website cache may show an old page version. So, Mouseflow cannot detect the new tracking code. This can also happen when the website URL does not match inside Mouseflow. Check your domain carefully before making other changes.
First, check the Mouseflow tracking code inside WordPress. Make sure the full code is added correctly. Then save the plugin settings again. After that, clear your WordPress cache, hosting cache, and CDN cache. Open your website in an incognito browser. Visit a few pages like a normal user. Then go back to Mouseflow and check tracking status again. This simple process usually fixes most Mouseflow integration WordPress issues.
No Session Recordings Are Showing
Sometimes tracking becomes active, but recordings do not appear quickly. This does not always mean something is wrong. Mouseflow needs visitor activity before showing recordings. If your website has low traffic, data may take time. Recordings may also not appear if tracking was added recently. An ad blocker can also block tracking during testing. In some cases, tracking may be paused inside the Mouseflow dashboard. So, check all settings before changing your WordPress setup.
Visit your website from another browser or device. Use incognito mode for better testing. Scroll pages, click buttons, and open internal links. Then check the Mouseflow dashboard after some time. Also confirm that tracking is not paused in Mouseflow. If your website has low traffic, wait for real visitors. Once visitors start browsing, Mouseflow analytics should begin showing useful session data.
Heatmaps Are Not Showing Enough Data
Heatmaps need enough visits before showing strong results. If your page has low traffic, heatmap data may look limited. This is normal for new websites or less visited pages. A WordPress heatmap tool works better when more users visit the page. If only a few users visit, the heatmap may not show clear patterns. You may not see enough clicks, scrolls, or movement data at first. So, do not judge a page too early.
Start with high-traffic pages first. Check your homepage, popular blog posts, service pages, and landing pages. These pages usually collect data faster. Wait until enough visitors use the page. Then review clicks, scrolls, and attention areas. Look for repeated patterns instead of one-time actions. This will help you make better design and content changes.
Mouseflow Code Added Twice
Duplicate tracking code can create wrong reports. This happens when Mouseflow is added in more than one place. For example, you may add code through the Mouseflow plugin WordPress setup. Then you may also add it through a header plugin. Some users also add it through Google Tag Manager. This creates duplicate tracking and confusing data. It may affect recordings, heatmaps, and visitor reports. Clean tracking is very important for accurate insights.
Use only one tracking method for Mouseflow. If you use the plugin, remove manual code from theme files. If you use Google Tag Manager, avoid plugin-based tracking. Check your header and footer script plugins too. Make sure Mouseflow code is not added there again. Keeping one setup method makes WordPress user behavior tracking more accurate and easier to understand.
Tracking Works on Desktop but Not Mobile
Sometimes Mouseflow works on desktop but not mobile. This issue can happen because mobile cache works differently. Some WordPress speed plugins create separate mobile cache files. These files may not include the latest tracking code. Mobile optimization settings can also delay or block scripts. A cookie consent banner can also stop tracking on mobile. This can affect your Mouseflow WordPress reports and create missing data.
Clear mobile cache from your caching plugin. Also clear hosting and CDN cache if available. Then test your website on a real mobile device. Accept cookie consent if your website uses a banner. Visit important pages and click buttons. After testing, check Mouseflow for mobile sessions. If tracking still fails, review script delay settings in your optimization plugin.
Conclusion
Mouseflow is a helpful tool for understanding website visitors. It shows how users click, scroll, move, and interact. This makes it easier to improve your WordPress website. When you add Mouseflow to WordPress, you can find weak areas faster. You can review ignored buttons, poor layouts, form issues, and checkout problems. These insights help you improve user experience with real behavior data. Mouseflow also works as a useful WordPress heatmap tool for beginners.
The plugin method is the easiest setup option for most users. It does not require advanced coding knowledge. You only need to create an account, add your website, copy the code, and save it in WordPress. After that, you should clear cache and test tracking. If problems appear, most fixes are simple. Check the tracking code, cache, consent settings, and plugin conflicts first. A clean Mouseflow integration WordPress setup gives better and more accurate reports.
Adding Mouseflow is simple when everything works correctly. But some WordPress websites need expert setup and testing. If you need help with Mouseflow WordPress setup, tracking issues, plugin conflicts, speed problems, or user behavior review, contact 24x7wpsupport. Our team can help you add tracking tools correctly and improve your website performance. We can also review your website issues and suggest better user experience improvements.






Brian is a WordPress support specialist and content contributor at 24×7 WP Support. He writes practical, easy-to-follow guides on WordPress troubleshooting, WooCommerce issues, plugin and theme errors, website security, migrations, performance optimization, and integrations. With a focus on solving real website problems, Brian helps business owners, bloggers, and online store managers keep their WordPress sites running smoothly.
