How To Add Facebook Widget To WordPress
Last updated on September 29th, 2021 at 10:59 am
Advertising or promoting products is the key to an organization’s success. Until a few years ago, marketers have been using traditional methods to channelize products. With the onset of social media to connect and communicate with people across the globe, marketers saw an opportunity to increase their brand awareness and track more users, without spending much.
When we talk about social media websites, Facebook is a name that rolls on the top. Evidently, there are millions of users actively using Facebook and using this platform to distribute a brand product is by far the most trending idea. In case, you too have a Facebook page and plan to integrate it within your WordPress website, you are about to hit the rod.
In case, you still haven’t given a thought about adding a Facebook widget in WordPress, it’s high time that you do so.
Wondering why?
Why Do You Need To Add Facebook Widget in WordPress?
To put it this way, Facebook rules the mind of users. What they see is what they buy and there isn’t a better way to communicate with a network of people in a single click, other than Facebook.
Every other person has a Facebook account and they use it chat with their peers, share ideas and connect on a wider platform. So, using this platform to bundle a network of customers, attract the potential and turn your website into a revenue-driven business.
Further,
- If you want to bridge the gap between your website users and the Facebook network, embedding a widget on the site is the best way out.
- In case, you plan to direct the website users to your Facebook page, integrate a button on the website that would direct them to the page in a single stance.
So, convinced?
Let’s move ahead to the steps required to add a Facebook widget on the WordPress website.
How to Add Facebook Widget in WordPress?
Adding a Facebook widget in WordPress is specifically easy and all you need to do is follow the steps given below:
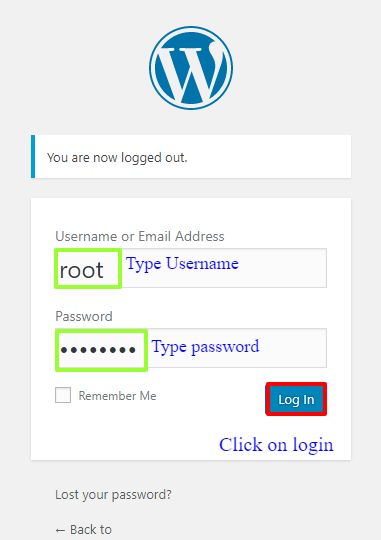
- To start, the first log in to the WordPress dashboard by entering the specific credentials.
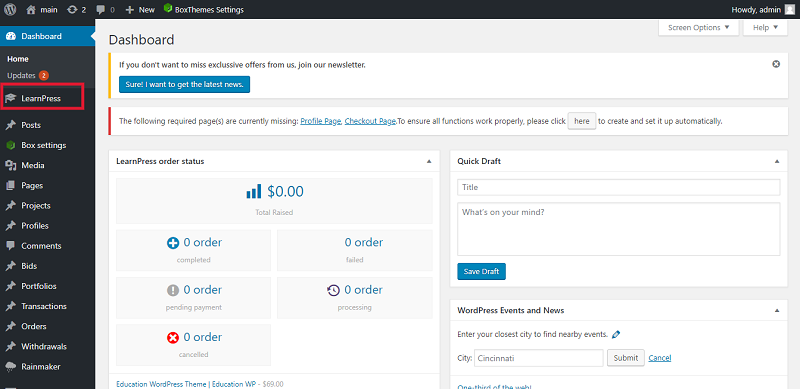
- Navigate to the left and click on plugins and then select add new.
- Under the search bar, enter the keyword: ‘Social LikeBox & Feed’ and then click on the search icon. Or, you can just download the needed plugin using this link.
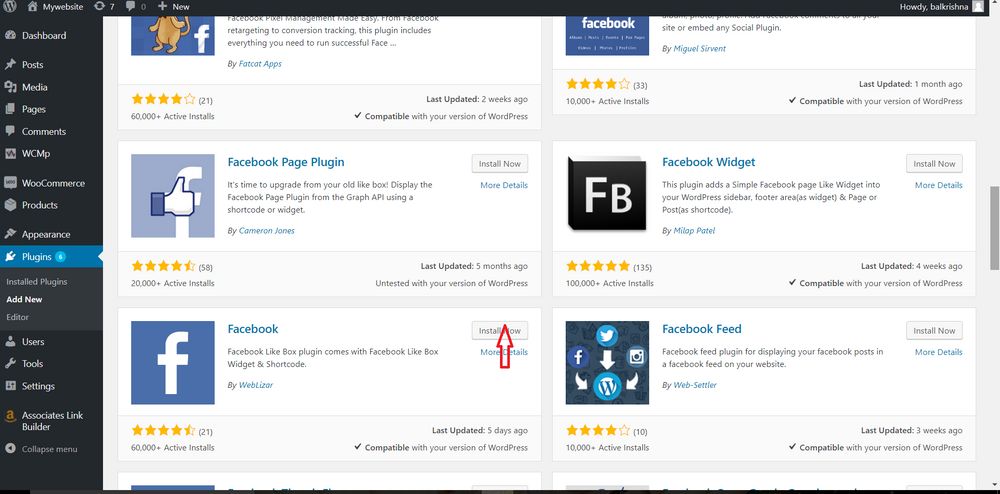
- Click on install to install the plugin and then activate it.
- After you have activated the plugin, visit the dashboard and here look for, Facebook by Weblizar for the setting plugin.
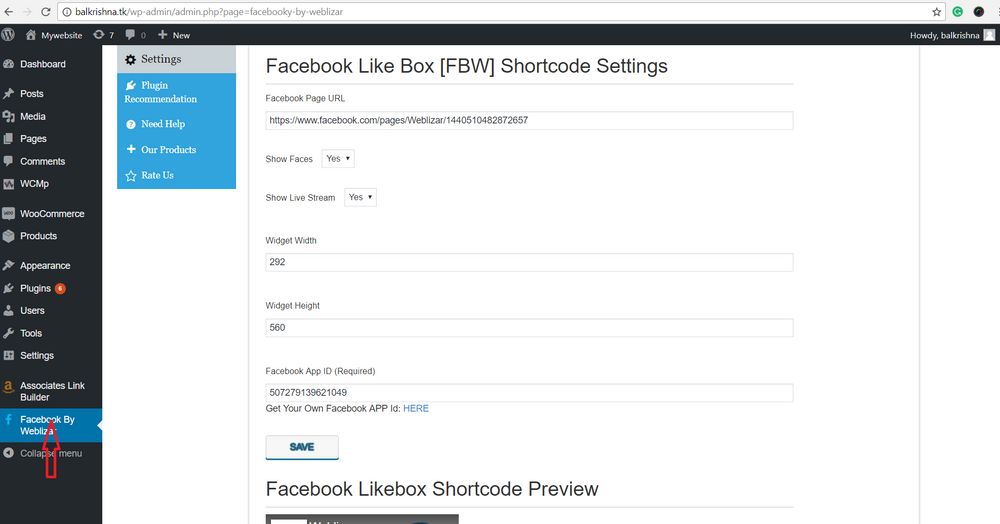
- Move to appearances and then click on the widget.
- A new page opens up. Here, under the widget tab, click on the Facebook lightbox.
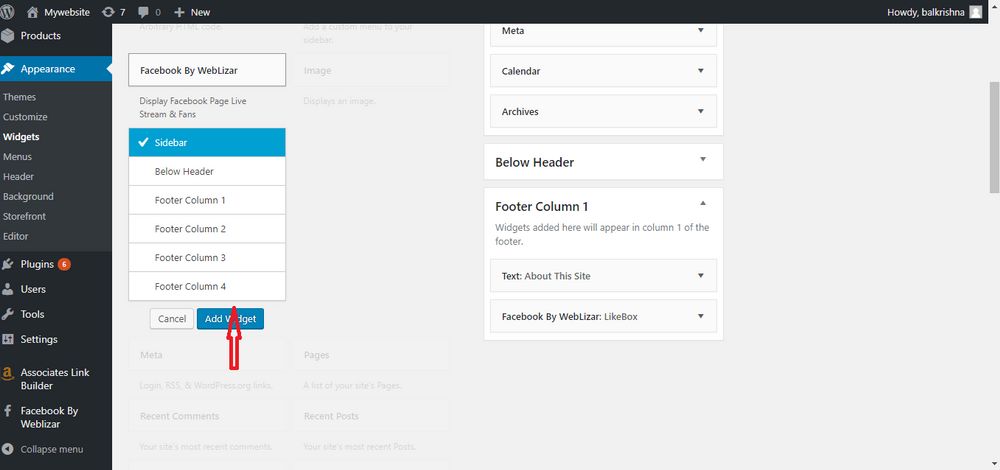
- Once this opens, click on it and then drag it on to the sidebar where you wish to place the Facebook widget.
- Next, a page opens where you need to make changes for the widget and also add the custom Facebook URL. This is where you want to direct your users. It could be the Facebook page of your business or a personal profile of the company. Either be the case, make sure that you have the page URL copied. In case, you haven’t, open a new browser window and then click open the Facebook page. Copy the URL of the page and then come back to the WordPress terminal.
- To the right of the screen, there would be a tab that says, Facebook Page URL. Paste the copied code here and then click on save the widget.
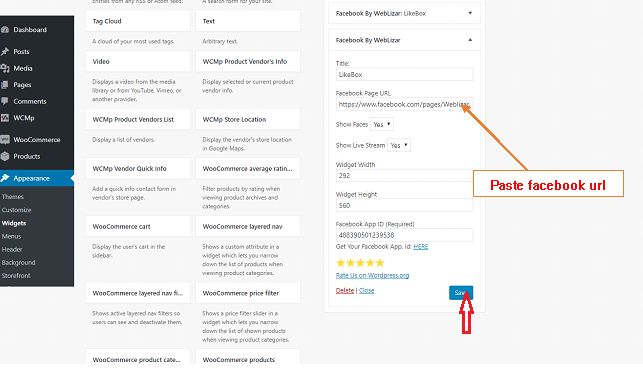
- Once done, refresh the website and you will see a new Facebook widget appearing in the sidebar.

This is how we add a Facebook widget in WordPress. Chat Now

