
How to Indent Text in WordPress: 4 Simple Methods (2026)
Last updated on September 1st, 2026 at 08:07 am
You press Tab in the WordPress editor. Nothing happens. So you add five spaces instead, hit Save, and the spaces vanish the second the page loads. This is one of the most common formatting complaints we hear, and it has nothing to do with a broken theme.
WordPress does not treat indents the way a word processor does. It stores your content as HTML, and HTML ignores plain spaces and tabs by design. To indent text you have to tell the browser to add space with a style rule. This guide walks you through four reliable ways to do that in 2026, from a two-click fix to a reusable class you can apply across your whole site.
Why WordPress Ignores Tabs and Extra Spaces
HTML collapses whitespace. That single rule explains almost every missing indent. When a browser reads your page, it turns any run of spaces, tabs or line breaks into one single space. So five spaces and one space look identical on screen. WordPress saves posts as HTML, so it inherits that behaviour.
The Tab key also has a different job inside the editor. It moves focus to the next block or field instead of inserting a character. That is an accessibility feature, not a bug. Keyboard-only users and screen reader users depend on Tab to move around the screen. WordPress will not give that up to add a few pixels of space.
So real indenting has to come from CSS. Three properties do nearly all the work. padding-left pushes the whole block inward from its edge. margin-left moves the block itself to the right. text-indent shifts only the first line, the way a printed novel does. Every method below is just a different way of applying one of those three.
Knowing this saves real time. Once you stop fighting the Tab key, the actual fix takes seconds.
Method 1: Use the Block Editor’s Built-In Indent Controls
The block editor does give you indent buttons, but only in certain blocks. Lists have them. Plain paragraphs do not. Knowing which block you are in tells you straight away whether a button will appear.
Indenting list items
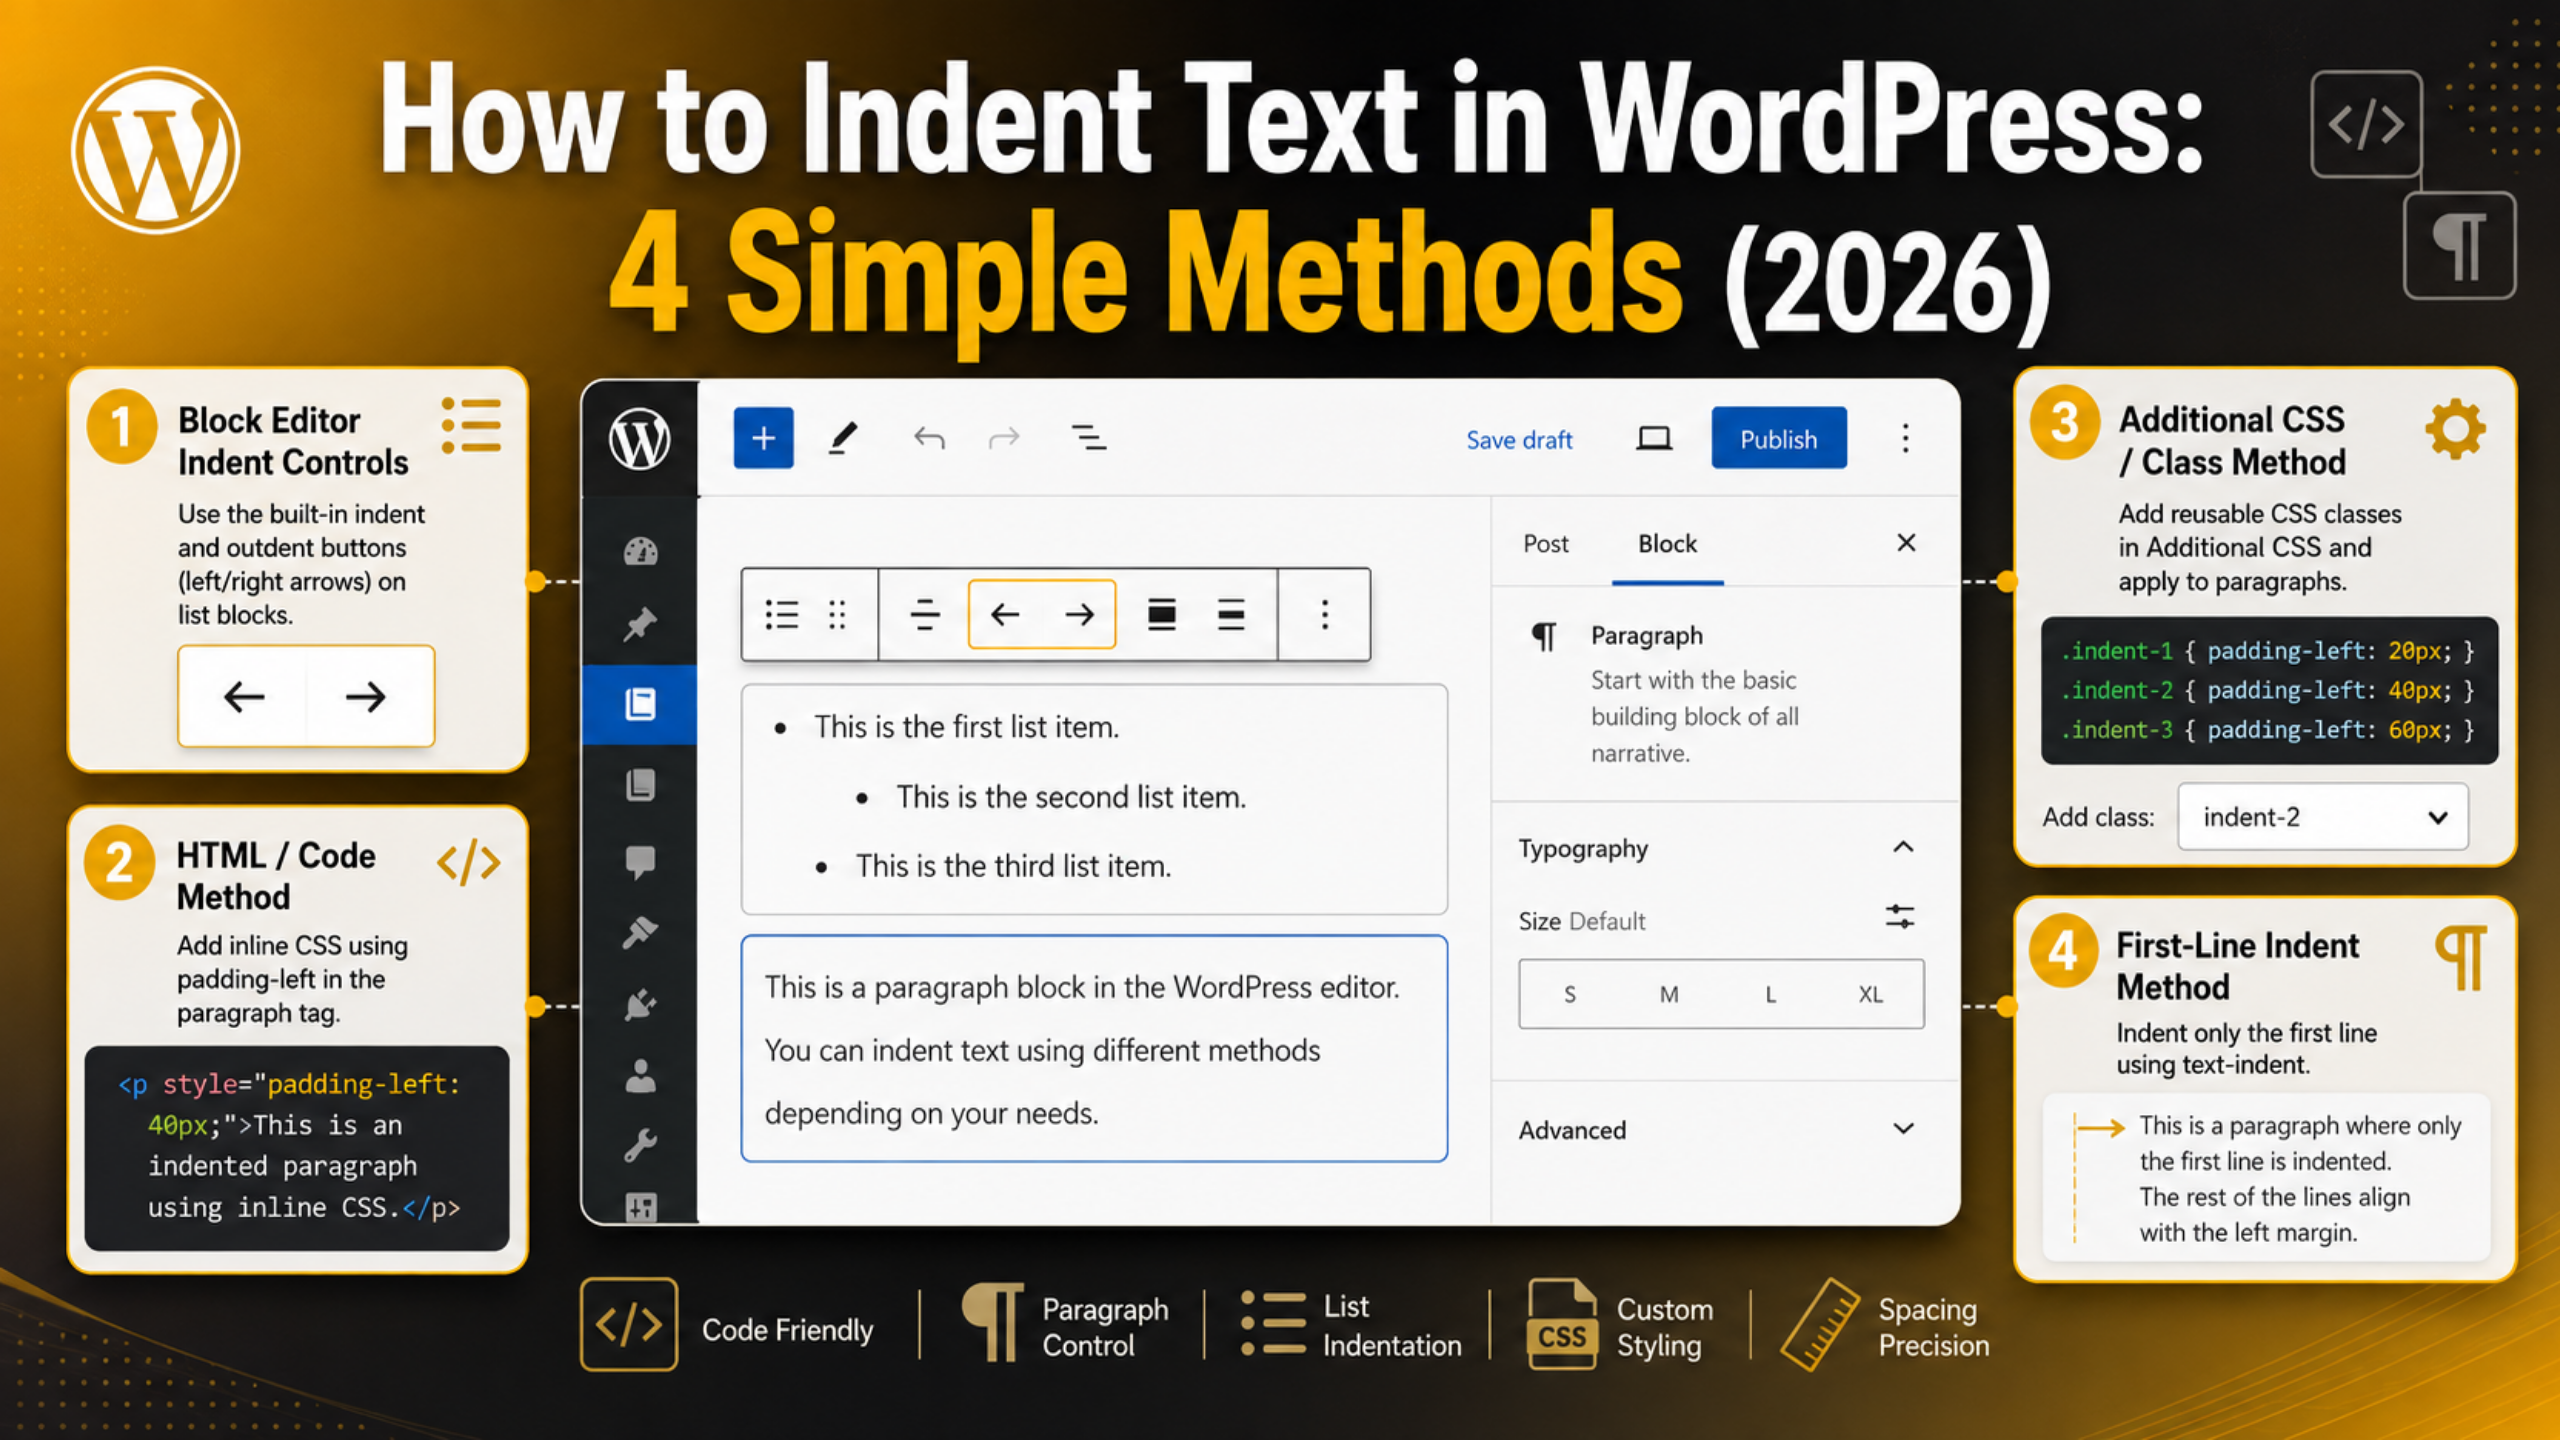
Click inside a bulleted or numbered list. Look at the toolbar above the block. You will see two arrow icons, one pointing left and one pointing right. The right arrow is Indent. The left arrow is Outdent. Click Indent and the current item slides in one level and becomes a child of the item above it. You can also press Tab while your cursor sits at the start of a list item. Inside a list, Tab does work, because WordPress maps it to the indent action there. Shift + Tab pulls the item back out one level.
Indenting a whole paragraph
Paragraph blocks have no indent button, so you need a workaround. If the meaning fits, turn the paragraph into a Quote block. Select the paragraph, click the three-dot menu in the block toolbar, choose Transform to, and pick Quote. Almost every theme indents quotes by default, so you get the spacing for free. If you want the indent without the quote styling, such as a vertical bar or italic text, skip to Method 2 or Method 3 instead.
Method 2: Add an Inline Indent in the HTML View
This method is fast, precise, and works on any single block. You edit that block’s raw HTML and add one style rule. Once you have done it a single time, it takes about ten seconds.
Start by clicking the paragraph you want to indent. Open the three-dot options menu on the block toolbar. Choose Edit as HTML. The block turns into plain code, and you will see something like this:
<p>Your paragraph text goes here.</p>
Now add a style attribute to the opening tag:
<p style="padding-left: 40px;">Your paragraph text goes here.</p>
Open the three-dot menu again and choose Edit visually to go back to the normal view. The indent shows up right away. You can change 40px to any value you want. One indent level is normally 40px, so use 80px for a second level and 120px for a third.
One warning is worth repeating. If you later transform the block into a different type, the editor may drop your inline style without telling you. Check the live page after any large edit. For content you plan to reuse or revise often, Method 3 is the safer choice.
Method 3: Build a Reusable Indent Class in Additional CSS
This is the method we recommend for any site with more than a handful of indented paragraphs. You write the rule once. After that you apply it with a short class name, and you can change every indent on the site by editing one line.
Go to Appearance → Customize → Additional CSS in your dashboard. If you run a block theme and the Customize link is missing, open yoursite.com/wp-admin/customize.php directly in your browser. Paste in these three rules:
.indent-1 { padding-left: 40px; }
.indent-2 { padding-left: 80px; }
.indent-3 { padding-left: 120px; }
Click Publish. Now open any post. Select the block you want to indent. In the right sidebar, open the Advanced panel and find the field labelled Additional CSS class(es). Type indent-1 into it and click away. Save the post and view the front end. Your paragraph is indented.
The payoff arrives later. If you decide 40px is too wide, you change one rule in Additional CSS and every indented paragraph on the site updates at once. Doing the same with inline styles would mean opening every post by hand. If you would rather work directly in your theme files, our guide to editing your WordPress source code shows how to do that without breaking the site.
Method 4: Indent Only the First Line With text-indent
Sometimes you do not want the whole block pushed across. You want the classic book look, where only the first line of each paragraph steps in. That calls for a different CSS property, and it reads very differently on the page.
Add this single rule to Additional CSS:


.entry-content p { text-indent: 30px; }
That rule targets every paragraph inside your post content. If nothing changes, your theme probably wraps content in a different class. Right-click a paragraph on the live page, choose Inspect, and read the container name. Common alternatives are .post-content, .wp-block-post-content and .content-area. Swap the correct one into the rule and save again.
Two small tweaks make this look properly typeset. First, remove the gap between paragraphs, because print typography uses either spacing or first-line indents, never both. Add margin-bottom: 0; to the same rule. Second, skip the indent on the first paragraph after a heading, which is what books do:
.entry-content h2 + p { text-indent: 0; }
Save this style for essays, stories and long opinion pieces. Avoid it on how-to posts, where readers scan rather than read line by line. It pairs well with a considered typeface, and our walkthrough on adding custom fonts in WordPress covers that side of it.
How to Indent Text in the Classic Editor
Plenty of sites still run the Classic Editor, and it handles indents differently. It ships with a real indent button. If you are already using it, this is the quickest route of the lot, and no code is involved.
Open a post and look at the Visual tab toolbar. On the second row you will find two icons showing lines with small arrows: Decrease indent and Increase indent. If that second row is hidden, click the Toolbar Toggle button at the far right of the first row, or press Alt + Shift + Z.
Put your cursor anywhere inside the paragraph and click Increase indent. The editor adds padding-left: 40px; to that paragraph. Click again for a deeper indent. Decrease indent strips 40px back off each time you press it.
You can confirm exactly what happened by switching to the Text tab. The inline style is sitting right there on the paragraph tag, identical to what Method 2 produces by hand. The Classic Editor simply does the typing for you. If those toolbar buttons are missing or greyed out, our fix for the WordPress visual editor not working will get them back.
Fixing Indents That Break or Disappear
Indents fail in a few predictable ways. Each one has a clear cause and a quick fix. Work through these three before you assume something larger is wrong with your site.
The indent vanishes after you save
This nearly always means a permission rule stripped your inline style. WordPress removes style attributes from posts saved by users who lack the unfiltered_html capability, which includes Editors and Authors on a multisite network. A caching layer serving an older copy of the page can look the same. Log in as an Administrator and try the edit again. If the style still disappears, stop using inline styles and move to the class approach in Method 3, which is never filtered out.
The indent looks wrong on phones
A 40px indent on a 360px-wide screen swallows more than a tenth of every line. Text ends up cramped and the reading experience suffers. Shrink the indent on small screens with a media query:
@media (max-width: 782px) { .indent-1 { padding-left: 16px; } }
782px is the breakpoint WordPress itself uses to switch to its mobile layout, so your rule lines up neatly with core styles rather than fighting them.
The editor and the live page disagree
The block editor loads its own stylesheet, so what you see while writing is not always what visitors get. Rules you add under Additional CSS apply to the front end only. For them to show inside the editor as well, your theme has to enqueue an editor stylesheet, and many do not. The reliable check is to open the post preview in a new tab and judge spacing from there. Never trust the editor canvas alone.
Which Indent Method Should You Pick?
The right choice comes down to how often you will do this, and who else edits the site. Think about volume first, then about permissions, then pick.
For a one-off indent in a single post, use Method 2. Editing the HTML directly is faster than setting anything up, and there is nothing left behind to maintain.
For a site where indents are part of your normal formatting, use Method 3. The reusable class costs five minutes up front and saves hours later. It also survives block transforms and user role restrictions, which inline styles do not.
For long-form writing that should read like a printed page, use Method 4. First-line indents are the correct typographic choice there, and they look far more polished than block indents ever will.
For nested lists, always use the built-in buttons from Method 1. They produce proper nested list HTML, which search engines and screen readers actually understand. Faking that nesting with padding throws the meaning away. If other editor quirks are slowing you down, our roundup of common block editor problems and their fixes covers the usual suspects.
Indenting is a small thing, but it is a signal. When spacing, fonts and headings all behave, your content reads as careful and trustworthy. When they fight you, every post takes longer than it should. The cause is usually a theme rule or a plugin conflict sitting quietly in the background where you would never think to look.
If your formatting keeps breaking, or you would simply rather someone else handled the CSS, the team at 24×7 WP Support can take it off your plate. We handle WordPress fixes, theme tweaks, speed work and round-the-clock monitoring so you can get back to writing. Get in touch any time, because we are online 24 hours a day, every day of the year.





Brian is a WordPress support specialist and content contributor at 24×7 WP Support. He writes practical, easy-to-follow guides on WordPress troubleshooting, WooCommerce issues, plugin and theme errors, website security, migrations, performance optimization, and integrations. With a focus on solving real website problems, Brian helps business owners, bloggers, and online store managers keep their WordPress sites running smoothly.
