
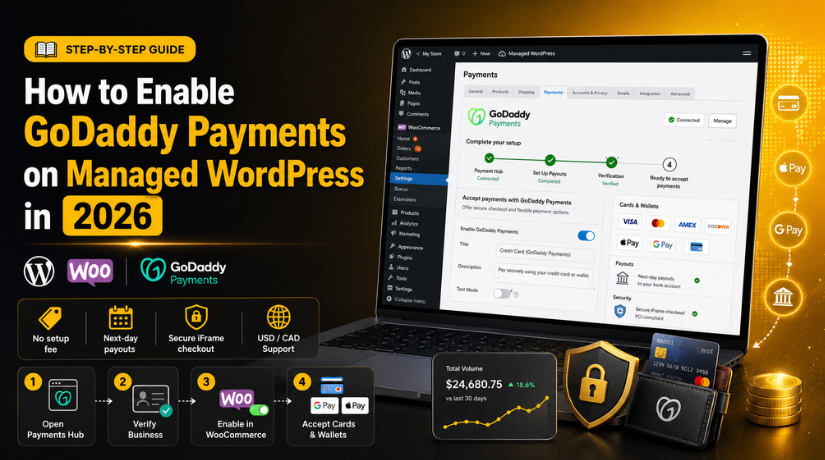
How to Enable GoDaddy Payments on Managed WordPress in 2026
Introduction
If you’re running an online store on GoDaddy’s Managed WordPress hosting, you already have one of the most convenient payment solutions available sitting right inside your dashboard — GoDaddy Payments. It’s built to work seamlessly with WooCommerce, requires no third-party accounts to juggle, and gets you accepting credit cards in a matter of minutes. The challenge most store owners face isn’t finding a payment gateway; it’s knowing exactly how to activate and configure the one already available to them.
This guide walks you through everything you need to know about enabling GoDaddy Payments on your Managed WordPress site in 2026 — from eligibility requirements to step-by-step activation, fees, features, and what to do when something doesn’t go as planned.
What Is GoDaddy Payments and Why Does It Matter?
GoDaddy Payments is a native payment processing solution built directly into GoDaddy’s ecosystem. Unlike third-party gateways that require you to create a separate merchant account, install an external plugin, and configure API keys, GoDaddy Payments is pre-integrated into Managed WordPress and Managed WooCommerce plans. That means less setup friction, fewer plugins to maintain, and one fewer vendor to deal with.
For store owners who already host with GoDaddy, this is a significant advantage. You manage your domain, hosting, and payments all under one roof. The gateway supports major credit and debit cards, Apple Pay, and Google Pay — covering virtually every customer payment preference. And because GoDaddy Payments uses hosted iFrames for processing, payment data never touches your server, which reduces your PCI compliance burden considerably.
From a business perspective, GoDaddy Payments also makes sense financially. There are no monthly fees, no setup costs, and no long-term contracts. You pay per transaction and nothing more — a clean, predictable cost structure that suits small and mid-sized stores very well.
Who Can Use GoDaddy Payments on Managed WordPress?
Eligibility Requirements
GoDaddy Payments is currently available to businesses operating in the United States and Canada. To use it on your Managed WordPress site, you need an active GoDaddy hosting plan — specifically a Managed WordPress or Managed Hosting for WooCommerce plan. It’s also worth noting that GoDaddy Payments has a list of prohibited business categories, including collection agencies, gambling operations, time-share businesses, dating services, and telemedicine providers. If your business falls into a restricted category, you’ll need to look at alternative payment gateways instead.
For the vast majority of WordPress store owners — retail, digital products, services, subscriptions — GoDaddy Payments is fully available and ready to use.
What You’ll Need Before Starting
Before you begin the setup process, gather the following information. Having it ready will make the verification process smooth and fast:
- Business owner’s full name and contact information
- Last four digits of the business owner’s Social Security Number (SSN)
- Business address and Employer Identification Number (EIN) — for registered businesses
- Bank account details: routing number, account number, and the name on the account
You’ll also want to make sure WooCommerce is installed and active on your Managed WordPress site before proceeding. Most Managed WordPress eCommerce plans come with WooCommerce pre-installed, but it’s worth confirming in your dashboard.
Step-by-Step: How to Enable GoDaddy Payments on Managed WordPress
Step 1: Log Into Your GoDaddy Account and Open Your Site
Start by logging into your GoDaddy account at godaddy.com. From your product page, locate your Managed WordPress plan and click to open the dashboard for the specific site where you want to accept payments. If you manage multiple sites, make sure you’re opening the correct one.
Step 2: Navigate to GoDaddy Payments in WooCommerce
Once inside your site’s WordPress admin dashboard, look at the left-hand menu. Under the WooCommerce section, you’ll see a menu item labeled GoDaddy Payments. Click it. This opens the Payments Hub — GoDaddy’s centralized interface for managing your payment setup, viewing transaction history, and configuring payout settings.
If you don’t see the GoDaddy Payments menu item, it’s possible the plugin isn’t installed or active. In that case, go to Plugins > Add New, search for “GoDaddy Payments for WooCommerce,” install it, and activate it. On most Managed WordPress plans, however, it comes pre-installed.
Step 3: Set Up Payouts and Verify Your Business
Inside the Payments Hub, click Set Up Payouts. This launches the business verification workflow — a one-time process required by financial regulations to confirm your identity and link your bank account for payouts.
You’ll be prompted to enter:
- Business owner contact details and the last four digits of their SSN
- Business profile information including address and EIN (if applicable)
- Bank account routing and account numbers
Follow all the prompts carefully. Once submitted, GoDaddy typically reviews and approves the information quickly. GoDaddy recommends completing this verification before you fulfill your first order so that payouts can begin processing immediately after your first sale.
Step 4: Enable GoDaddy Payments in WooCommerce Settings
After verification is complete, you need to make sure GoDaddy Payments is actually turned on as an active payment method in your WooCommerce store. Navigate to WooCommerce > Settings > Payments. You’ll see a list of available payment methods. Find GoDaddy Payments and toggle the Enabled switch to the on position.
Click Save Changes to confirm. At this point, your checkout page will display GoDaddy Payments as an option and your customers can begin checking out with credit cards, debit cards, Apple Pay, or Google Pay.
Step 5: Configure Payment Method Options (Optional but Recommended)
While you’re in the WooCommerce Payments settings, take a few minutes to configure additional options. You can set the title and description customers see at checkout, enable digital wallet support (Apple Pay / Google Pay), and adjust order status behavior after payment. You can also enable the Debug Mode from this screen if you ever need to troubleshoot a transaction issue — it logs detailed error information that makes diagnosis much faster.
Understanding GoDaddy Payments Fees in 2026
One of the most attractive aspects of GoDaddy Payments is its straightforward fee structure. Here’s what to expect:
- Online transactions: 2.3% + $0.30 per transaction
- In-person card payments (POS): 2.3% + $0 per transaction
- Manually entered cards: 3.3% with no flat fee
- Chargeback fee: $15 per disputed transaction
- Setup fee: $0
- Monthly fee: $0
Standard payouts arrive the next business day at no extra cost. If you need same-day payouts, GoDaddy offers that option for an additional 1.5% fee (minimum $0.50), even on weekends and holidays — a feature that many standalone payment processors don’t offer.


There’s also a Rate Saver program available in some US and Canadian markets. This is a surcharging option that passes transaction fees to customers, effectively bringing your processing cost to 0%. It requires subscribing to a GoDaddy Plus plan, so factor that into your cost analysis if this is something you want to explore.
Key Features Worth Knowing
Payment Methods Supported
GoDaddy Payments supports Visa, Mastercard, American Express, and Discover, as well as digital wallets including Apple Pay and Google Pay. This covers the overwhelming majority of online shoppers in 2026. The gateway also supports tokenization, which is essential for stores offering subscriptions or recurring billing through WooCommerce Subscriptions.
Security and PCI Compliance
Because GoDaddy Payments uses hosted iFrames, your server never sees or stores raw card data. This significantly reduces your PCI DSS compliance scope — a real benefit for small store owners who don’t have dedicated IT or security teams. The transaction data flows directly between the customer’s browser and GoDaddy’s secure payment infrastructure.
The Payments Hub Dashboard
GoDaddy Payments comes with a Payments Hub — a dedicated dashboard where you can view transaction history, issue refunds, track payouts, and monitor your store’s financial activity. For store owners who want all their business data in one place rather than logging into a separate merchant portal, this is a genuine quality-of-life improvement.
Troubleshooting Common GoDaddy Payments Issues
Even with a straightforward setup, things occasionally go wrong. Here are the most common issues and how to resolve them:
GoDaddy Payments not showing on checkout: This is usually caused by the payment method not being toggled on in WooCommerce > Settings > Payments, or a currency mismatch (GoDaddy Payments only supports USD and CAD). Check both settings. You might also find our guide on fixing WooCommerce payment gateways not showing on checkout helpful for diagnosing deeper configuration issues.
Payouts not arriving: If payouts are delayed, verify that your bank account information was entered correctly during setup. You can check and update payout details from the Payments Hub. Note that verification must be fully approved before payouts begin.
Transaction errors: Enable Debug Mode under WooCommerce > Settings > Payments > GoDaddy Payments, then attempt a transaction. The error logs will show specific codes and messages that pinpoint the problem. Common causes include expired API credentials or a mismatch between the store’s SSL certificate and the payment iframe.
Plugin conflicts: If you recently installed a new plugin and GoDaddy Payments stopped working, deactivate your recently added plugins one at a time to identify the conflict. Security plugins and caching plugins are the most common culprits.
How GoDaddy Payments Compares to Other WooCommerce Gateways
GoDaddy Payments isn’t the only option for Managed WordPress stores, and it’s worth understanding where it fits in the wider landscape before committing. For stores already deeply in the GoDaddy ecosystem, it’s the clear choice — the integration is native, the fees are competitive, and there’s no extra account to manage.
Compared to Stripe, GoDaddy Payments wins on simplicity and ecosystem integration but falls short on developer flexibility, multi-currency support, and advanced fraud tools. Stripe’s Radar fraud detection and robust API make it better suited for high-volume or internationally focused stores. For a detailed breakdown of gateway options for different business models, our article on payment gateway integration for B2B and B2C WooCommerce stores covers the full picture.
PayPal and Square are also popular alternatives, each with their own strengths. If you’re torn between options, our comparison of PayPal vs Stripe for WooCommerce can help you evaluate those two head-to-head as well.
For most small to mid-size store owners on GoDaddy Managed WordPress, GoDaddy Payments is simply the most practical starting point — you’re up and running faster, there are fewer moving parts, and the pricing is transparent with no hidden fees.
Best Practices for Running GoDaddy Payments on Managed WordPress
Once you’ve enabled GoDaddy Payments, a few habits will keep your payment setup running smoothly:
Complete the payout verification before your store goes live — not after. Delaying verification means your first sales won’t reach your bank account until the process is done, which can create unnecessary cash flow problems early on. Keep your bank account information current in the Payments Hub; if you switch banks, update the details immediately to avoid interrupted payouts.
Run occasional low-value test transactions to confirm the payment flow works, especially after plugin or theme changes. GoDaddy Payments has no sandbox mode, so a real transaction is the only way to verify the end-to-end checkout experience. Review your chargeback reports monthly too — even one or two per month can signal a UX issue worth fixing early.
Get Your Store Accepting Payments Today
Enabling GoDaddy Payments on your Managed WordPress site is one of the easier tasks in the WooCommerce setup process. With no setup fees, competitive transaction rates, built-in integration, and support for Apple Pay and Google Pay, it covers everything most store owners need. Follow the steps in this guide — navigate to the Payments Hub, complete verification, enable the gateway in WooCommerce — and you can have a fully functional payment system live within an hour.
If you run into any technical issues during setup or need expert help configuring your WooCommerce store for maximum performance, the team at 24×7 WP Support is available around the clock to assist. From payment gateway configuration to plugin troubleshooting and full WooCommerce optimization, we handle the technical heavy lifting so you can focus on growing your business.
Related posts:
How to Contact WordPress Support: Phone, Email & All Options Explained
What Is Elementor in WordPress? Purpose, Features & How to Build With It
WordPress Quizlet Explained: Anchor Text, Permalinks, and Key Terms
How to Indent Text in WordPress: 4 Simple Methods (2026)
Lead your business with WooCommerce Leadpages integration

Brian is a WordPress support specialist and content contributor at 24×7 WP Support. He writes practical, easy-to-follow guides on WordPress troubleshooting, WooCommerce issues, plugin and theme errors, website security, migrations, performance optimization, and integrations. With a focus on solving real website problems, Brian helps business owners, bloggers, and online store managers keep their WordPress sites running smoothly.
