
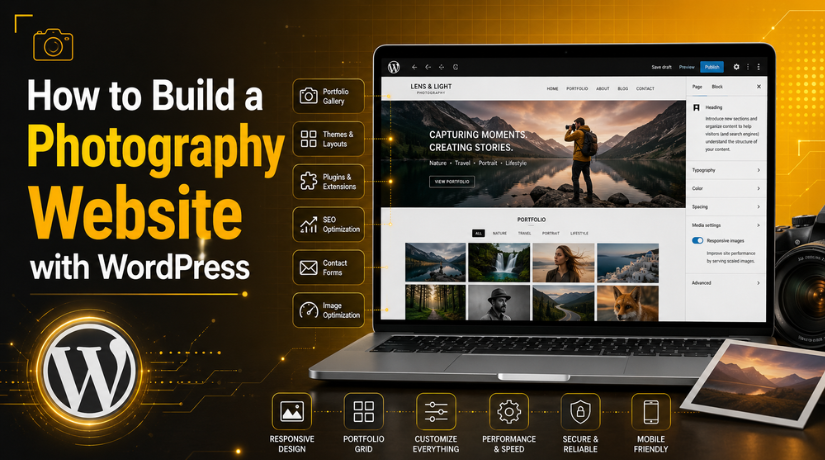
How to Build a Photography Website with WordPress
Introduction
You’ve put in the hours. Your portfolio is solid, your shots are stunning, and you’re ready to share your work with the world — and maybe land some paying clients along the way. The only thing standing between you and a professional online presence is your website.
WordPress is the platform most photographers turn to in 2026, and for good reason. It gives you complete creative control, doesn’t lock you into a subscription model, and scales as your business grows. Whether you’re a wedding photographer, a travel shooter, or a portrait artist, this guide walks you through every step of building a photography website on WordPress — from picking a domain name to attracting your first client inquiry.
Why WordPress Is the Best Platform for Photography Websites in 2026
There’s no shortage of website builders out there — Squarespace, Wix, Pixieset, and SmugMug all market heavily to photographers. So why choose WordPress?
First, ownership. On subscription platforms, you’re essentially renting your website. When you build on WordPress (the self-hosted wordpress.org version), your site, your content, and your SEO authority belong to you. Second, flexibility. WordPress powers over 43% of all websites on the internet because it adapts to virtually any need. Need a client proofing system? There’s a plugin for that. Want to sell prints? WooCommerce handles it. Planning to add a blog to drive organic traffic? WordPress is where content marketing lives.
Third — and this matters a lot for photographers — the ecosystem of themes and gallery plugins built specifically for visual storytelling is unmatched anywhere else. You won’t be forcing your work into a generic template. You’ll be building something that’s genuinely yours.
What You Need Before You Start
Before you log into a hosting dashboard, take ten minutes to get a few things sorted:
Your niche and target client. A wedding photographer and a commercial product photographer have very different site needs. Knowing who you’re building for helps you choose the right theme, write the right copy, and put the right gallery front and center.
Your portfolio selection. Pick 20–40 of your absolute best shots. Resist the urge to show everything — a tightly curated gallery signals confidence and quality. Editors and clients will scroll through your best work, not your entire archive.
A domain name idea. Your name or studio name works well. Keep it short, easy to spell, and avoid hyphens if possible. Check availability before you fall in love with it.
A basic sitemap. Most photography websites need: a Home page, a Portfolio or Gallery page (possibly split by category), an About page, a Services/Pricing page, and a Contact page. That’s it to start.
Step 1: Choose a Domain Name and Hosting Plan
Your hosting provider is the foundation everything else sits on. For photographers, speed and storage matter. You’re uploading high-resolution images — you need a host that handles them without choking.
In 2026, solid options for photographers include SiteGround, Kinsta, WP Engine, and Bluehost. If you’re just starting out, a shared hosting plan from SiteGround or Bluehost costs around $3–5 per month and handles most beginner-to-intermediate photography sites without issues. Once your traffic grows or you add a client portal, consider moving to managed WordPress hosting.
Register your domain through your host or a separate registrar like Namecheap. Getting both through the same provider simplifies setup, but it’s not required.
Step 2: Install WordPress and Choose a Photography Theme
Most modern hosts offer one-click WordPress installation. Log into your hosting dashboard, find the WordPress installer (often under a “Website” or “Apps” section), click install, and you’re up and running in minutes. You’ll set your admin username and password during this step — use something strong and store it securely.
Once you’re in the WordPress dashboard, the next major decision is your theme. Your theme controls how your site looks and, to a significant degree, how it performs.
Top Photography Themes for WordPress in 2026
For a deeper dive into photography-specific themes, check out our guide to the Top 10 WordPress Photography Themes — but here’s the quick overview:
Inspiro is one of the most popular free photography themes available, with stunning full-screen sliders, video support, and password-protected galleries. It works out of the box without needing a page builder.
Divi (by Elegant Themes) is a premium drag-and-drop builder theme that gives you pixel-level control over your layouts. It has dozens of photography-specific demo templates and works well for photographers who want a highly custom look without hiring a developer.
Oshine and Kalium are both premium options designed with creative professionals in mind. Each comes with multiple demo layouts so you can import a starting point that matches your style and build from there.
Whatever theme you choose, make sure it’s responsive (looks great on mobile), optimized for speed, and regularly updated by its developer. You can also browse our Top 10 Photo Style WordPress Themes roundup for additional options that focus specifically on visual presentation.
Step 3: Set Up Your Homepage and Key Pages
Your homepage is your first impression. For most photographers, this means a full-screen hero image or slider, a brief headline that tells visitors who you are and what you shoot, and a clear call to action — usually a button leading to your portfolio or a contact form.
Keep your navigation simple. Five or six menu items is plenty. Visitors shouldn’t have to click more than once or twice to find what they’re looking for.
Your About page matters more than most photographers think. People hire photographers they connect with. Write in first person, share your story, include a professional photo of yourself, and mention what makes your approach different. Don’t just list your gear.


Your Services or Pricing page should give potential clients enough information to know whether you’re a good fit — without necessarily listing every price (though transparency generally builds trust). Include the types of shoots you offer, what clients can expect, and how to book.
Step 4: Add a Photo Gallery Plugin
WordPress themes give you the shell, but a dedicated gallery plugin handles the heavy lifting of displaying your images beautifully and efficiently. The default WordPress image blocks work for simple layouts, but if you want lightboxes, albums, password-protected client galleries, watermarking, or advanced filtering, you need a plugin.
Best Gallery Plugins for WordPress Photographers
Envira Gallery is one of the most photographer-friendly options available. It offers drag-and-drop gallery creation, mobile-responsive layouts, social sharing, watermarking, and deep WooCommerce integration for selling prints. The free version covers basic needs; the pro version unlocks client proofing and video support.
FooGallery is a strong free option that prioritizes speed and SEO. It loads galleries efficiently so your page speed scores don’t tank under the weight of dozens of high-res images.
Modula is popular with creative portfolios for its visual customization options. You can adjust spacing, hover effects, and grid styles without touching a line of code.
NextGEN Gallery is one of the oldest and most feature-rich options. It handles very large image libraries well and is a solid choice if you’re building a site with hundreds or thousands of images.
For more recommendations, see our full roundup of the Top 10 WordPress Portfolio Themes which also covers how portfolio plugins integrate with popular theme layouts.
Step 5: Optimize Your Images for Web Performance
This step is where many photographers sabotage their own sites. You export a 4,500-pixel-wide JPEG at full quality, upload it, and suddenly your homepage takes eight seconds to load. In 2026, page speed directly affects both your Google rankings and your bounce rate.
The fix is to compress and resize your images before uploading. Tools like Lightroom, Squoosh (a free browser-based tool from Google), or ShortPixel (a WordPress plugin) can dramatically reduce file sizes with no visible quality loss to the human eye.
A good rule of thumb: images should be no wider than 2,000–2,500 pixels for display purposes, and file sizes should aim to be under 300KB each where possible. Use JPEG for photographs and WebP format where your server and theme support it — WebP files are typically 25–35% smaller than equivalent JPEGs.
Also enable lazy loading, which tells the browser to only load images as they scroll into view rather than all at once. WordPress has had native lazy loading built in since version 5.5, so you may not need to do anything extra — just make sure your theme isn’t overriding it.
Step 6: Add Contact Forms and Client Communication Tools
Your contact page is where business happens. Don’t just add an email address — use a contact form that allows potential clients to describe their project, share a date or location, and choose a session type. This filters leads and gives you what you need to respond with a quote.
WPForms and Gravity Forms are both excellent options. WPForms is slightly easier for beginners; Gravity Forms has more conditional logic options (showing different fields based on what someone selects) and is better for photographers with complex booking flows.
If you want to go further, consider adding a scheduling plugin like Amelia or Simply Schedule Appointments. These let clients book sessions directly from your site, reducing back-and-forth emails and making your operation feel more professional.
Step 7: SEO Tips for Your Photography Website in 2026
A beautiful website no one can find doesn’t grow a photography business. Basic SEO setup is essential — and it’s more accessible than it sounds.
Install Yoast SEO or Rank Math. Both are free and guide you through optimizing each page with a focus keyphrase, meta title, and meta description. Fill these in for every page and every portfolio category page, not just your homepage.
Name your image files descriptively before uploading. “DSC_0042.jpg” tells Google nothing. “austin-wedding-photographer-ceremony.jpg” tells Google exactly what it’s looking at, and that file name can help you rank in Google Images — a significant traffic source for photographers.
Fill in the Alt Text field for every image you upload. This helps with accessibility (screen readers use it) and also signals to search engines what the image depicts. Keep alt text descriptive and natural — “bride and groom first kiss Austin Texas outdoor wedding” works well.
Start a blog, even a small one. Writing location-specific content — “Best Outdoor Portrait Locations in [Your City]” or “What to Wear for Family Photos in Fall 2026” — helps you attract local search traffic that converts into booked sessions.
Ready to Launch? Here’s What to Check Before You Go Live
Before you hit publish, run through this quick checklist: Your site loads in under three seconds on mobile. All gallery images are compressed. Your contact form works and sends email to your inbox. You have a privacy policy page (required if you collect any data). Your social media profiles are linked. And your portfolio is tight — only your best 20–30 images, curated ruthlessly.
If you’d rather have a professional handle the technical side while you focus on shooting, the team at 24×7 WP Support specializes in building and maintaining WordPress websites for creative professionals. From theme setup and gallery configuration to speed optimization and ongoing maintenance, we’ve got every layer covered. Find out what it costs to hire a WordPress professional and take the guesswork out of your online presence — so you can get back to what you do best: creating images that move people.
Related posts:

Brian is a WordPress support specialist and content contributor at 24×7 WP Support. He writes practical, easy-to-follow guides on WordPress troubleshooting, WooCommerce issues, plugin and theme errors, website security, migrations, performance optimization, and integrations. With a focus on solving real website problems, Brian helps business owners, bloggers, and online store managers keep their WordPress sites running smoothly.
