
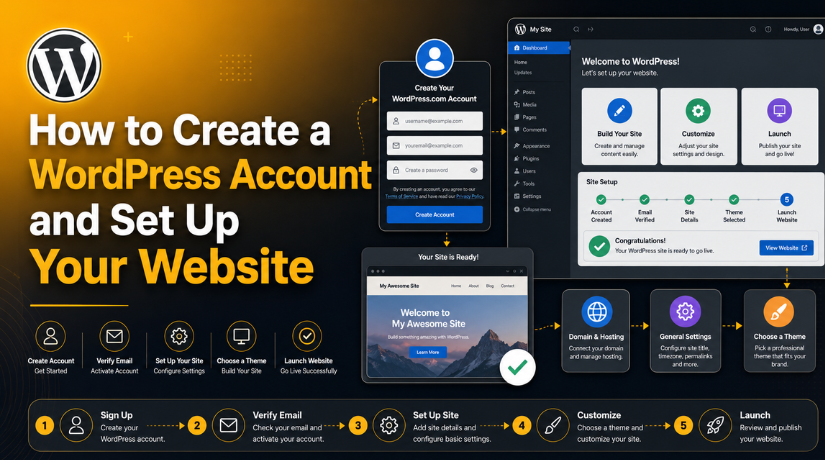
How to Create a WordPress Account and Set Up Your Website
Introduction
Whether you’re starting a personal blog, launching a small business site, or building an online portfolio, WordPress remains the most powerful and widely used platform to do it. In 2026, WordPress powers more than 40% of all websites on the internet — and for good reason. It’s flexible, beginner-friendly, and scalable enough to grow with your ambitions. But if you’re brand new to it, figuring out where to even begin can feel overwhelming.
This step-by-step guide covers everything you need to know: creating your WordPress account, choosing the right type of setup, configuring your dashboard, selecting a theme, installing essential plugins, adding content, and securing your site from day one. By the time you’re done reading, you’ll have a clear, actionable roadmap for getting your WordPress website off the ground.
WordPress.com vs. WordPress.org — Which One Is Right for You?
Before you create any account, you need to understand the single most important distinction in the WordPress world: WordPress.com and WordPress.org are two completely different products, even though they share the same name and are both built on the same underlying software.
WordPress.com is a hosted platform managed by Automattic. You sign up, and WordPress handles the server, security, and automatic updates for you. Setup is fast and requires no technical knowledge — you’re writing content within minutes. The free plan gives you a yoursite.wordpress.com subdomain and basic features. However, meaningful customization — installing any plugin you want, using custom themes, or running ads on your site — requires a paid plan starting around $4–$9 per month. The Business plan, which unlocks plugins and themes, costs around $25/month.
WordPress.org is the free, open-source WordPress software that you download and install on your own web hosting server. You’ll pay for hosting (typically $5–$15/month for beginners) and a domain name (around $10–$15/year), but you get complete, unrestricted control. Install any plugin, use any theme, customize every aspect of your site, run advertising, and build an e-commerce store — all without platform-level restrictions. This is the version recommended for businesses, professional bloggers, and anyone who plans to grow their site over time.
The bottom line: if you just want a simple personal blog with no growth ambitions, WordPress.com can get you there quickly. If you want to build something professional and scalable, self-hosted WordPress.org is the smarter long-term investment.
How to Create a WordPress.com Account
If you want the simplest entry point, WordPress.com gets you online in minutes. Here’s how the process works:
Sign Up at WordPress.com
Go to wordpress.com and click Get Started. Enter your email address, create a username, and set a password. You can also sign up using your existing Google or Apple account to skip the form. Once your account is created, WordPress will walk you through a brief setup wizard.
Choose a Plan
WordPress.com offers a free plan and several paid tiers: Personal, Premium, Business, and Commerce. The free plan is functional for basic blogging but comes with significant limitations, including a wordpress.com subdomain, WordPress ads displayed on your site, and no access to custom plugins. If you’re building anything beyond a hobby site, consider starting with at least the Personal or Business plan.
Pick Your Domain Name
You’ll be prompted to choose a web address. You can use a free .wordpress.com subdomain, purchase a custom domain through WordPress.com directly, or connect a domain you already own from another registrar. Your domain is your website’s identity, so choose something short, relevant, and easy to type and remember.
Select a Theme and Customize
WordPress.com will offer you a selection of design templates to get started. From the built-in customizer, you can adjust colors, fonts, page layouts, and header images without writing a single line of code. For WordPress.com users, the theme selection is curated — you won’t have access to the full WordPress theme repository unless you’re on a Business plan or higher.
How to Set Up a Self-Hosted WordPress Site (WordPress.org)
If you want full control, self-hosted WordPress is the better choice. The process has gotten significantly more accessible in 2026, with most hosting providers offering streamlined one-click WordPress installation tools.
Step 1: Purchase a Domain and Choose Web Hosting
You’ll need two things: a domain name (your website address, such as yoursite.com) and a web hosting account (the server where your website files live). Many beginner-friendly hosts — Bluehost, SiteGround, Hostinger, and DreamHost — bundle a free domain with their hosting plans and include one-click WordPress installation at no extra cost.
When evaluating hosting, prioritize plans that include an SSL certificate for HTTPS, daily or weekly automatic backups, and responsive customer support. Shared hosting plans are typically enough for brand-new websites and cost between $5 and $15 per month.
Step 2: Install WordPress with One Click
Once your hosting account is active, log in to your hosting control panel — usually cPanel or a proprietary dashboard. Find the WordPress Installer or Website Builder option and launch it. You’ll enter your site title, desired admin username (do not use “admin” — choose something unique), and a strong password. Click Install and the process completes automatically, usually in under five minutes.
Step 3: Log In to Your WordPress Dashboard
After installation, your WordPress admin panel lives at yourdomain.com/wp-admin. Bookmark this URL — you’ll return to it every time you work on your site. Log in with the credentials you created during installation. If you ever lose access, you can reset your password from the login page or through your hosting panel.
Configuring Your Essential WordPress Settings
Before you start designing or creating content, spend a few minutes making sure your site’s foundational settings are correct. These choices affect SEO, usability, and how your site is indexed by search engines.
Navigate to Settings → General and update your site title and tagline. These appear in browser tabs and search engine results, so accuracy and clarity matter here. Set your timezone, date format, and site language while you’re there.
Next, go to Settings → Permalinks and switch to the “Post name” structure. This gives you clean, human-readable URLs like yoursite.com/how-to-create-a-wordpress-account instead of yoursite.com/?p=123. This is a critical SEO step — make this change before you publish any content, because changing permalink structure later can break existing URLs and requires redirect management.
Finally, visit Settings → Reading. If you’re building a business site rather than a blog, set a specific static page as your homepage. This gives you full control over what visitors see when they first land on your site.


Choosing and Installing a WordPress Theme
Your WordPress theme controls the visual appearance of your website — the layout, typography, color palette, and structural design. There are thousands of free and premium themes available, and picking the right one early saves a lot of rework later. For a deeper understanding of how themes work technically, see our guide on what is a WordPress theme and how does it work.
To install a theme, go to Appearance → Themes → Add New in your dashboard. You can browse by popularity, most recent, or feature filters. Popular free themes for beginners in 2026 include Astra, GeneratePress, and Kadence — all known for fast load times, clean code, and excellent compatibility with page builders and the native Gutenberg block editor.
When evaluating any theme, check these factors: mobile responsiveness (non-negotiable in 2026), Google PageSpeed scores of 90+ out of the box, compatibility with the WordPress block editor, and active developer support with updates within the last few months. A pretty theme that loads slowly or breaks with popular plugins will create more problems than it solves.
Installing Essential WordPress Plugins
Plugins add functionality to your WordPress site — think of them as apps. You install them from Plugins → Add New. Here’s a practical, focused starter set for any new WordPress website:
SEO: Yoast SEO or Rank Math. Both provide on-page content analysis, XML sitemap generation, meta title and description control, and schema markup — all essential for appearing in Google search results.
Security: Wordfence or Solid Security. These plugins add firewall rules, brute-force login protection, file integrity scanning, and malware detection. Install a security plugin before your site has any traffic, not after.
Performance: WP Rocket (premium) or WP Super Cache (free). Caching dramatically speeds up your site by serving pre-built pages instead of generating them fresh with every visit. Page speed is a confirmed Google ranking factor, so don’t skip this step.
Backups: UpdraftPlus. Schedule automatic backups to Google Drive, Dropbox, or Amazon S3. A recent backup has saved countless WordPress sites from complete data loss after a hack or server failure.
Contact Forms: WPForms Lite or Contact Form 7. Every website needs a way for visitors to reach you without exposing your email address to spam bots.
One important note: resist the temptation to install a plugin for every minor feature request. Plugin bloat — having too many installed plugins, especially inactive or outdated ones — remains one of the leading causes of slow performance and security vulnerabilities on WordPress sites in 2026. Install what you actively use, and remove anything you don’t.
Creating Your First Pages and Posts
With your theme and plugins configured, it’s time to build out your content. WordPress organizes content into two primary types, and understanding the difference between them is fundamental to using the platform effectively.
Pages are for static content that doesn’t change frequently. Your Home page, About page, Services page, and Contact page are all classic examples. Create them under Pages → Add New. Pages don’t have publish dates, categories, or tags — they exist outside of the blog stream.
Posts are for regularly published content — blog articles, news updates, tutorials, or any content you’ll add to over time. Posts are organized by categories and tags and displayed in reverse chronological order on your blog archive. Create them under Posts → Add New.
Both pages and posts use the Gutenberg block editor by default. Gutenberg works by adding blocks — paragraphs, headings, images, buttons, columns, videos, and more — that you stack and arrange visually. It’s intuitive enough for complete beginners and powerful enough that many sites no longer need a separate page builder plugin.
Securing Your WordPress Site from the Start
WordPress is a secure platform when correctly configured — but a poorly set-up site is an attractive target for automated bots and hackers. Getting security right from the beginning is far easier than recovering from a breach later.
Use a strong, unique password for your admin account and store it in a reputable password manager like Bitwarden or 1Password. Enable two-factor authentication (2FA) through your security plugin — this alone stops the vast majority of brute-force attacks. Keep your WordPress core software, themes, and plugins updated consistently; outdated software remains the most common attack vector in 2026. Make sure your site is running on HTTPS with a valid SSL certificate — your hosting provider likely offers this free via Let’s Encrypt.
For a full breakdown of everything that goes into keeping a WordPress site protected, read our comprehensive resource: Everything You Need to Know About WordPress Security. And if you started on WordPress.com and now want to migrate to a self-hosted setup for more control, our detailed walkthrough on how to move from WordPress.com to WordPress.org covers the entire process step by step.
Let 24×7 WP Support Keep Your Site Running at Its Best
Creating your WordPress account and getting your site online is an exciting milestone — but it’s just the beginning of the journey. Keeping your site fast, secure, backed up, and updated is an ongoing responsibility that can quickly become time-consuming, especially as your site grows. If you’d rather focus on your business or content and leave the technical side to experts, the team at 24×7 WP Support is ready to help. We provide round-the-clock WordPress maintenance, security monitoring, performance optimization, and emergency support — so your website stays online and working exactly as it should, every single day. Reach out today and let’s take care of your WordPress site for you.
Related posts:
Where Is Popup Maker in WordPress? Popup Builder Explained
Improving Core Web Vitals in WordPress Through Custom Development
Gatsby vs WordPress: Key Differences Explained
How To Fix WordPress “Briefly Unavailable For Scheduled Maintenance Error”
Is Elementor Free for WordPress? Free vs Pro Plans Compared in 2026

Brian is a WordPress support specialist and content contributor at 24×7 WP Support. He writes practical, easy-to-follow guides on WordPress troubleshooting, WooCommerce issues, plugin and theme errors, website security, migrations, performance optimization, and integrations. With a focus on solving real website problems, Brian helps business owners, bloggers, and online store managers keep their WordPress sites running smoothly.
