
How to Use WebP Images in WordPress for Faster Speed
Introduction
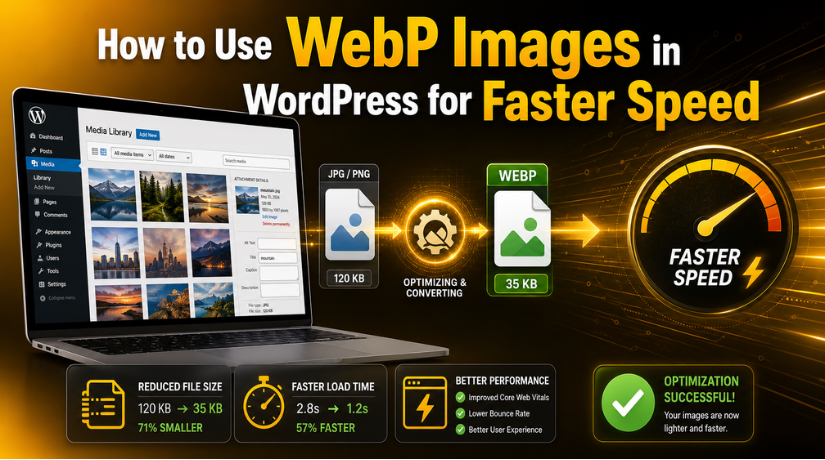
Images play a big role in WordPress website speed. A page may look great, but heavy images can slow it down. Large JPG and PNG files increase the total page size. This can make visitors wait longer before the page loads. Many users leave a website when it feels slow, especially on mobile devices.
This is where WordPress WebP images can help. A modern image format called WebP was created to speed up web loading. It minimizes the file size of photographs while maintaining their clarity. It takes less time for smaller image files to load. This enhances the browsing experience in general.
Website owners can improve WordPress speed with WebP images without changing the full site design. It is a simple image optimization step. It works well for blogs, service pages, portfolios, and WooCommerce stores.
What Are WebP Images?
An image format called WebP was created specifically for the contemporary web. It helps in reducing the size of image files without sacrificing quality. This makes it useful for WordPress websites that use many images.
With WordPress image optimization WebP, website owners can make pages lighter. A lighter page usually loads faster for visitors. WebP images can be used for:
- Blog post images
- Featured images
- Product photos
- Website banners
- Service page graphics
WebP can often replace JPG or PNG files on WordPress pages. However, the image should still look clear after conversion. Good quality matters as much as speed.
Does WordPress Support WebP Images?
Many users ask, does WordPress support WebP images? Yes, modern WordPress versions support WebP uploads. Similar to JPG and PNG files, WebP files can be uploaded to the Media Library.
Once uploaded, WordPress WebP images can be added to posts, pages, and featured image sections. This makes WebP easy to use for regular website updates.
However, hosting support can still matter. Some older servers may not deliver WebP images correctly. So, always test one WebP image before changing many images. Also, keep WordPress, themes, and plugins updated for better compatibility.
WebP vs JPG in WordPress
When comparing WebP vs JPG WordPress images, speed is the main point. JPG images are common and easy to use. Many WordPress websites still use JPG files for blogs, banners, and product photos. They work well, but they can be larger than needed.
WebP gives website owners a lighter image option. It can reduce file size while keeping the image clear. This facilitates a quicker page load for users. Additionally, it enhances mobile device surfing.
You do not need to remove every JPG image immediately. That can take time and may create issues. A better method is to start with important pages first. These may include the homepage, service pages, blog images, and product pages.
WebP is useful when your website has many visual elements. It helps lower page weight without changing your design. However, image quality should always be checked after conversion. A faster image is only helpful when it still looks professional.
How to Use WebP Images in WordPress Manually
You can manually use WebP images in WordPress without a plugin. This method works well for smaller websites. It is also helpful when you only need to update selected images.
To convert images to WebP WordPress manually, follow a simple process. Select the image you wish to optimize first. This may be a blog image, banner, or featured image. Then, convert the JPG or PNG file into WebP format using a trusted image tool.
After conversion, check the image before uploading it. Make sure it looks sharp and clear. Avoid uploading blurry or over-compressed images. Quality matters for trust and user experience.
Follow these basic steps:
- Choose the image that needs optimization.
- Convert it into WebP format.
- Check the final image quality.
- Upload it to the WordPress Media Library.
- Replace the old image on the page.
- Add clear alt text for accessibility.
- Test the page after publishing.
Manual WebP use gives you more control. It also helps you review every image before it goes live. For beginners, this is a secure choice.
How to Automatically Convert Images to WebP in WordPress
Manual conversion works for small websites. But it can take time on larger sites. If your website has many posts, products, or service pages, automation is better. You can automatically convert images to WebP WordPress using a trusted image plugin.
A WebP plugin can convert new uploads into WebP format. Additionally, some plugins convert older Media Library photos. This helps you optimize existing images without replacing each file manually. It keeps things simple and saves time.
Automatic conversion is useful for blogs, business websites, and WooCommerce stores. These sites often use many images across pages. Product photos, banners, and featured images can increase page size. WebP helps reduce that load and supports faster browsing.
Before you convert images to WebP WordPress in bulk, take a complete backup. This is an important safety step. It protects your original images if anything goes wrong. You should also test the plugin on a few images first.
When choosing the best WebP plugin for WordPress, check the features carefully. Do not install a plugin only because it looks popular. A good plugin should match your site needs and hosting setup.


Look for these important features:
- Automatic WebP conversion for new image uploads.
- Bulk conversion for old Media Library images.
- Backup option for original JPG and PNG files.
- Safe delivery of WebP images on browsers.
- Compatibility with caching and CDN tools.
- Support for WooCommerce images if needed.
Avoid using many image optimization plugins together. They may conflict and break image delivery. After setup, check your homepage, blog posts, and product pages. Make sure every image loads clearly. This careful process keeps your WordPress image optimization safe and effective.
What to Check Before Choosing a WebP Plugin
Choosing the right plugin is important for safe image optimization. The best WebP plugin for WordPress should do more than convert files. It should protect your images, support your site setup, and work smoothly with your theme.
Do not install a plugin only because it has many downloads. First, see if it meets the requirements of your website. A small blog may need simple conversion. A WooCommerce store may need stronger image support.
A good plugin should help with WordPress image optimization WebP in a safe way. It should not break image URLs or affect page layouts. It should also keep original images as a backup. If something goes wrong, this helps in file restoration.
Before choosing a plugin, check these key points:
- It should convert JPG and PNG files into WebP.
- It should support bulk conversion for old images.
- It should optimize new image uploads automatically.
- It should keep original images safely stored.
- It should work with your theme and page builder.
- It should support WooCommerce images if needed.
- It should receive regular updates from developers.
- It should work well with caching and CDN tools.
Also, read recent plugin reviews before installation. Reviews can show real user issues. You should also test the plugin on a staging site when possible.
How WebP Helps Improve WordPress Speed
WebP helps reduce image file size on WordPress pages. Smaller files need less time to load. This can make your website feel faster for visitors.
When you improve WordPress speed with WebP images, you reduce page weight. This is helpful for homepages, service pages, blogs, and product pages. Mobile users may notice the biggest improvement. They often browse on slower networks or smaller devices.
WordPress WebP images can also improve user experience. Pages feel smoother when images load quickly. Visitors can read content without waiting for large images. This may help them stay longer on your website.
However, WebP alone is not a complete speed solution. You should also use proper image sizes, caching, and clean plugins. WebP works best as part of a full image optimization plan. It supports better speed, cleaner pages, and a more professional website experience.
Common Mistakes to Avoid When Using WebP in WordPress
WebP is helpful, but setup mistakes can affect your website. A wrong image setup may break layouts or reduce image quality. So, always follow a careful process before changing many files.
One common mistake is uploading very large WebP files. WebP can reduce file size, but image size still matters. A large image with huge dimensions can still slow pages. Images should always be resized before being uploaded to WordPress.
Another mistake is converting images without checking quality. Some tools may compress images too much. This can make photos blurry or dull. WordPress image optimization WebP should improve speed without harming design quality.
Avoid these common mistakes:
- Uploading large WebP files without resizing them.
- Converting images without checking final quality.
- Not saving original JPG or PNG files.
- Using many image optimization plugins together.
- Forgetting to test images on mobile devices.
- Ignoring featured images and product images.
- Not clearing cache after replacing images.
When you convert images to WebP WordPress, always keep backups. This helps you restore images if something fails. Also, use only one trusted image optimization plugin.
How to Test If WebP Images Are Working Properly
After setup, test your WordPress WebP images carefully. Open your key pages and check if all images load. Review the homepage, blog posts, service pages, and product pages.
Prior to uploading photos to WordPress, they should always be resized. Next, see if WebP is displayed in the file type. Clear your website cache after making changes. Also, clear CDN cache if your site uses one.
Run a speed test before and after WebP setup. This helps you compare real performance changes. Check both desktop and mobile results for better accuracy.
Conclusion
WebP is a smart way to reduce image size. It helps pages load faster and improves user experience. You can use WebP manually or through a plugin. Just keep backups, test images, and avoid unsafe setup mistakes.
If WebP setup feels confusing,24×7 WP Support can help you review your WordPress image setup and site performance safely.
Related posts:
Ghost vs WordPress: Which Platform Is Better for Your Website?
How to Fix Chinese Characters Appearing on My Website in Google Search Results
Best Drag and Drop WordPress Theme Builders (Paid + Free)
Bricks Builder vs Elementor Pro: Which Is Better for WordPress?
Improving Core Web Vitals in WordPress Through Custom Development

Brian is a WordPress support specialist and content contributor at 24×7 WP Support. He writes practical, easy-to-follow guides on WordPress troubleshooting, WooCommerce issues, plugin and theme errors, website security, migrations, performance optimization, and integrations. With a focus on solving real website problems, Brian helps business owners, bloggers, and online store managers keep their WordPress sites running smoothly.
