
How to Set Up Easy Appointments in WordPress: Complete Installation Guide
Introduction
Online booking is now important for every service-based website. Customers do not always want to call or wait. They want a quick way to choose a service. They also want to select a date and time easily. This is where an appointment booking WordPress setup becomes useful.
A booking form can save time for both sides. Customers can book appointments without sending many messages. Business owners can manage bookings from one place. This reduces confusion and missed appointment requests. It also improves the customer experience on the website.
Many businesses still manage appointments manually. They use phone calls, emails, or chat messages. This process can become slow and confusing. A missed call can also mean a missed lead. An online booking system WordPress setup can solve this problem. It allows users to book appointments directly from the website.
The Easy Appointments WordPress plugin is a useful option for this purpose. It helps website owners add appointment booking features without coding. You can manage services, workers, locations, and time slots. You can also collect customer details through a booking form. This makes the booking process simple and clear.
In this guide, you will learn the basics first. You will understand what the Easy Appointments plugin does. You will also learn how its booking system works. This will help you prepare before starting the setup process.
What Is the Easy Appointments Plugin in WordPress?
The Easy Appointments plugin is a WordPress appointment plugin. It helps you add booking features to your website. Visitors can choose a service and select an available time. They can then submit their details through a booking form. The website owner can view and manage these appointments easily.
This plugin works like an appointment scheduler WordPress tool. It connects your services, workers, locations, and time slots. When these settings work together, customers see available booking options. This makes the full process easy for users.
For example, a clinic can add doctors as workers. It can add different treatments as services. It can also add clinic branches as locations. Customers can then choose the doctor, service, and available time. This creates a complete booking flow on the website.
Easy Appointments WordPress is useful because it keeps things organized. You do not need to manage every booking manually. You can set your available hours in advance. Customers can only book from the available time slots. This reduces double bookings and scheduling mistakes.
The plugin is also useful for small businesses. It gives them a simple online booking system WordPress option. They can start accepting appointments without building custom software. This saves time, money, and development work.
Who Should Use Easy Appointments in WordPress for Online Booking?
The Easy Appointments WordPress setup is useful for service-based websites. It helps businesses accept bookings directly from their website. Customers can select a service, date, and time easily. This saves time for both customers and business owners. It also removes many manual booking problems.
The Easy Appointments plugin works well for businesses that manage appointments daily. It is helpful when customers need fixed time slots. It is also useful when different staff members handle different services. This makes it a smart appointment booking WordPress solution for many industries.
Best Business Types That Can Use Easy Appointments in WordPress
Many businesses can use the Easy Appointments plugin for booking needs. Clinics and doctors can use it for patient appointments. Salons can use it for hair, beauty, or spa bookings. Coaches and consultants can use it for session scheduling. Tutors and trainers can use it for class bookings.
Repair service providers can also use this plugin. They can let customers book service visits online. Agencies can use it for consultation calls. Legal and tax consultants can use it for client meetings. Fitness trainers can use it for personal training sessions.
Local service businesses can also benefit from this system. Cleaning services, home service teams, and real estate consultants can use it. They can manage service requests in a clear way. This makes the WordPress appointment plugin helpful for many business types.
When the Easy Appointments Plugin Makes Sense for Your Website
The Easy Appointments WordPress plugin makes sense when you offer services. It works well when users must book time slots. It is also helpful when your team manages many appointments. You can create services, assign staff, and manage availability.
This plugin is a good choice when you need simple booking. It is useful when you want basic appointment control. You can show available days and hours on your website. Customers can then choose a suitable time without confusion.
It also works well for businesses with multiple staff members. Each worker can have different service availability. This helps you manage schedules in a better way. It reduces double bookings and missed appointment requests.
When You May Need More Advanced Booking Features
The Easy Appointments plugin is helpful for basic booking needs. However, some websites may need more advanced booking features. For example, you may need online payment before booking. You may also need deep calendar sync or complex reminders.
Some businesses need paid appointments with checkout options. Others may need automatic SMS reminders for customers. Large teams may need advanced reporting and staff dashboards. In these cases, you may need extensions or another booking tool.
You should review your business needs before setup. Check whether your booking process is simple or complex. If your process is simple, this plugin can work well. If your process needs payments, check available add-ons first.
Things to Prepare Before Setting Up Easy Appointments in WordPress
Before using the Easy Appointments WordPress plugin, prepare your booking details. This helps you avoid mistakes during setup. It also makes the booking system clear for customers. A planned setup saves time and reduces confusion later.
You should first list your services clearly. Then prepare staff names, locations, and working hours. You should also decide what customer details you need. These details will help you build a better booking form.
Prepare Your Services Before Creating Booking Options
Your services are the main part of your booking system. Customers choose these services before selecting appointment time slots. So, each service name should be clear and simple. Avoid confusing names that look too similar.
For example, use names like “Free Consultation” or “Website Support Call.” A salon may use “Haircut Appointment” or “Facial Treatment.” A clinic may use “General Checkup” or “Follow-Up Visit.” These names help users choose the right service quickly.
Prepare Staff or Worker Details for Easy Appointment Scheduling
Workers are the people who provide your services. They may be doctors, consultants, trainers, or support staff. In the Easy Appointments plugin, workers connect with services and locations. This helps the system show correct availability.
Prepare each worker’s full name before setup. Also prepare their email address and phone number if needed. Correct emails help workers receive booking updates. This keeps everyone informed about new appointments.
Prepare Business Hours, Break Times, and Availability Rules
Business hours are very important for online booking. They tell customers when appointments are available. You should prepare your opening and closing hours first. Also decide which days are available for booking.
For example, your business may work Monday to Friday. Your working hours may be 10 AM to 6 PM. You may also want lunch breaks between appointments. These details must be added correctly during setup.
Prepare Booking Form Details for a Better Customer Experience
The booking form collects customer information during appointment booking. You should decide which fields are really needed. A short form is better for most users. Long forms may reduce booking submissions.
Basic fields usually include name, email, and phone number. You can also add a message or note field. This helps customers share special requests before booking. If needed, you can add a consent checkbox too.
Prepare Email Notification Content Before Going Live
Email notifications are important for every appointment system. They confirm bookings and keep everyone updated. You should prepare emails for customers, admins, and workers. This helps your booking process look professional.


A customer email should include appointment details clearly. It should show service name, date, time, and location. It can also include business contact details. If cancellation is allowed, mention the cancellation process too.
Why Preparation Makes the Easy Appointments Setup Easier
Preparation makes the full setup process faster and cleaner. You already know what services, workers, and locations to add. You also know your available days and time slots. This reduces mistakes during configuration.
A planned setup also improves customer experience. Visitors can understand services without confusion. They can select correct time slots and submit details easily. This creates a better website experience.
How to Set Up Easy Appointments in WordPress (Step By Step)
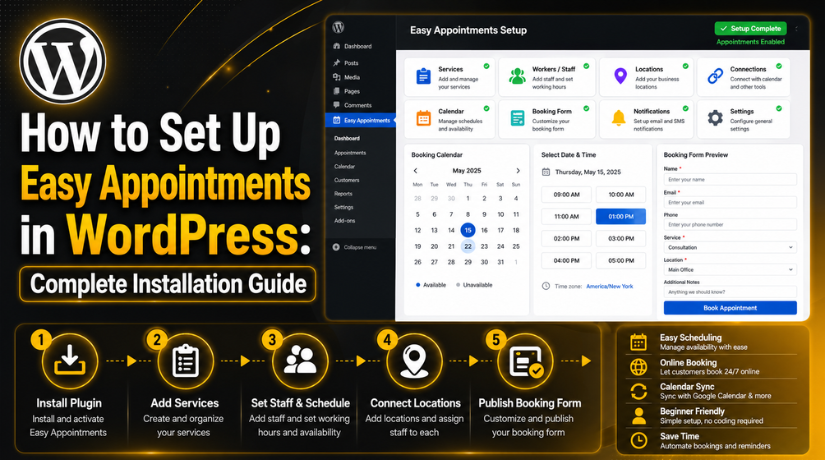
Setting up Easy Appointments WordPress is simple when you follow each step. The plugin works best when services, workers, locations, and time slots connect properly. You should complete every basic setting before publishing the booking form. This helps visitors see the right appointment options on your website. The Easy Appointments plugin gives you a useful way to manage service bookings. Follow the steps below to create a clear appointment flow.
Step 1: Install the Easy Appointments Plugin
- Log in to your WordPress dashboard.
- Go to Plugins. Click Add New.
- Search for Easy Appointments.
- Click Install Now.
- After installation, click Activate.
- Now check your WordPress left menu.
- You will see the Easy Appointments option there.
- Do not add the booking form yet.
- First, complete all basic settings.
- This helps your WordPress appointment plugin work correctly.
Step 2: Add Your Business Location
- A location is the place for the appointment.
- It can be your office, clinic, salon, or branch.
- It can also be an online meeting option.
- Go to the Easy Appointments settings.
- Open the location section. Add your location name.
- Use a simple and clear name.
- Examples:
- Main Office
- Online Consultation
- Clinic Visit
- Home Visit
- If you have many branches, add each branch separately.
- This helps customers select the correct location.
Step 3: Add Your Services
- Services are the options customers can book.
- Go to the services section. Add your service name.
- Keep service names simple and clear.
- Examples:
- Free Consultation
- Website Support Call
- Dental Checkup
- Haircut Appointment
- Fitness Session
- Add the correct service time.
- If the service takes 30 minutes, add 30 minutes.
- If the service takes 60 minutes, add 60 minutes.
- Correct timing helps show the right slots.
- This makes your appointment booking WordPress setup better.
Step 4: Add Workers or Staff Members
- Workers are the people who provide the service.
- They can be doctors, trainers, consultants, or staff members.
- Go to the worker section.
- Add the worker’s name. Add the worker’s email address.
- Add a phone number if needed.
- Save the worker details.
- If you work alone, add yourself as a worker.
- This step is still important.
- Without a worker, booking slots may not show.
- If you have a team, add every staff member separately.
Step 5: Connect Location, Service, and Worker
- This is the most important step.
- You must connect location, service, and worker.
- This tells the plugin who is available.
- It also tells where and when they are available.
- Go to the connection section.
- Select your location. Select your service. Select your worker.
- Set available days. Set start time and end time.
- Save the connection.
- Example:
- Location: Main Office
- Service: Free Consultation
- Worker: John
- Time: Monday to Friday, 10 AM to 5 PM
- If this connection is missing, time slots may not show.
- Create separate connections for different staff or services.
Step 6: Set Working Hours and Time Slots
- Working hours show when bookings are allowed.
- Time slots show available appointment times.
- Add your opening time. Add your closing time.
- Add break time if needed.
- Block lunch time if staff are unavailable.
- Block holidays and off days.
- Check service duration again. Check the slot step setting.
- These settings control booking times.
- Wrong settings can show wrong slots.
- Test time slots after saving.
- This keeps your online booking system WordPress setup correct.
Step 7: Customize the Booking Form
- The booking form collects customer details.
- Keep the form short. Keep the form easy.
- Add only important fields.
- Basic fields can include:
- Name
- Phone number
- Message
- Add a consent checkbox if needed.
- Make only important fields required. Do not ask too many questions.
- A simple form helps users book faster.
- Add Google reCAPTCHA if you get spam.
- Test the form after changes.
Step 8: Set Up Email Notifications
- Email notifications confirm bookings.
- They inform customers, admins, and staff.
- First, set customer confirmation emails. Add clear appointment details.
- Include:
- Service name
- Date
- Time
- Location
- Worker name
- Contact details
- Then set admin email alerts.
- Admin alerts help you track new bookings.
- Add worker emails if staff need updates. Keep email text short and clear.
- Clear emails make your booking system professional.
Step 9: Add the Booking Form to a WordPress Page
- Go to Pages.
- Click Add New.
- Add the page title Book an Appointment.
- Add the Easy Appointments shortcode.
- Use this shortcode for the standard form:
- [ea_standard]
- You can also use this shortcode:
- [ea_bootstrap]
- Publish the page.
- Open the page on the front end. Check if the booking form appears.
- If the form does not show, check the shortcode.
- Add this page to your website menu.
- Add a Book and Appointment button on service pages.
- This helps visitors find the booking page quickly.
Step 10: Test the Full Booking Process
- Open the booking page like a customer.
- Select the location. Select the service. Select the worker.
- Select the date. Select the time. Fill in the form.
- Submit a test booking.
- Check if the booking appears in WordPress.
- Check the customer email. Check the admin email.
- Check the worker email if enabled.
- Test the form on mobile. Make sure all fields work properly.
- Fix issues before making the page live.
Step 11: Manage Appointments From WordPress Dashboard
- After setup, manage bookings from WordPress.
- Open the Easy Appointments dashboard.
- View new appointment requests. Check customer details.
- Check the service name. Check appointment date and time.
- Confirm appointments when needed.
- Cancel appointments when required.
- Update appointment status. Review bookings regularly.
- Export appointment data if needed.
- Update staff schedules when availability changes.
- A good Easy Appointments WordPress setup saves time.
- It also gives customers an easy booking experience.
Common Easy Appointments Setup Problems and Simple Fixes
The Easy Appointments WordPress setup is simple for most websites. Still, some users may face problems during configuration. These issues usually happen because one small setting is missing. A wrong shortcode, missing connection, or email issue can break booking. The good thing is that most problems are easy to fix. You only need to check each setting step by step. This section explains common issues in the Easy Appointments plugin. It also gives simple fixes for each problem.
Appointment Time Slots Are Not Showing on the Booking Form
This is one of the most common setup issues. Users install the plugin and add the booking form. But available time slots do not appear on the page. This usually happens when location, service, and workers are not connected. The appointment booking WordPress system needs these settings together. If one setting is missing, slots may stay hidden.
First, check if you added at least one location. Then check if you added at least one service. After that, check if one worker is available. Now review the connection between all three items. The connection must include correct days and working hours. If working hours are empty, slots will not show. Also check the service duration and slot step settings.
Easy Appointments Booking Form Is Not Showing on the Page
Sometimes the booking form does not appear after publishing. This can happen because the shortcode is wrong. It can also happen when the plugin is not active. The Easy Appointments plugin needs the correct shortcode to display forms. If the shortcode has extra spaces or wrong text, it may fail.
Open the booking page inside WordPress. Check whether you used the correct shortcode. You can use [ea_standard] for the standard layout. You can also use [ea_bootstrap] for another layout option. Make sure the shortcode is added in a proper content block. If you use a page builder, test it in a shortcode block.
Appointment Emails Are Not Sending to Customers or Admins
Email problems are common in many WordPress websites. Your booking form may work, but emails may not arrive. This does not always mean the WordPress appointment plugin is broken. Many hosting servers block or limit default WordPress emails. Sometimes emails also go to the spam folder.
First, check the email address added in plugin settings. Make sure customer, admin, and worker emails are correct. Also check your email notification templates. They should include the right appointment details. Then test a booking using a different email address. Check inbox, spam, and promotions folders.
Wrong Time Slots Are Appearing for Customers
Wrong time slots can confuse customers and staff. This problem usually happens because of wrong duration settings. It can also happen due to wrong slot step settings. Your Easy Appointments WordPress setup must match real working hours. If the settings are not correct, slots may appear incorrectly.
First, check the service duration. If a service takes 60 minutes, set it correctly. Then check the slot step. Slot step controls how often times appear. For example, slots may appear every 30 minutes. This may be useful for some businesses. But it can confuse users if not planned well.
Customers Cannot Submit the Appointment Booking Form
Sometimes customers can open the form but cannot submit it. This issue may happen because required fields are missing. It may also happen due to reCAPTCHA issues. Security plugins can also block form submissions. Cache and script optimization may create problems too.
Start by testing the form yourself. Fill every required field and submit the booking. If the form shows an error, read the message carefully. Check if any required field is hidden or broken. Then review your custom fields inside the plugin settings. Make sure field names and options are added correctly.
Conclusion
The Easy Appointments WordPress plugin is useful for service websites. It helps businesses accept bookings directly from their website. You can manage services, workers, locations, and time slots. You can also create a simple booking form for customers. This makes appointment scheduling easier for both sides.
Most setup problems happen because of missing settings. Time slots may hide when connections are incomplete. Emails may fail when WordPress mail is not configured. Forms may break because of cache or script conflicts. These issues can be fixed with careful testing. A proper appointment scheduler WordPress setup needs complete configuration.
Before making the booking page live, test everything properly. Check services, locations, workers, forms, emails, and mobile layout. Also submit a test booking like a real customer. This helps you find problems before your visitors do. A clean online booking system WordPress setup improves trust and conversions.
If you want expert help, contact 24x7wpsupport today. Our team can install and configure the Easy Appointments plugin for you. We can set up services, workers, locations, and booking forms. We can also fix email issues, shortcode errors, and mobile layout problems. Visit 24x7wpsupport to get professional WordPress support. Our experts can make your WordPress appointment plugin setup smooth, clean, and ready for customers.
Related posts:

Brian is a WordPress support specialist and content contributor at 24×7 WP Support. He writes practical, easy-to-follow guides on WordPress troubleshooting, WooCommerce issues, plugin and theme errors, website security, migrations, performance optimization, and integrations. With a focus on solving real website problems, Brian helps business owners, bloggers, and online store managers keep their WordPress sites running smoothly.
