
Guide to Establish an Online Business – Integrating WooCommerce with WordPress
Last updated on August 10th, 2021 at 01:21 pm
As much as the thought of running an online store appeals to the owner, the process of setting up daunts the same. Considering that you never have had any faceoff with technical development and deployment, establishing an online store all by yourself might appear to be a bit difficult right?
Even if you don’t have much knowledge about WordPress or setting up an online store, this article will help walk down the process of integrating woocommerce with WordPress to kick-start your online business. But before that, let’s have a look at why do you need an online store in the first place.
Why Do You Need An Online Store?
With the growing trend of online shopping and the wave of digitization, every business owner today is expected to have an online store, let alone a digital presence. Further, statistics show that:
- The global worth of e-commerce sales to cross $4 trillion by 2020
- 42.9% increase in mobile sales by 2020
- Around 2.14 billion people are expected to make a purchase online by 2021.
These figures are sufficient enough to outline the potential of an online business followed by the need to integrate one for your business.
Setting Up An Ecommerce Store
WordPress, though initially, a blogging platform has grown as one of the top CMS enabling entrepreneurs to use it and turn it into any form of the website, or E-commerce website, to be specific here. The platform acts as backend software empowering the needs of establishing an online store and run to its full potential. However, the WordPress site alone cannot serve as a platform to run your online business. You need to collaborate with a dedicated portal and here, we would use WooCommerce.
WooCommerce integration is by far, one of the best ways to create a digital presence of your brand and start your own online business.
Prerequisite of Integration of WooCommerce with WordPress
- A domain name
- A Web hosting account
Once, you have all three in your hand, we can now proceed towards the main steps of setting an online store.
Step 1: Domain Name and Web Hosting
A domain name is nothing but the unique address associated with your store and Web hosting is the remote computer that stores all your files and data, enabling global access.

To set up a domain name and register for web hosting, you can connect with any of the web hosting service provider. They have different packages based on different features. As a starter, opt for a basic plan but make sure that plan includes the option of:
- SSL Certification
- Ability to upgrade plans
- Provide significant webspace.
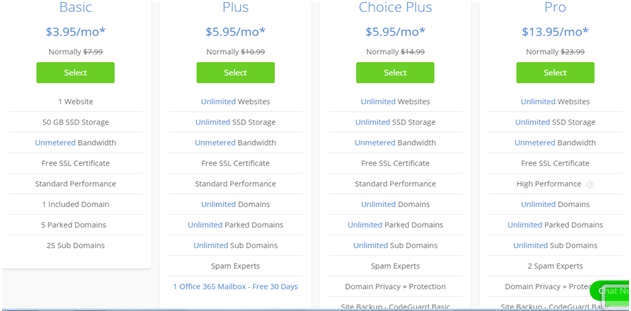
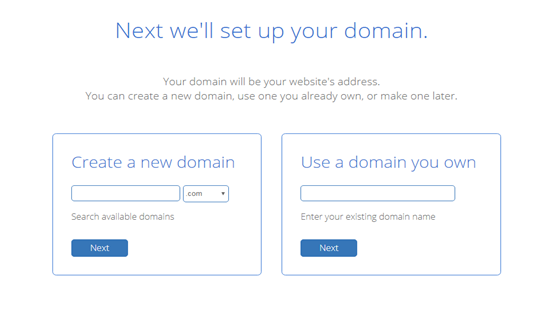
You would need to buy the plan depending upon your requirements. Once you purchase a plan, you need to next set up a domain name. Keep it something that is both short and attractive, and one that speaks for your business.
Step 2: Set Up WordPress
Now, you need to install WordPress on your hosting account.
As you click to open the homepage of your hosting account, you would find an option of “Install WordPress“. Follow the instructions to install your WordPress website. This is just a blank website which you can access through the selected domain name.
Steps To Set Up the WordPress Website
- Start with logging into your account with the BlueHost website.
- Hover around the page to visit the control panel.
- Here, you will find an option that says Install WordPress.
- Choose from the available list of domains that you would like to add to your website name and give it the online presence.
- Once you have selected the domain, you can now move ahead with the installation by clicking on the “Install Now” button.
- After the process is completed, you will be given access to your all-new WordPress website.
Do not forget to configure the WordPress site so that it loads with HTTPS and not HTTP. Though your hosting package supports the above, you would still need to embed changes manually.
- Click Settings -> General Page
- Modify the WordPress site address to https
- Scroll down to the end of the page and click save
You are now ready to use your WordPress site and optimize it as the online store.
Step 3: WooCommerce Integration
The final thing you need to do to start your online store is integrating woocommerce with WordPress site.
- Navigate to the WordPress dashboard, click on Plugins -> Add New.
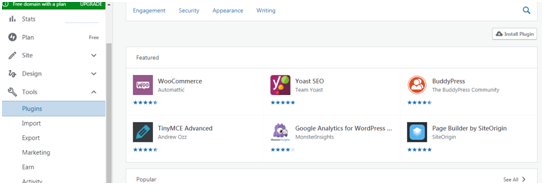
- Click on Install Now -> Activate
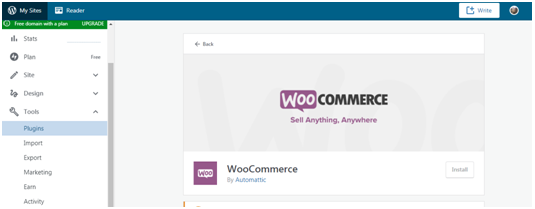
Once activated, a wizard pops-up and you can now just click on Let’s Go. An online store isn’t a normal site that you will design it the way you like. To run a professional store, you would require to customize the store. And there comes in the next step.
Set Up The Store Location
As woocommerce welcomes you, a wizard pops up that ask you to feed local store details like the country, the store address, the currency in which your store would operate, and the types of products you plan to sell. Once you have entered all the desired information, you can then click on continue.
Set Up Pages
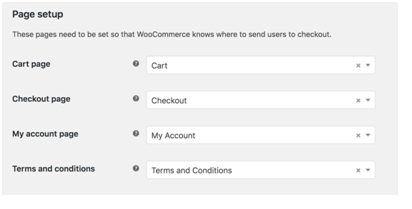
The second wizard that appears on the screen would ask you to add pages within your woocommerce store. Though this has to be specific to your store, you can leave the job to the site, for now. Click on the continue option and WooCommerce would set up the following pages for you:
- Shop – page to display the products for purchase.
- Cart – page where products are added by the customer before checkout.
- Check out – a page where customers choose the method of shipping or delivery and pay to close the sale.
- My Account – Customized page for the registered customers detailing their past orders and relevant information.
After this, you need to set up the locale, one that highlights your origin, and currency.
Shipping & Taxes
The next process involves setting up the shipping details and configuring your store to ship both in local and international zones. You can now choose the unit dimension and also set when to choose a flat rate or free shipping. The woocommerce integration also allows you to set live rates. The woocommerce integration with WordPress gives you ample choice in terms of picking up the popular carrier services like FedEx, UPS, etc. Moving ahead with the shipping settings:
- Select whether or not you are to ship physical products. Checking the box, WooCommerce would fill the details.
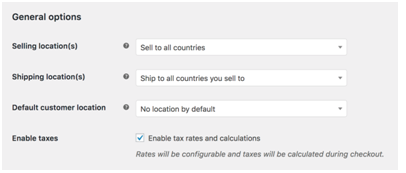
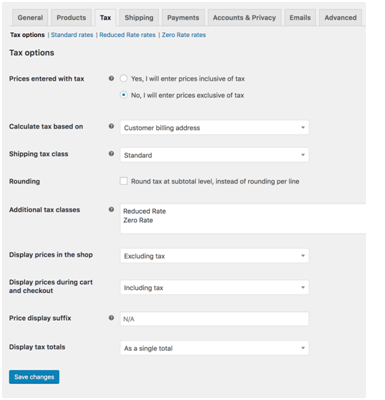
- Finally, the tax to be associated with the product. In case you are to charge tax, WooCommerce would display the rates and take care of the rest. Just double-check the details to be on the safer side.
Payment Wizard
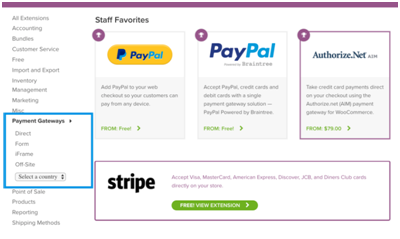
Here we set up payment options for your woocommerce store. As you would open the wizard, there appear a few choices like PayPal, Stripe. Go ahead with selecting a payment for the same. WooCommerce has multiple options, however PayPal and stripe are the ones suggested. Make sure you have a registered PayPal or Stripe account to connect it with your e-commerce store.
You can also add third-party payment plugins. But for now, let’s stick to the one provided by the store.
Store Optimization
Apart from the basic settings, the setup wizard also prompts several tools that you can integrate within your WooCommerce store to optimize and enhance the overall site functionality. These include Automated Taxes, Facebook integration, MailChimp, and WooCommerce Admin. Either, let them stay the way they are or check the ones that you wish to add to your online site. Press Continue.
Connect With Jetpack
Another feature or choice prompted by the wooCommerce setup wizard is the jetpack integration. For the site managers that prefer automating the taxing process and the payment collection method, jetpack integration would serve the purpose best. In addition to the basic features, jetpack also offers better security, improved store monitoring, greater product promotion, and 360° view of the store statistics.
To integrate the tool, press Continue with Jetpack. Here, you would first need a Jetpack account. To create the same, either go for social media sign in or manually entering the username, email address, and password. Either way, integration would have you active on the jetpack account. The difference lies in the next phase, a new account creation would land you on the Jetpack interface whereas the social media sign up would take you directly to the last phase of the setup process.
Add Products
Seems your online wooCommerce store is ready? But how do you sell? Where are the products? Oops!
Don’t worry! We are now going to add products within the woocommerce store. You can add products manually within the store or if you already have a list of products in a CSV file, you can simply import them.
After the products are uploaded, you would need to define each and turn them market-ready.
Before, getting into the details of adding and describing, let me define three major aspects of a product.
a) Category
b) Attributes
c) Type
The category of the product is the generic name or the generalized view of the product which you can add to streamline the process of searching. For instance, if you are adding t-shirts, you can categorize these as top-wear, lowers for pants/pyjamas and accessories for additional items. You can also segment products based on whether it is a men’s product or women’s. This enhances the search process and makes it easier for users to track products.
The product attributes are its physical properties. The color, the fabric, and the size, all are part of the attributes. You can set product-specific attributes or designate a single kind for all of the products. Setting up the attributes of the product, helps customers find the best of the kind and choose one that intimidates them the most.
Finally, the type. It states whether the product is actually a product or it’s some kind of service, whether it is downloadable or can it be shipped, etc, etc. Ok, you need not scratch your head to segment the type of the products. Woocommerce integration with WordPress has inbuilt types as:
- Simple – The type simple suggests that the product works as a stand-alone item and can be shipped as a single entity. For example physical books.
- Grouped – This is for items that are more than one in frequency and related to each other like a dozen shot glasses.
- Virtual – Here, the products act or are services that are used and not shipped directly to the user.
- Downloadable – Purchasing images, Songs or videos aren’t physical. Instead, they are digital products and can be downloaded. Hence, the type of downloadable.
- External – Something like hosting a product that is displayed on your store but you aren’t the owners. It is sold somewhere else.
- Variable –Something that can vary in different aspects as the size or the color, etc.
After knowing up all the prerequisites, it’s time to add products within your online store. Prime entries include:
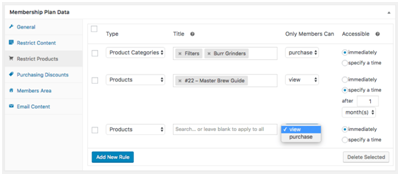
a) Product name
b) Product description
c) Short Description
d) Product Categories
e) Product Tag
f) Product Image
g) Product Gallery
To add the product:
- Navigate to the WordPress dashboard, scroll down to Products -> Create Product. You can also jump to the Products and then, click on Add New.
- A wizard opens, here type in the name of the product and then draft a description about the same. Make sure that the description holds information relevant to the product.
- Now, move on to the section of Product data and select the product type. You can add significant other information such as stock, price, and inventory, linked products and shipping details.
- Head straight to the bottom and add a short product description which is visible just below the name of the product.
- Once you are done with the detailing part, you can then choose the product categories, set tags, upload the featured image, and fill in the product gallery with relevant images. All of these are similar to the WordPress post. The option of Catalog is something new and you can set that as:
a. Shop and search results: Global visibility of the products: search results, shop pages, and category.
b. Shop only or Search results only: Choosing the setting would restrict the visibility of the products. This happens in the smell that either the products are visible on shop and category pages or just the search results.
c. Hidden: Picking up this would confine the products to the single product page. - Completed with the above, you can now publish the site and preview the same.
If required, you can add, update and delete products from the store. Managing orders is easy with the woocommerce order menu. All you need to do is scroll to the left bar, click on order and have a streamlined view of the orders: active, completed and failed. You can also update the status of the order. The woocommerce setting page gives you the ease to modify or update the page.
- Add/remove payment
- Integrate plugins
- Configure e-mail
- Alter shipping methods
- Change account setting
- Modify tax rates.
In the end, you can customize the store, add themes, integrate plugins, and install extensions on the go.
Undoubtedly, woocommerce integration is an excellent tool to start your online store. And why not? It does not mandate any technical skills. All you need to do is take the step and get started!


