
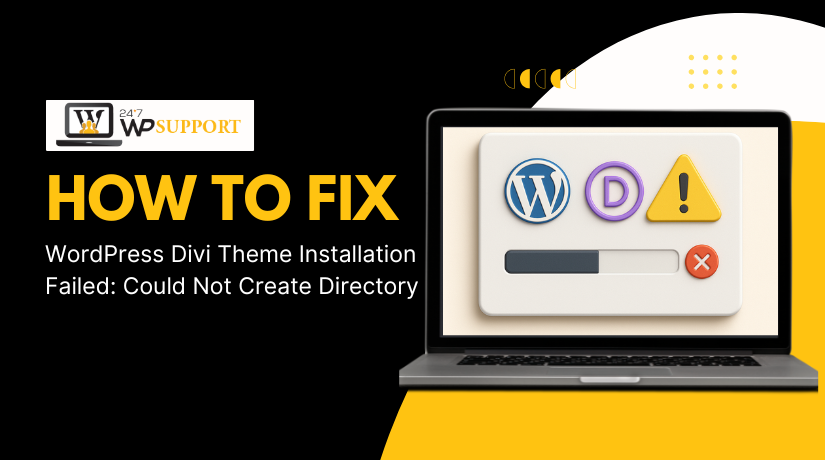
WordPress Divi Theme Installation Failed: Could Not Create Directory Fix
Last updated on October 10th, 2025 at 05:20 am
Introduction
One of the most potent WordPress themes out there is Divi. It has numerous design tools and a built-in page builder. Many users choose Divi for its flexibility and ease of use.
However, sometimes users face problems during installation. One common error is:
“Installation failed: Could not create directory.”
This error often appears when you try to upload or install the Divi theme from your WordPress dashboard. The entire process may halt, leaving you dissatisfied and uncertain about what to do next.
This issue usually means that WordPress cannot create a new folder to store the theme files. This could occur for several causes, such as:
- Your server’s incorrect file or folder permissions
- Hosting limitations or server settings
- Upload size restrictions in your WordPress setup
- Problems with your theme zip file
You might be surprised to learn how frequent this issue is, especially with big themes like Divi. Since the Divi package contains many files, it requires proper server settings and permissions to install correctly.
But don’t worry, you can quickly solve the problem with the help of this guide.
Whether you are new to WordPress or a Divi pro, this step-by-step guide is for you.
Understanding the “Could Not Create Directory” Error
When you see the error “Could not create directory” in WordPress, it means the system failed to create a folder. This is needed to store your theme or plugin files. It often appears when you try to install large themes like Divi.
This issue usually happens because WordPress does not have permission to write or create folders in the server. The folder path where this fails is usually:
/wp-content/themes/
Here is what this error means in simple terms:
- WordPress is trying to create a folder
- The server blocks that action
- As a result, the installation fails
The message may look like this:
“Installation failed: Could not create directory.”
This problem is not unique to Divi. It can occur with any plugin or theme. But Divi is large in size, so the chances of hitting this error increase.
When Does This Error Occur?
The error usually shows up during:
- Installing a new theme (like Divi)
- Updating a theme or plugin
- Uploading files through the dashboard
Why It Happens
There are several reasons why this happens:
- Incorrect file or folder permissions
- Your server user doesn’t have write access
- Your web host has strict security rules
- Upload limit is too low for large themes
This problem blocks WordPress from making new folders. It affects the upload and install process completely.
Why Does the Divi Theme Installation Fail?
The Divi theme is large and complex. It includes many files and advanced features. Because of this, some WordPress setups struggle during installation. Let’s investigate the cause of the installation failure before attempting to resolve the problem.
This section covers the most common reasons behind the error:
“Divi theme installation failed: Could not create directory.”
- Incorrect File and Folder Permissions
The most frequent cause of the error is this. WordPress needs permission to create folders and write files on the server. WordPress will prevent the upload if the file or folder permissions are not proper.
Folders should usually have 755 permissions. Files should have 644 permissions. If these are set wrong, the system can’t create the required theme folder. That’s when you see the “could not create directory” message.
This can happen after:
- Changing servers or hosts
- Transferring WordPress to a different domain
- Manually changing server settings
- Ownership Issues on the Server
Every file and folder on your site has an owner. If the owner is not the web server, WordPress may not have the rights to create new folders. This can happen if files were uploaded using a different user or tool.
For example:
- If you uploaded WordPress files via FTP as a different user
- If your hosting uses strict security with multiple user accounts
This results in a permission conflict, which causes the directory creation to fail.
- Upload File Size Limits
Divi is a large theme, often more than 40MB. Many shared hosting plans have small upload limits, like 2MB or 8MB.
If your site’s PHP settings are not updated, the theme upload can fail. WordPress will try to unpack the ZIP file, but it won’t complete.
These problems are tied to size limits, not just file permissions.
- Hosting Restrictions or Misconfiguration
Some hosts block folder creation for security reasons. This is common in low-cost or shared hosting environments. These settings may prevent WordPress from writing to the necessary folders.
Common causes include:
- Safe Mode or open_basedir restrictions
- Server firewall blocking PHP scripts
- Misconfigured .htaccess rules
Even if WordPress works fine otherwise, Divi may still fail during install.
How to Fix “Could Not Create Directory” Error
Let’s move on to the solutions now that you are aware of the causes. Fixing the Divi theme installation failed error is not difficult. You just need to follow the right steps in the correct order.
This section covers all working solutions to fix the error permanently.
- Fix WordPress File and Folder Permissions
Incorrect permissions are one of the biggest causes of this error. WordPress needs the right access to write files and create directories.
What are the correct permissions?
- Folders: 755
- Files: 644
If your folders or files use different permissions, WordPress cannot write to them.
How to fix permissions:
FTP or cPanel can be used for this.
Using the File Manager in cPanel:
- Log in to your hosting cPanel.
- Open File Manager.
- Go to your public_html or WordPress root folder.
- Right-click the wp-content folder > Choose Permissions or Change Permissions.
- Set permissions to 755.
- Open the themes folder inside wp-content.
- Do the same for it—set permissions to 755.
- For files inside the folders, set them to 644.
Using FTP (like FileZilla):
- Connect to your site using FTP.
- Navigate to wp-content/themes/.
- Right-click > Set file permissions.
- Enter 755 for directories and 644 for files.
- Use the recursive option for all subfolders and files.
After correcting the permissions, try uploading the Divi theme again.
Keyword used: fix wordpress file permissions 755 644
- Install the Divi Theme via FTP
If the WordPress dashboard still gives errors, try installing Divi manually. FTP is a direct and reliable method to upload large files like Divi.
Steps to install Divi via FTP:
- First, extract the Divi ZIP file on your computer.
- Open your FTP client (FileZilla, Cyberduck, etc.).
- Connect to your server using your FTP login details.
- Navigate to wp-content/themes/.
- Upload the unpacked Divi folder to this location.
- Wait for the upload to complete (it may take a few minutes).
- Go to your WordPress dashboard.
- Navigate to Appearance > Themes.
- You’ll see Divi listed there—click Activate.
This method avoids file size limits and permission issues during the upload process.
- Increase WordPress Upload and PHP Limits
If your server has strict upload limits, Divi may fail to install. Increasing your upload limit can solve problems like:
- The theme not uploading
- “Link expired” error
- Theme extraction failure
How to increase the upload limit:
You can change this in a few ways, depending on your host.
Method 1: Edit php.ini File
Add or update these values:
upload_max_filesize = 64M
post_max_size = 64M
max_execution_time = 300


Method 2: Edit .htaccess File
Add this to the top of the file:
php_value upload_max_filesize 64M
php_value post_max_size 64M
php_value max_execution_time 300
php_value max_input_time 300
Method 3: Contact Hosting Support
Ask your hosting company if you feel uneasy making changes to these files. Many shared hosts will increase these values for you.
- Ensure the Theme ZIP File is Correct
Sometimes the downloaded Divi file contains more than just the theme. Elegant Themes includes documentation and extra files in the main ZIP. If you upload this full package, WordPress may fail to unzip it.
What to do:
- Extract the downloaded ZIP file on your computer.
- Inside, find the correct file named Divi.zip (this is the actual theme).
- Upload this file only, not the whole package.
- Switch to a Better Hosting Environment (Optional)
If you keep running into issues, your hosting may be the problem. Low-tier shared hosts can have:
- Poor file permission handling
- Strict PHP limits
- Blocked functions needed by WordPress
In such cases, consider moving to a WordPress-optimized host. These hosts support large themes and complex builders like Divi.
Always clean your browser’s cache and the site’s cache after using these changes. Then try installing the Divi theme again.
Fixing the “Unzip Theme Package” Divi Builder Error
Sometimes when you try to install Divi, you may see a different error. One common message is:
“Unpacking the package… Could not create directory.”
Or you might get:
“The package could not be installed. The theme is missing the style.css stylesheet.”
These errors are related to unzipping issues during the installation process. They often appear when the uploaded file is too large or incorrect.
Why This Error Happens
The error happens when WordPress fails to extract the ZIP file. This can occur for several reasons:
- The uploaded ZIP file is too large
- Your PHP settings have low file size limits
- You are uploading the incorrect Elegant Themes bundle ZIP file.
- The server lacks permission to create folders during extraction
Large themes like Divi put extra pressure on your hosting resources. If limits are low, the unzip process will fail before it finishes.
How to Avoid or Fix It
To avoid the unzip error, make sure you’re uploading the correct file. Elegant Themes often gives you a full package, not just the theme.
Follow these steps:
- After downloading the main ZIP file from Elegant Themes, extract it.
- Inside, locate the correct file: Divi.zip.
- You must upload this theme file to WordPress.
- Go to Appearance > Themes > Add New and upload Divi.zip.
- If it still doesn’t work, manually upload and install it using the FTP method.
Use FTP for Large Theme Files
If unzipping fails even with the correct file, FTP is the best option. It skips the unzip step and lets you place the theme folder directly.
This avoids errors caused by low PHP memory or upload time limits.
How to Prevent Divi Theme Installation Errors
Once you’ve fixed the error, the next step is to prevent it from happening again. Future time and frustration can be avoided by taking a few wise actions now. This section explains how to keep your WordPress setup optimized, so the “could not create directory” error doesn’t return.
- Use Only the Correct Theme File
One of the most common mistakes is uploading the wrong ZIP file. Elegant Themes often gives a full package that includes:
- Documentation
- License details
- PSD files
- And the actual Divi theme ZIP
Uploading the full package will confuse WordPress and lead to errors like:
- “Missing stylesheet”
- “Could not create directory”
- “Unzip failed”
Prevention Tip:
Always unzip the downloaded file first. Locate the correct file — usually named Divi.zip — and upload only that file through the WordPress dashboard.
- Set the Correct File and Folder Permissions
Incorrect permissions block WordPress from creating or writing to folders. Every time you change hosting, migrate your site, or restore a backup, file permissions can get reset.
Recommended Settings:
- Folders → 755
- Files → 644
Use your hosting panel or an FTP tool like FileZilla to check and correct these values. This ensures WordPress has the proper access to perform theme installations, updates, and uploads.
- Upgrade Your Hosting Plan (If Needed)
Many cheap shared hosting plans have limited resources. They may restrict:
- File upload size
- Maximum execution time
- File access permissions
These limits can cause large themes like Divi to fail during installation.
What to Look For in a Host:
- WordPress-optimized environment
- PHP version 7.4 or higher
- Minimum 128MB memory limit (256MB recommended)
- Upload size limit of at least 64MB
Your WordPress experience will run much more smoothly if you select a host with up-to-date server configurations.
- Keep PHP and WordPress Updated
Outdated software can also cause compatibility and installation issues. Divi may not function properly on older PHP versions because it uses more recent PHP functions.
Best Practices:
- Keep WordPress updated to the latest stable release
- If you’re not sure, ask your host to update your PHP version.
- Update themes and plugins frequently to avoid conflicts.
Staying up to date improves security, performance, and compatibility with larger themes like Divi.
- Monitor Upload Size and Timeout Limits
Even after fixing file permissions, your server may still block uploads due to low PHP settings. If you deal with big themes a lot, make the following adjustments:
upload_max_filesize
post_max_size
max_execution_time
max_input_time
Set these values to:
upload_max_filesize = 64M
post_max_size = 64M
max_execution_time = 300
max_input_time = 300
You can adjust these settings in .htaccess, php.ini, or wp-config.php, or ask your hosting support to do it for you.
Conclusion
Building your website with Divi should be simple, not stressful. Technical errors like “could not create directory” can be frustrating, especially when you just want to launch your design. However, you can prevent these issues and maintain a productive workflow by using the appropriate approach.
If you’re ever stuck, don’t waste hours troubleshooting alone. Whether it’s a theme upload issue, a permission conflict, or a server configuration problem, getting expert help can save your time and protect your site.
Our team at 24x7WPSupport.com is ready to assist you anytime — day or night. We specialize in fixing WordPress errors fast, including Divi theme problems, plugin conflicts, file permission issues, and more.
Get instant help now and enjoy peace of mind while working on your WordPress site.
Visit 24x7WPSupport.com — because your website deserves zero downtime.
Related posts:
WordPress iFrame and How to embed Video and content in WordPress?
Does WordPress Have a Testing or Sandbox Environment?
Admin vs Editor vs Moderator: Key Differences Explained
Online Communities & WordPress Support Forums You Should Know to Help
Does Showit Work With WordPress? Setup, Linking, and Cost Explained

Brian is a WordPress support specialist and content contributor at 24×7 WP Support. He writes practical, easy-to-follow guides on WordPress troubleshooting, WooCommerce issues, plugin and theme errors, website security, migrations, performance optimization, and integrations. With a focus on solving real website problems, Brian helps business owners, bloggers, and online store managers keep their WordPress sites running smoothly.
