How to Migrate Products and Orders in WooCommerce?
Any store visitors would love to browse products, add their favorites to their cart, and purchase. WooCommerce offers a plethora of options for managing and maintaining orders.
It allows store owners to add or update products to their WooCommerce consistently and easily. This plugin even supports to migrate products and orders in WooCommerce stores.
Moving or copying details of each order or product is time-taking and complicated. You need to adopt easier processes to make things in a proper manner. Importing and exporting data is the quickest technique to migrate products and orders in WooCommerce.
Introduction to WooCommerce
WooCommerce allows you to whirl around a standard WordPress website into a fully-functional e-commerce store. This plugin stands out from its other contenders. It is hard to resist WooCommerce for developing an online store employing WordPress.
You will get complete ownership of the content that you publish.
Product types of WooCommerce
Rightly, WooCommerce has six types of products. Hence, it is our job to identify each type of product type and its advantages. Also, you need to analyze how it will enable optimum conversion.
Let’s understand the product types of WooCommerce:-
- Simple Product
This type of WooCommerce product type is unique and requires shopping. But it does not have many options. The major products come under this type.
- Virtual Product
You do not need a shipping option for this product type. Enabling this will disable the fields of shipping automatically.
- Downloadable Product
Choosing this WooCommerce product will do the activation of the new field. It will offer a new link for downloading the product. The shoppers can easily download the file using the link. They will receive this via email once the shoppers have made their purchase.
- Grouped Product
This is the compilation of simple products that can be separately purchased.
- Affiliate/ External Product
These are those WooCommerce product types that are described and listed on your site but elsewhere sold.
- Variable Product
They are product types with variations. Each has a various price, SKU, and many more.
How to Migrate Products and Orders in WooCommerce?
Hover over the menu Products on the dashboard of WordPress. Tap Add New for creating a new product.
Fill in the details that are default such as:-
- Name of the Product
- Description
- Short Description of the product
- Tags
- Categories
- Add the image of your orders or items
- Add the images to the product gallery
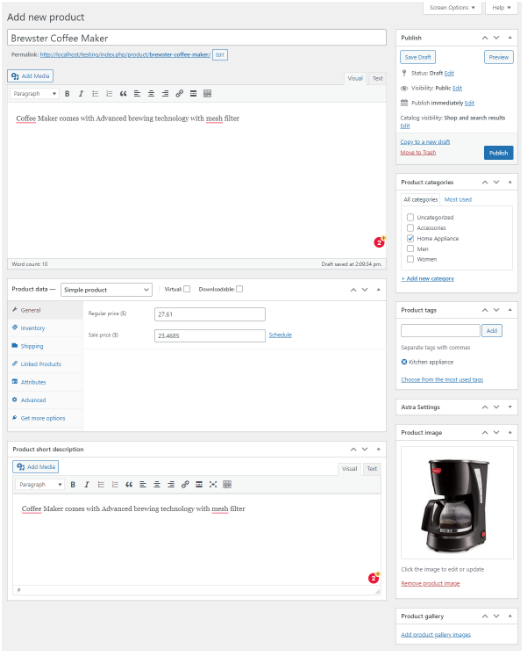
You can keep your product description as per your requirement. You can even add advantages of the product. Make sure to optimize the product description and title for keywords.
Select the WooCommerce Product Type
From the dropdown, pick one WooCommerce product type. This you will find in the product data meta box.
Check Virtual if you are selling a digital product and Downloadable for attaching the file to download. Checking will enable the options.

Product Data Meta Box
Fill in all the information in the Product data meta box after choosing the WooCommerce product type.
There are seven sections included in the product data box. They are:-
- General
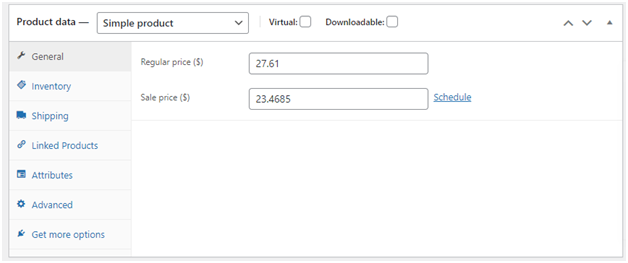
Here, you can add the price value for sales and regular prices. You can implement the sale value price if you provide discounts. Else, you can implement the regular cost.
Choose the status of tax even if it is taxable or not. Select the tax class if it is taxable.
- Advanced
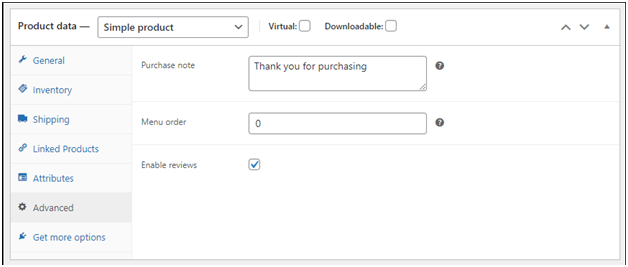
In this tab, you can add the note for purchase that will be displayed after placing an order. You can set the item’s order position using the menu orders. You can also enable the option for reviews.
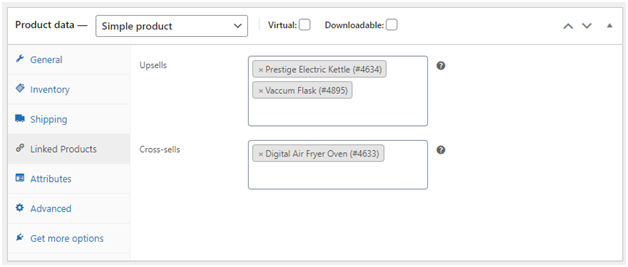
- Linked Products
You can provide recommendations to your customers using the option of linked products. You can also do up-selling and cross-selling.
To the checkout page, you can add your upsell product.
- Inventory
Through this tab, you can manage your stocks.
For making it visible, visit WooCommerce. Hit Settings and click Products. Lastly, tap Inventory to migrate products and orders in WooCommerce. Do not forget to enable stock management and add value to the SKU.
SKU is basically the number for identification that is given for each WooCommerce service or product. You can manage this manually or employ a plugin for building SKUs.
I am text block. Click edit button to change this text. Lorem ipsum dolor sit amet, consectetur adipiscing elit. Ut elit tellus, luctus nec ullamcorper mattis, pulvinar dapibus leo.
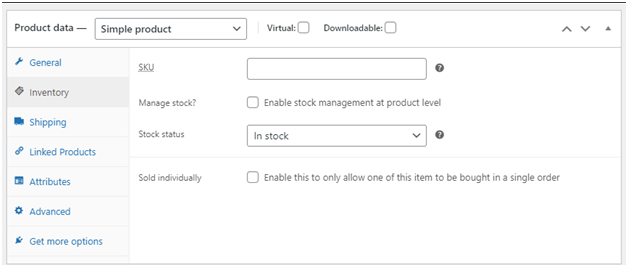
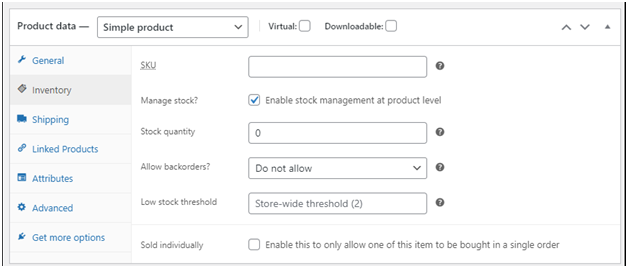
You need to enable Manage stock to check fields such as:-
- Low stock threshold
- Allow backorders
- Stock Quantity
Else, you need to update the stock manually. WooCommerce will display the product as soon as you enable WooCommerce.
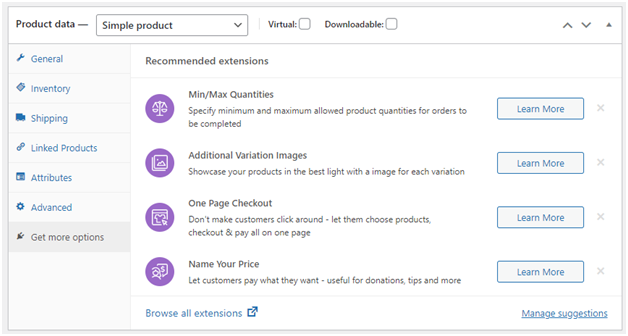
- Get More Options
You will be recommended a list of premium extensions of WooCommerce to purchase and employ in your store.
Now, that you have added all the details of the product, hit Publish just by implementing the blog post.
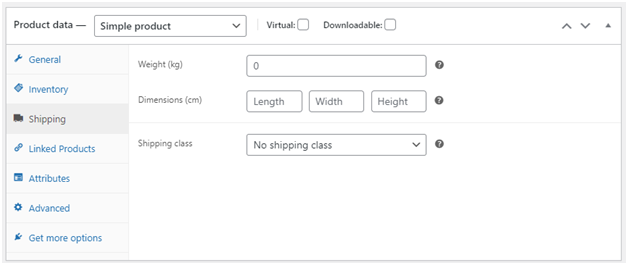
- Shipping
Enter the product’s dimension and weight that needs to be shipped. You will see a field that is termed Shipping Class.
It will cluster the product as per the weight limits. It will allow you to manage products with similar weights & use the specific shipment service.
- Attributes
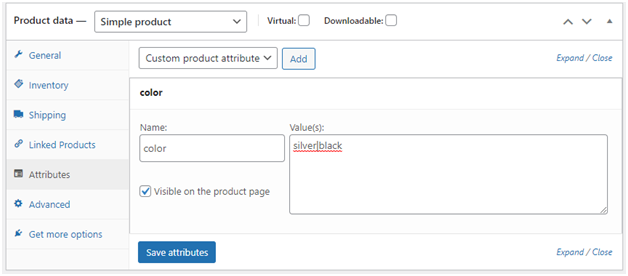
In this tab, you can implement attributes like size, color, and many more. You will find the button Add next to the Custom product attribute.
Enter the name of the attribute. Some values of the attributes are segregated with pipelines. Click the option Add button to add different attributes.
Once you are done filling in attribute details, tap the option Save.
WooCommerce Orders
The orders will be generated as soon as the customer completes the process of checkout. They are only visible to Shop Manager clients and Admin. You will see a unique ID and specific status for each order.
Order Statuses will enclose the following:-
- Checkout draft
- Authentication Required
- Canceled
- On Hold
- Refunded
- Processing
- Pending Payment
- Failed
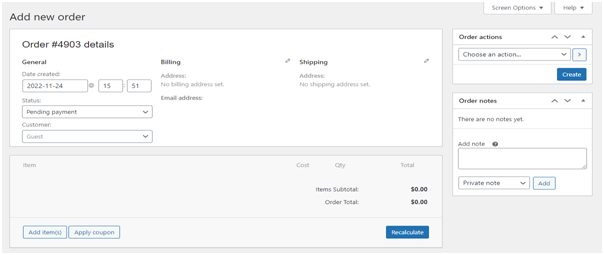
These statuses are a great way to order tracking from Pending payment to Completed. Under the menu of WooCommerce, you can add orders manually. For this,
Hit Add New and you will see a single order page. You need to share the line items and customer details. Apply Fees and Coupons and estimate the totals.
Set the status for anyone such as Pending Payment or Completed. Then, hit the option Save. The order will be successfully added.
Importer Plugin
You can opt for an export-import plugin like WP Ultimate CSV Importer. Through this plugin, you can manage the process of export-import of complex data. You can export & import bulk data in XML or CSV files.
You can get CSV Importer on wordpress.org and this can be downloaded for free.
In the free version, you have 20,000+ active installs and total downloads of 1,117,755. These numbers clearly signify that this is the most popular on wordpress.org.
You can download this plugin for free and enjoy the features such as:-
- Custom fields
- WooCommerce bundles
- WooCommerce products
- Pages
- Import-export posts
- Custom Posts
- Users
- Taxonomies
For advanced features, you need to switch to CSV Importer pro. In this, you get options for updates and scheduling. It gives support for plugins such as Yoast, WooCommerce, JetEngine, Toolset, etc.
How to Migrate Products and Orders in WooCommerce from your existing website?
It is easy to migrate products and orders in WooCommerce from your old website.
Migrate Products and Orders in WooCommerce
The default WordPress export tool can export all the details in the XML file format. However, it has no choice but to pick other formats of files and export specific data. Go for an exporter plugin.
Let’s understand clearly how to migrate products and orders in WooCommerce using CSV Importer pro.
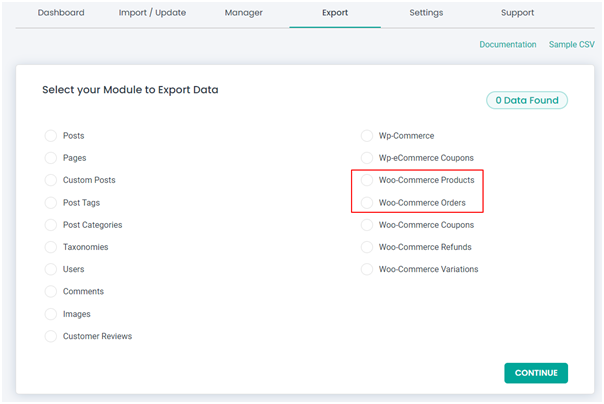
- Navigate to the tab of Export.
- Select the Woo-Commerce Products module for exporting products. Else, you can for Woo-Commerce Orders for ordering export. Hit the button, Continue to migrate products and orders in WooCommerce
You need to configure the following on the next page:-
- Name of the File
- Options for Advanced Filter
- File Type
Use the option of split records for splitting and exporting the records to separate files.
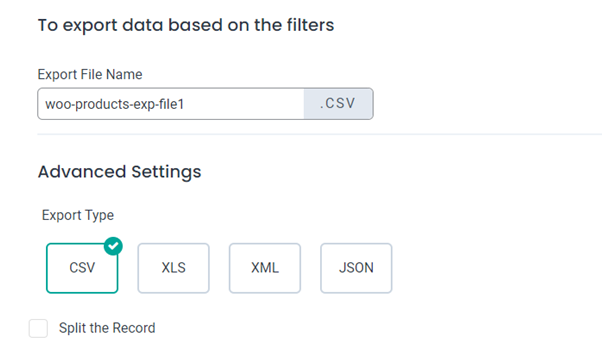
You need to do the configuration of the filters to extract the Product records or specific pages. It allows you to export the data of a specific category, period, inclusions, etc.
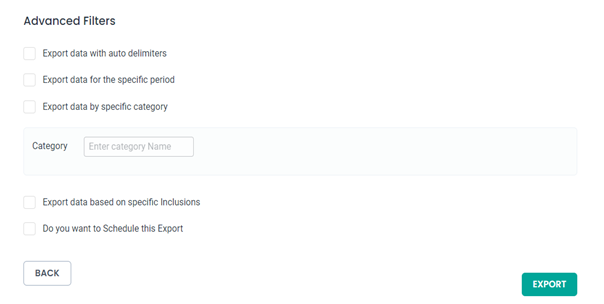
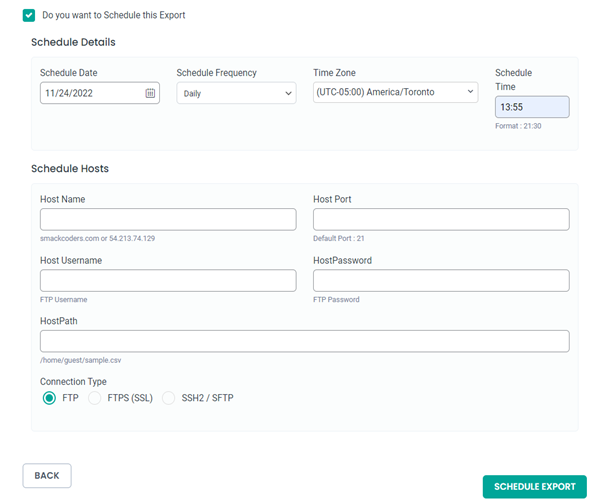
You get the schedule options for exporting. For this, you need to check on Do you want to schedule this export. Share the details of scheduling such as Timezone, Frequency, Date, and Time. Next, hit the button Schedule export to migrate products and orders in WooCommerce.
If your business does not require a scheduling option, then tap Export.
Hit Download to migrate products and orders in WooCommerce. Do not forget to save the exported file to your system.
Migrate Products and Orders in WooCommerce, i.e New site
As same as WordPress’ default export option, there are some restrictions set for import options too.
You need to migraine products and orders in WooCommerce using XML or CSV files. For this, you can go for WP Ultimate CSV Importer.
Steps to Migrate Products and Orders in WooCommerce using WP Ultimate CSV Importer
Pick the options from External URL/ SFTP/ FTP or desktop to upload XML/ CSV.
Choose post type fr
From the dropdown, you need to select the post type.
For importing the products, the post type will be WooCommerce Product and for importing orders, it will be WooCommerce Orders.
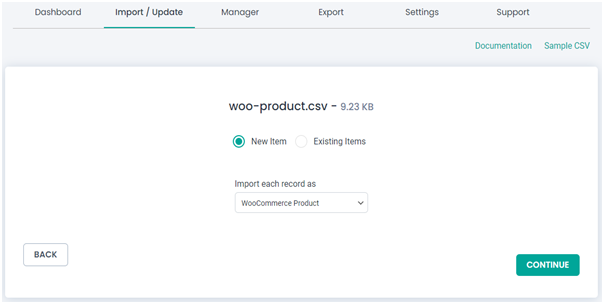
Map all the headers CSV with the adjacent fields of WordPress on the next screen. Ensure to map the product-related and order-related fields.
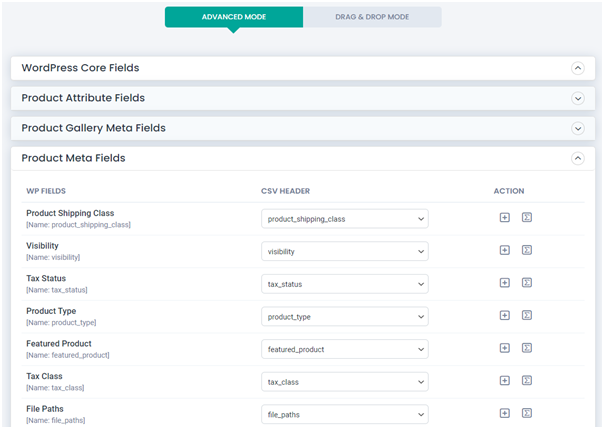
Once done, fill in the name of the template inside the text box- Save this mapping as.
For importing external image URLs use the media handling page. Hit Continue for proceeding to the next action.
Tap Import for importing your Orders/ Products immediately to WooCommerce.
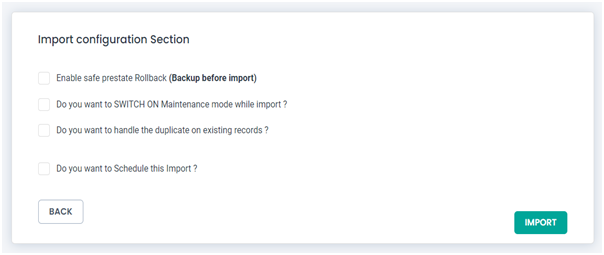
You must do the verification using View Logs. Else, you can do the verification directly inside WooComemrce by navigating to Orders & Products page.
In a Conclusion
Even though it is quick to migrate WooCommerce Products & Orders by exporting and importing files, but may face some errors.
Hence, it will be wise to get WooCommerce support from an eligible team like WP Video Tutorial. We are an advanced team that is adept in WordPress/ WooCommerce design and development services. Our advent developers can help you to make your journey smoother in the web world.


