
How To Make Table In WordPress
Last updated on February 12th, 2020 at 01:08 pm
Alright, if we ask you about how to add the non-visual content to your pages in the most precise manner while giving out a lot of information, your answer must be – create a table and render data in it. But how to do it?
It is undoubtedly possible for the WordPress site owners to create tables for their pages and posts. But for this, you should have an amazing knowledge of HTML and CSS. For the people who are not very good at the technical side, the task remains daunting.
Wait. Is it?
We mean, WordPress has numerous life-saver plugins and there’s nothing you cannot do using this powerful CMS. So, why not try another way of creating table in WordPress i.e. make table using a good WP plugin.
Before we tell you how to do so, let us explain why to do so.
Why should you Add Tables in your WordPress Pages and Posts?
Because –
- You want your readers to understand everything in the least time, and most probably, they want the same too.
- Tables let you arrange the website content in a less clumsy way.
- You want to improve the readability of your website’s pages and posts, in order to enhance its search engine ranking.
- You do not want to create tables in a typical manner i.e. using HTML and CSS.
- Editing or creating tables using a WordPress plugin will save time for you.
Got good enough reasons for making tables in WordPress and that too, through a plugin by visual editing? Now, let’s get started with table creation.
Guide to Make Table in WordPress
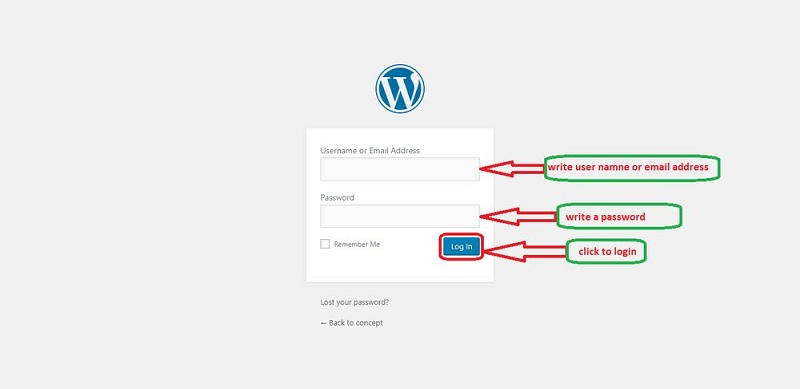
First of all, login to your WordPress website’s admin panel using the username and password that you’ve set for the same.
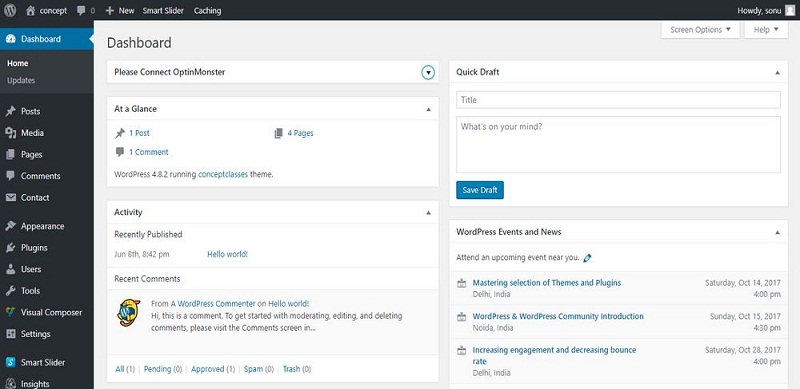
If the credentials are correct, you will see the admin dashboard opened in front of you.
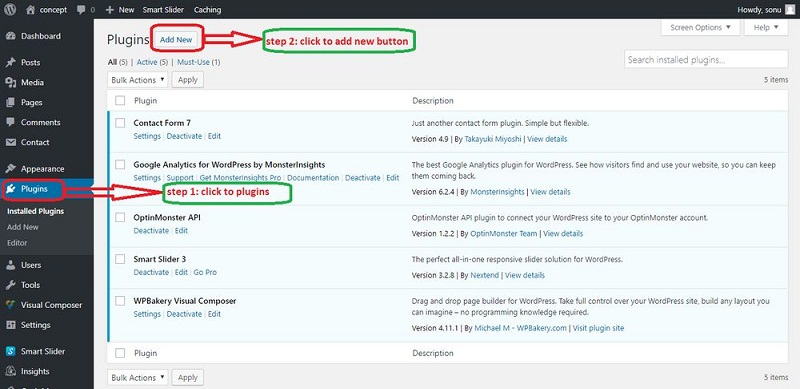
Now, search for the link for ‘Plugin’ page and click on it. From the plugin page, use the option ‘Add New’ to install the plugin for creating tables in WordPress.
Oh, thinking which plugin to use for that?
Wait, we’ll tell.
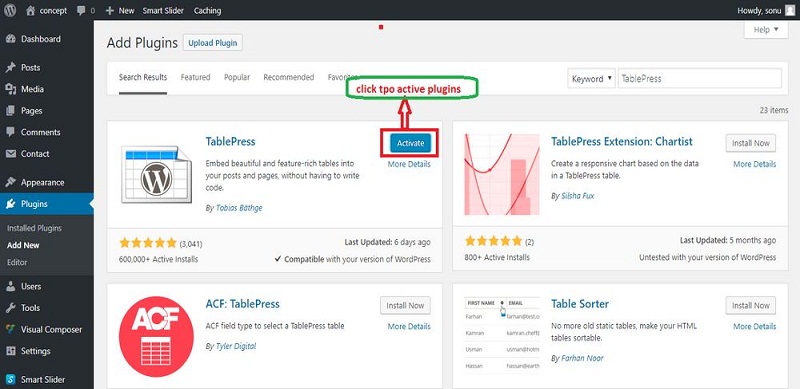
Search for ‘TablePress’ and you will find the plugin.
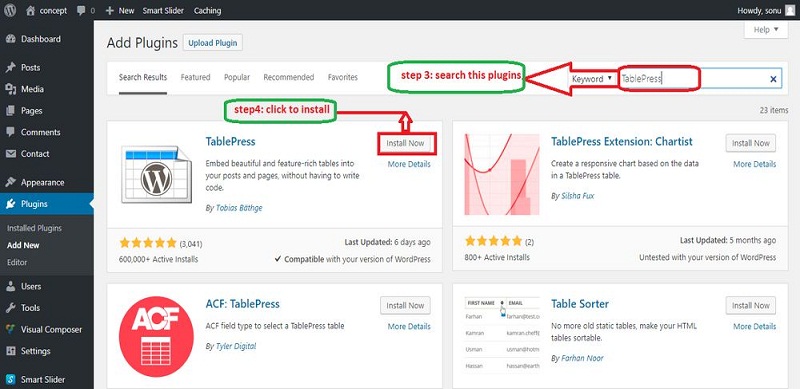
Click on ‘Install’. Once the plugin is installed, just activate it and thereafter, you can start creating tables in WordPress.
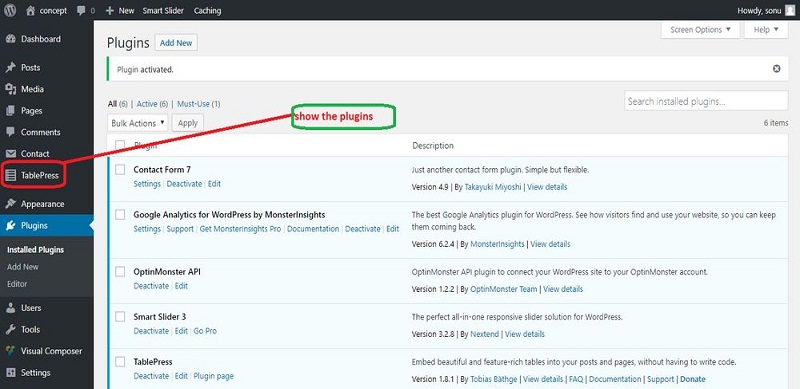
To check whether or not this plugin is installed well, you can go to the plugins page again and check if the plugin is listed there or not. Also, there should be a link named ‘TablePress’ in the left sidebar of your WordPress admin panel.
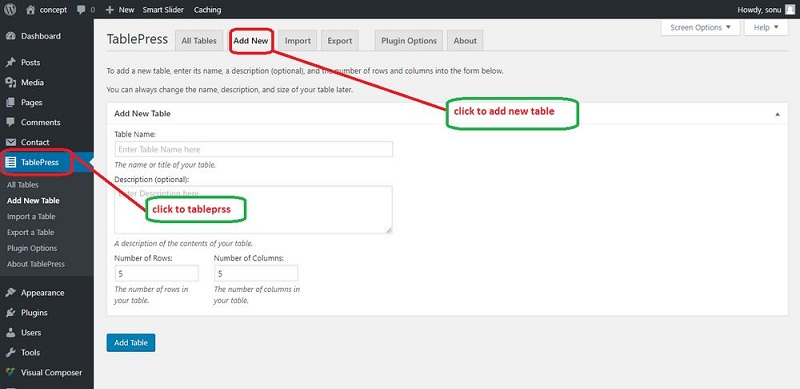
On clicking the link ‘TablePress’, you will find the options for creating, exporting and importing tables. Alongside this, the plugin will let you see all the created tables in one place and configure a few settings related to your tables.
To create a table, click on the ‘Add New’ button from the top of the plugin dashboard, or on the ‘Add New Table’ link, present in the WordPress dashboard.
Thereafter, you can add table name, description (which is optional), number of rows in the table and number of columns in the table. Fill these details and click on the ‘Add Table’ button.
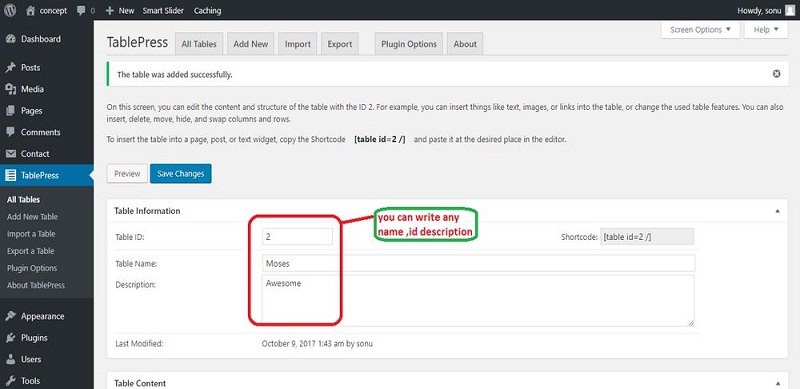
After the previous step, you will be redirected to a new tab which will have details as you’d filled. Now, navigate to the ‘Table Content’ section.
Here, you will see rows and columns, created as you want. Fill in the values of each column here.
Below this section, there are multiple options related to editing your current table. Use these options accordingly wherever needed.
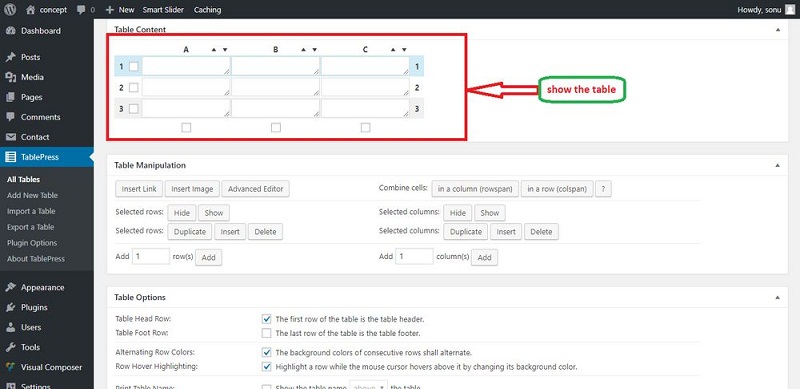
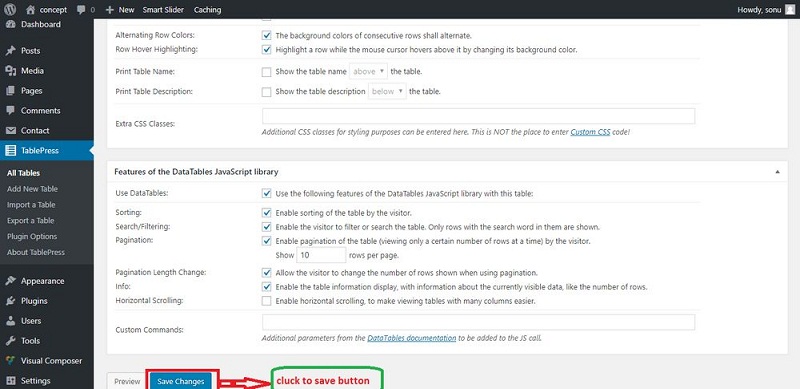
Once you’re done with making the WordPress table, click on the ‘Save Changes button’.
In the end, go to TablePress > All Tables page and search for the table you’d created. Here, you will find the name (or search for its ID, if you have created so many tables) of your table listed in the page. Copy the shortcode for it now.
Whenever you have to render this table in your post or page now, just paste this shortcode and hit the save button. On reloading the page/post, you will find that your table is added to the desired section now.
The Final word
Tables are very important for websites and blogs when you want to add content in the short format while not excluding any information from the page. So, using the method as we’ve explained above, you will be able to do so without hassles. What are you waiting for then? Just create tables from your WordPress dashboard and save time!


