

How to Integrate Stripe Payment Gateway in WordPress?
Introduction
In today’s digital economy, providing secure and smooth payment options is essential for any online business. Stripe has emerged as one of the most trusted and developer-friendly payment gateways worldwide. It allows businesses of all sizes to accept credit cards, debit cards, wallets, and even bank transfers globally.
WordPress, being the world’s most flexible content management system, offers numerous ways to integrate payment solutions. Whether you run an eCommerce store, accept donations, or sell subscriptions, Stripe and WordPress make a powerful pair.
This article provides a step-by-step guide to fully integrate Stripe Payment Gateway in WordPress, covering all methods and technical details you’ll need for a successful implementation.
Understanding Stripe and WordPress Compatibility
What is Stripe?
Stripe is a comprehensive online payment processing platform that lets you accept payments securely over the internet. It supports multiple currencies, payment methods, recurring billing, and real-time reporting.
Benefits of Using Stripe
- Global Reach: Accept payments in over 135 currencies.
- Security: Stripe is PCI DSS compliant and uses tokenization to protect sensitive data.
- Developer Friendly: Provides flexible APIs and SDKs for custom development.
- Instant Setup: Easy to create an account and start accepting payments.
Stripe + WordPress: The Perfect Match
WordPress supports Stripe through a variety of plugins and custom API integrations. It’s an ideal solution for:
- WooCommerce-based online stores.
- Membership websites.
- Donation portals.
- Subscription and booking platforms.
Prerequisites Before Integrating Stripe
Before proceeding, make sure your WordPress site meets these basic requirements:
- Install an SSL Certificate: Stripe requires all payment pages to be served over HTTPS for security.
- Create a Stripe Account: Sign up at https://stripe.com and verify your business details.
- Update WordPress & Plugins: Ensure you’re using the latest version of WordPress and WooCommerce if applicable.
- Install Required Plugins: Choose a compatible Stripe plugin based on your needs (detailed in the next section).
Methods to Integrate Stripe in WordPress
Method 1: Using WooCommerce and Stripe
WooCommerce is the most popular WordPress plugin for building eCommerce stores. The WooCommerce Stripe Payment Gateway plugin allows seamless integration.
Steps:
- Install WooCommerce: From the WordPress dashboard, go to Plugins > Add New, search for WooCommerce, and install it.
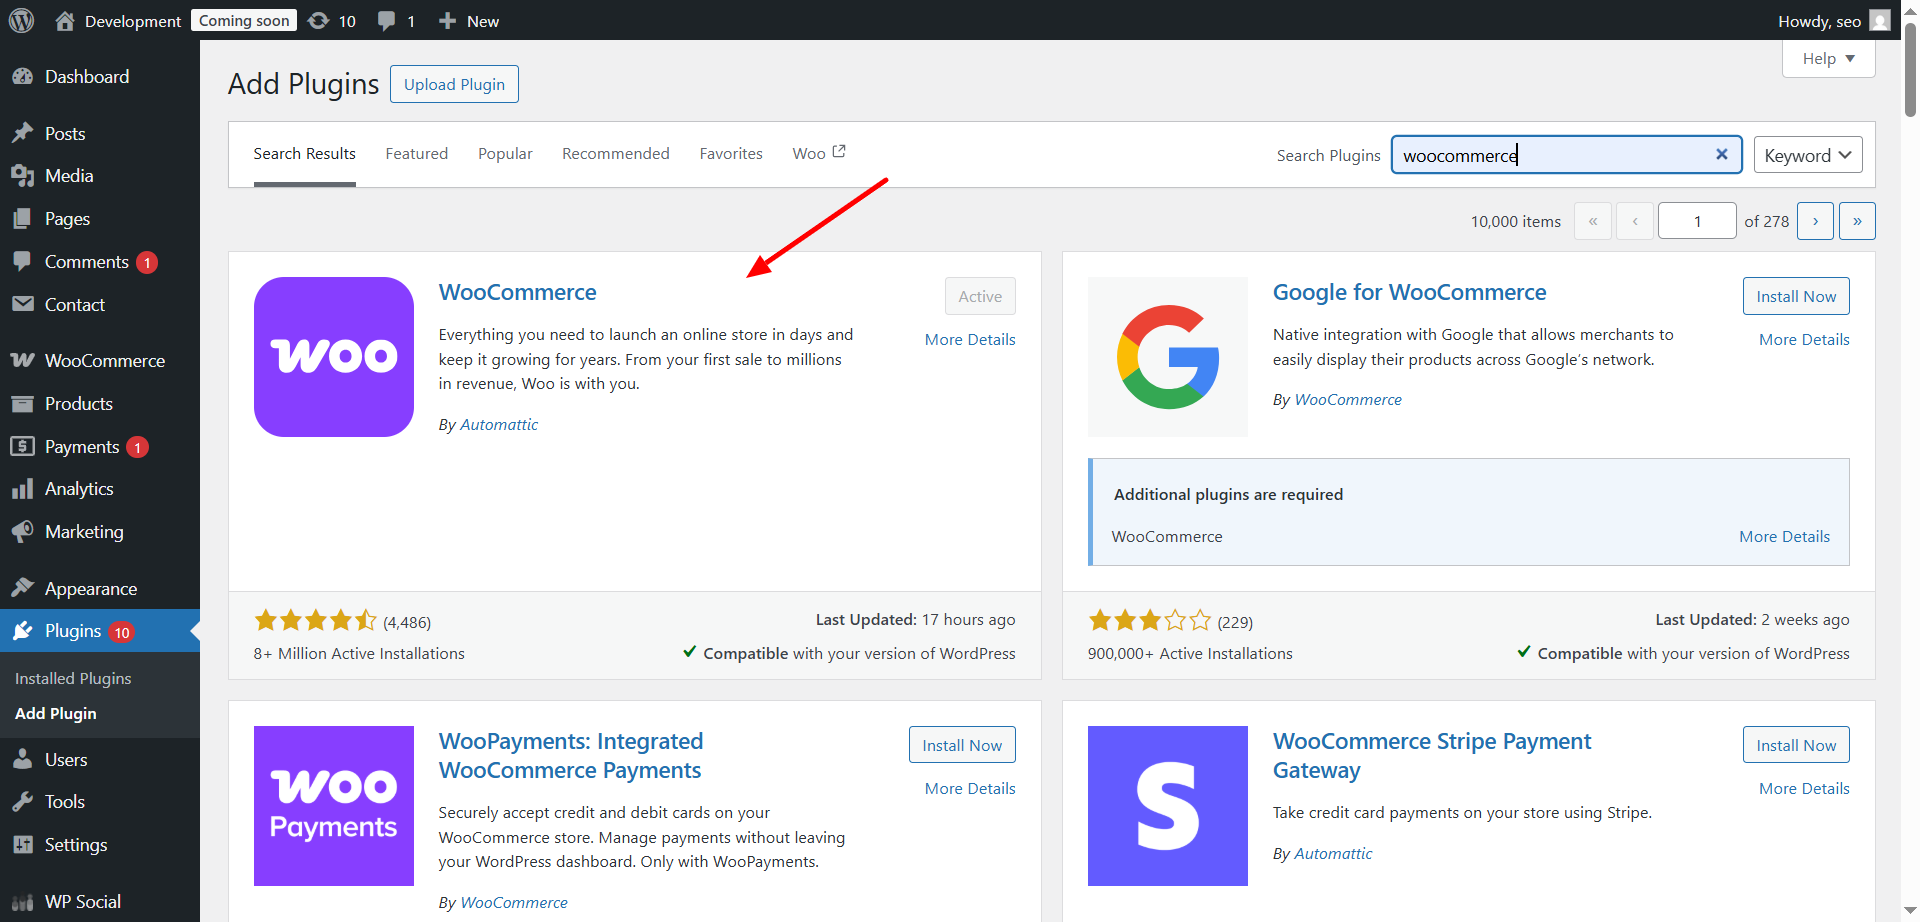
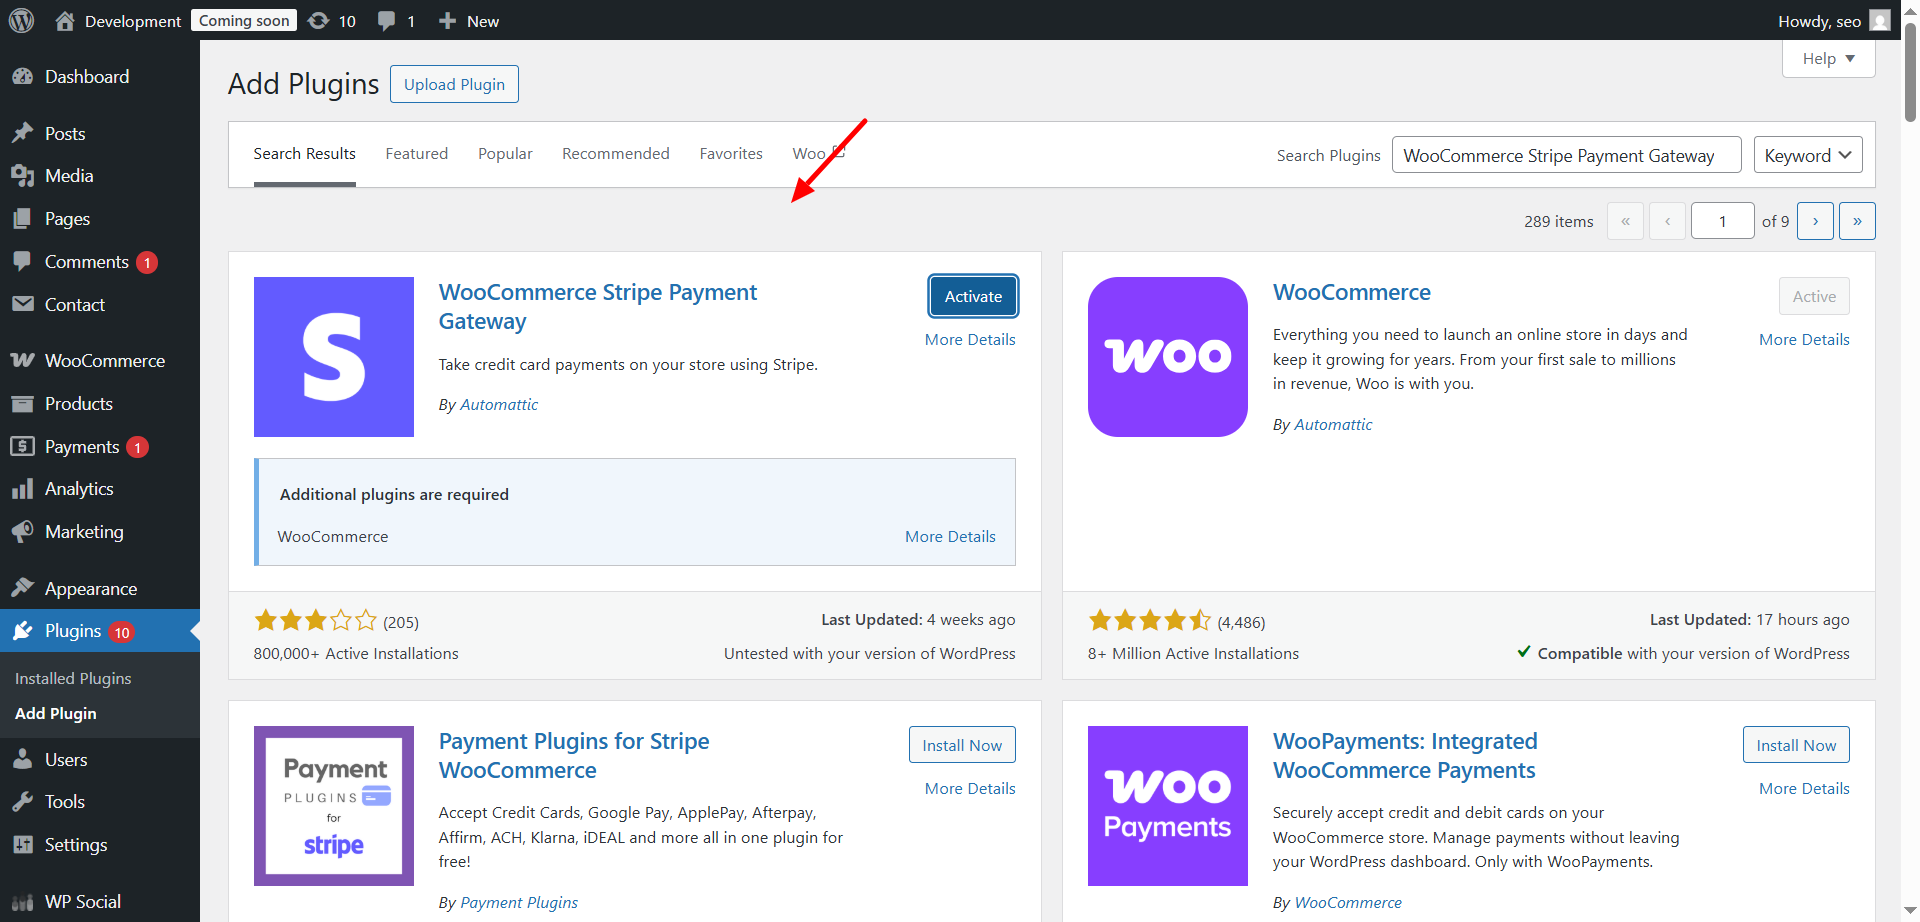
- Install Stripe Plugin: Search for WooCommerce Stripe Payment Gateway and activate it.
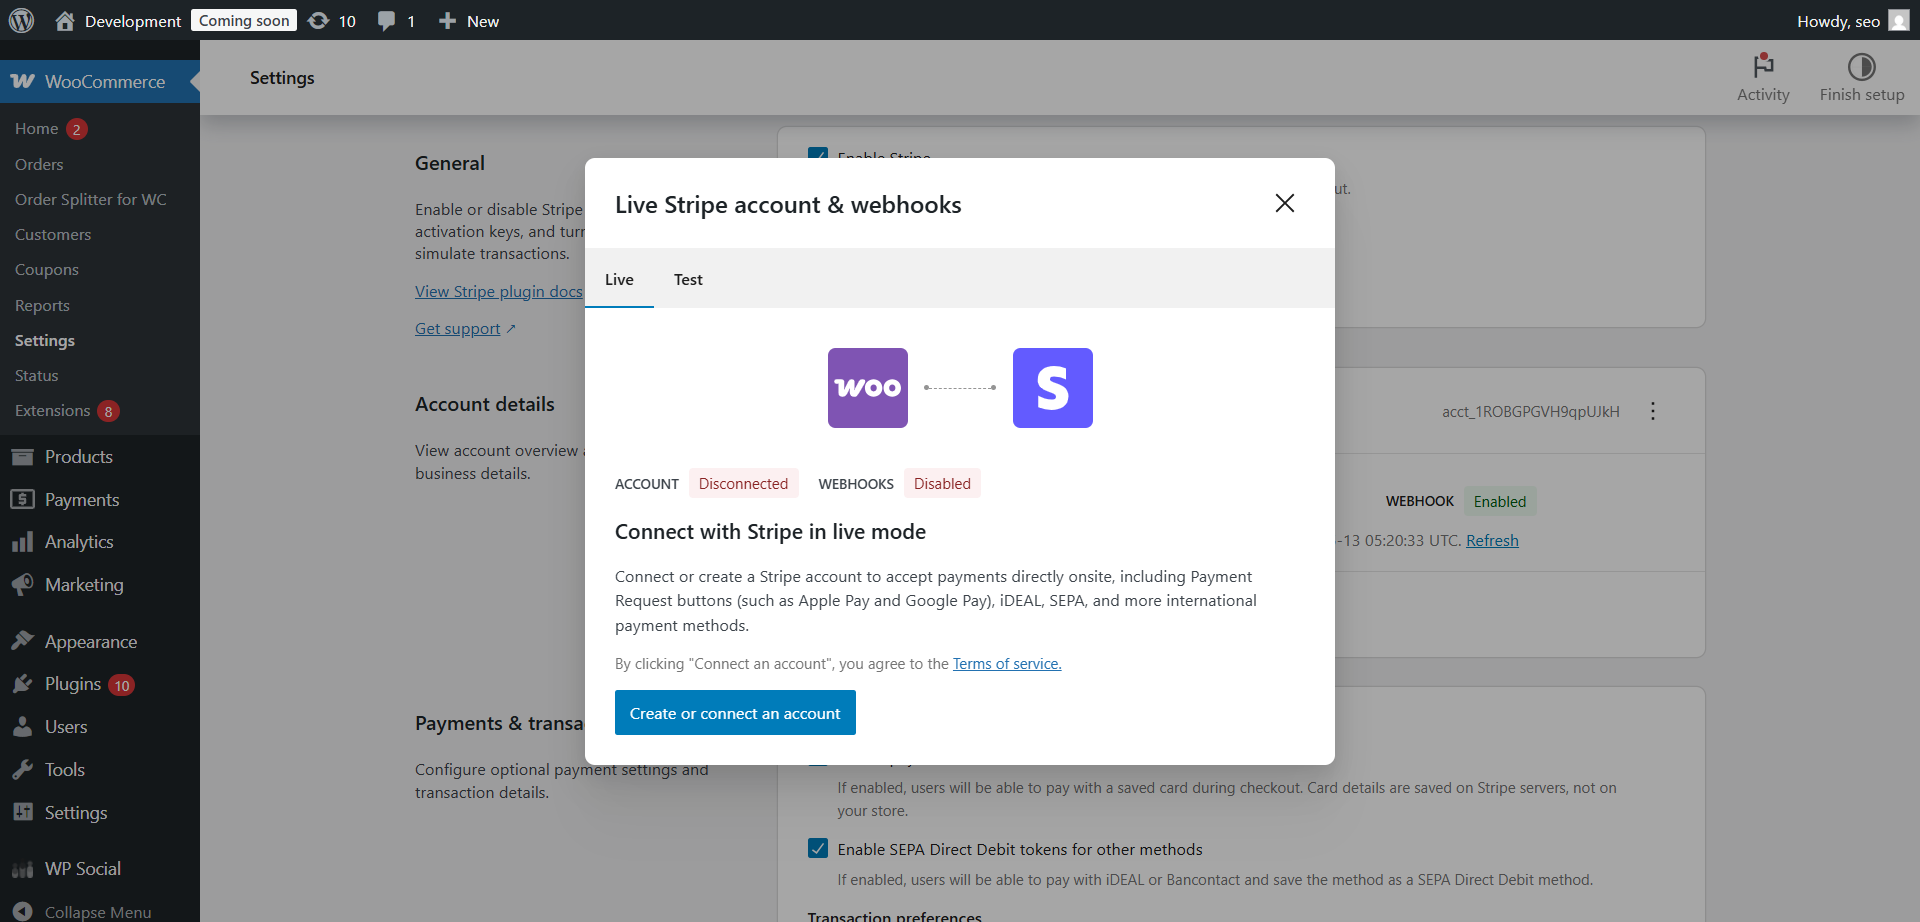
- Connect Stripe:
- Go to WooCommerce > Settings > Payments.
- Enable Stripe and click Set up.

- Enter your Publishable Key and Secret Key (found in your Stripe dashboard under Developers > API keys).
- Configure Webhooks:
- In your Stripe dashboard, set up webhooks to send payment event notifications back to WooCommerce.
- Test Transactions:
- Enable test mode and perform transactions to ensure everything works before going live.
Features:
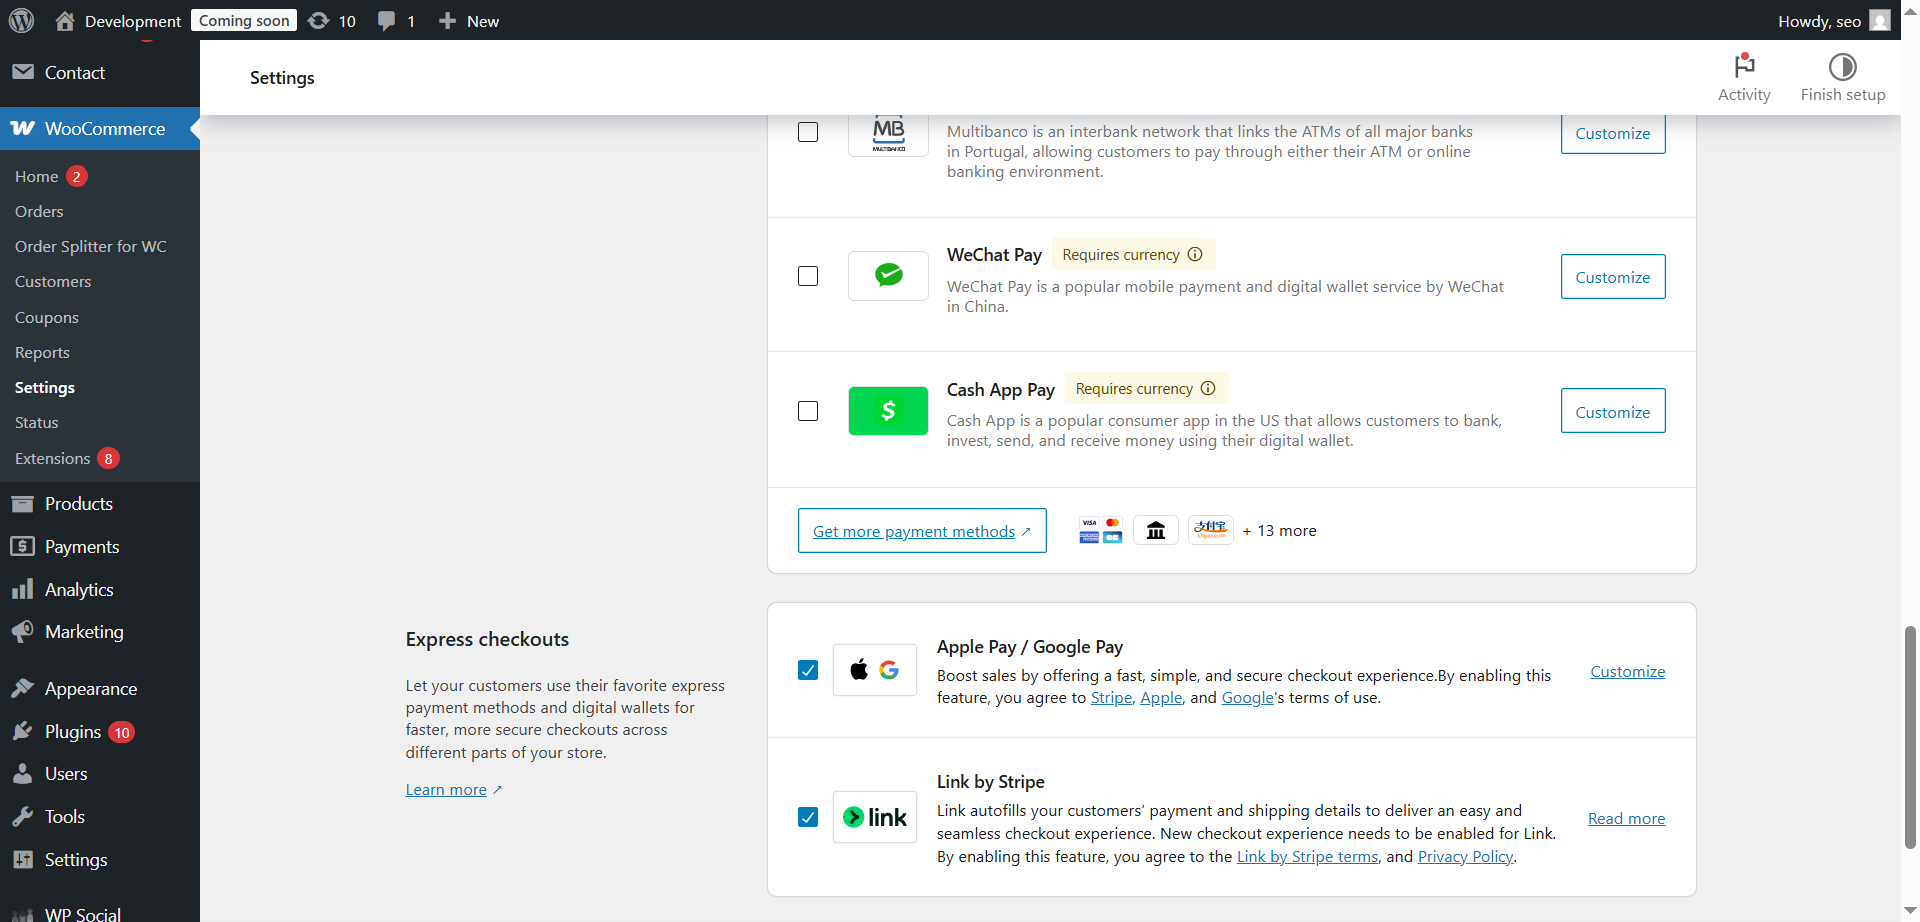
- Supports Apple Pay and Google Pay.
- Automatic refunds and secure payment processing.
- Supports subscriptions and recurring payments with WooCommerce Subscriptions add-on.
Using Stripe Payments Plugin
If you’re not running an eCommerce store but still want to accept payments (e.g., donations, simple products), the Stripe Payments plugin is ideal.
Steps:
- Install Stripe Payments from the WordPress plugin repository.
- Go to Stripe Payments > Settings.
- Add your API keys from your Stripe dashboard.
- Create payment buttons using the shortcode generator:
- Example: [accept_stripe_payment name=”My Product” price=”10.00″ button_text=”Pay Now”]
- Place the shortcode anywhere on your pages or posts.
Benefits:
- Lightweight and simple to configure.
- No WooCommerce dependency.
Great for event tickets, digital downloads, or charitable donations.
Custom Stripe Integration for Developers
For advanced use cases where plugins fall short, you can directly integrate Stripe’s API with custom code.


When to Choose Custom Integration?
- Complex checkout flows.
- Integrating Stripe Connect for marketplaces.
- Full control over the front-end and back-end payment logic.
Steps Overview:
- Install Stripe
composer require stripe/stripe-php
- Add Stripe Checkout Form:
- Create a Stripe session server-side using the \Stripe\Checkout\Session::create() function.
- Redirect the user to the secure Stripe-hosted checkout page.
- Handle Webhooks:
- Create a webhook endpoint in your WordPress environment to listen for payment_intent.succeeded and other events.
- Implement Security:
- Validate all webhook signatures using the Stripe secret key.
- Store payment confirmations in your WordPress database.
This approach requires a solid understanding of PHP and the Stripe API but offers the highest level of customization.
How to Set Up Recurring Payment in Stripe?
Recurring payments allow you to automatically bill customers at regular intervals. Stripe makes subscription billing straightforward in WordPress.
Using WooCommerce Subscriptions Plugin
- Install WooCommerce Subscriptions (premium plugin).
- Create a new subscription product in WooCommerce:
- Set billing frequency (e.g., weekly, monthly, annually).
- Set price and subscription length.
- Connect your Stripe account via WooCommerce Stripe Payment Gateway.
- Customers can now subscribe, and Stripe will automatically charge them on the set schedule.
Using WP Simple Pay or Stripe Billing
If not using WooCommerce:
- Install WP Simple Pay (pro version required for subscriptions) or use Stripe’s Billing API directly.
- Create a Product and Pricing Plan in Stripe Dashboard.
- Add a Stripe Checkout button or form to your WordPress site.
- Customers subscribe directly through Stripe’s secure checkout.
Benefits of Recurring Billing with Stripe
- Reduces manual invoicing efforts.
- Supports trial periods, discounts, and promotional plans.
- Automatic dunning management for failed payments.
Troubleshooting Common Stripe Integration Issues
- Payment Option Not Visible: Check if Stripe is enabled in the plugin settings.
- Invalid API Keys: Ensure you’ve copied the correct keys (test/live modes are separate).
- Webhook Errors: Verify the webhook URL and signing secret.
- SSL Certificate Not Found: Payments won’t work without HTTPS; install a valid SSL certificate.
- Plugin Conflicts: Temporarily disable other plugins to detect conflicts.
Conclusion
Stripe is an excellent choice for integrating secure and reliable payment processing into your WordPress website. Whether you opt for a plugin like WooCommerce Stripe Payment Gateway, Stripe Payments, or go for a full custom API integration, Stripe provides the flexibility and security you need.
Always ensure thorough testing before launching your site in live mode. Regularly update your plugins and Stripe API keys to maintain security and compliance.
Need Expert Help with WordPress or WooCommerce?
Don’t get stuck with payment gateway issues or website errors.
Our WordPress and WooCommerce experts are available 24/7 to assist you.
👉 Start a live chat now at 24x7wpsupport.com
📞 Call us directly:
- US & Canada: 888-818-9916
- UK: 800-069-8778
- Australia: 1800-990-217
Get fast, reliable support from professionals who know WordPress and WooCommerce inside out!
Can I use Stripe without WooCommerce?
Yes, plugins like Stripe Payments allow you to add Stripe payment buttons without WooCommerce.
Related posts:
Is Stripe safe for WordPress?
Absolutely. Stripe uses advanced security measures and is PCI DSS compliant.
Related posts:
Resolving Plugin Conflicts with Stripe Payment Gateway in WooCommerce
Troubleshooting API Key Issues with Stripe in WooCommerce
Everything you need to know about QuickBooks WooCommerce Integration
Fix Stripe Not Updating Order Status in WooCommerce
How to Fix Stripe Payment Errors After Checkout in WooCommerce
How long does Stripe setup take?
The basic setup with a plugin can take less than an hour. Custom integrations may take longer.
Related posts:
