
How to Install WordPress On Ubuntu Using Terminal (Step-by-Step Guide)
Introduction
WordPress powers many websites because it is flexible and easy to manage. Ubuntu is one of the most trusted server systems for hosting websites. When you install WordPress on Ubuntu using a terminal, you build the site manually from the server side. This method gives you more control over the full setup. It also helps you understand how WordPress works behind the screen. This guide is made for users who want a clean and practical starting point. It is useful for beginners, developers, and website owners using a VPS or cloud server. For a modern setup, Ubuntu 24.04 LTS is a strong choice, and WordPress officially supports Apache or Nginx with current PHP and MySQL or MariaDB versions.
Many users choose terminal setup because it feels direct and reliable. A control panel hides many important server tasks from view. The terminal shows each step clearly and gives you better control. You decide how Apache works, where WordPress files go, and how the database connects. This makes later troubleshooting much easier and faster. It also helps when you want a lighter and cleaner server. Many cloud servers start with a fresh Ubuntu install, so terminal work becomes the normal path. That is why many users follow an Ubuntu WordPress setup guide like this one before building a live website.
In this guide, you will learn the full base process clearly. You will understand what terminal-based setup means in real use. You will also learn what to prepare before you begin. After that, the next parts will cover the main installation steps. Those steps include server updates, web server setup, database setup, PHP installation, and WordPress configuration. The goal is to make WordPress installation on Ubuntu feel simple, clean, and easy to follow.
What Does It Mean to Install WordPress On Ubuntu Using Terminal
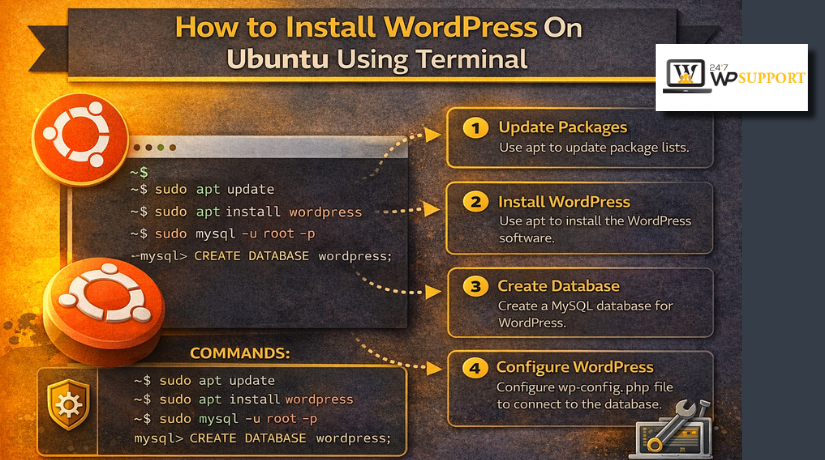
When people say they want to install WordPress Ubuntu terminal style, they mean a manual setup using command-line commands. You do not click buttons in cPanel or any hosting panel. Instead, you open the terminal and run commands one by one. Those commands update Ubuntu, install Apache, install MariaDB or MySQL, add PHP, and prepare WordPress files. After that, you connect everything and finish the setup in the browser. This is called a manual server-level WordPress setup Ubuntu server method, and it is still one of the most trusted ways to launch WordPress.
A terminal-based WordPress setup includes several connected tasks. First, you prepare the Ubuntu system and install updates. Next, you install the web server that will load your site. Then you install the database server that stores WordPress content and settings. After that, you install PHP, because WordPress runs on PHP. Then you create a database, download WordPress, edit the config file, and set file permissions. Finally, you load the site in a browser and complete the installation screen. The official WordPress installation flow also centers on these same stages: download files, create the database, configure wp-config.php, and run the install script.
This method still matters because many live websites now run on cloud servers. Those servers often give you only SSH access at the start. In such cases, you must install WordPress via command line Ubuntu style. It is also useful for developers who want a clean environment without extra hosting tools. Manual setup reduces unwanted software and gives better visibility into server behavior. It also helps you learn where WordPress files live and how core settings work. That knowledge becomes very useful when you need to fix errors later.
What You Need Before Starting WordPress Installation on Ubuntu
Before you begin, you need a few basic things ready. You need an Ubuntu server, root or sudo access, and a stable internet connection. You also need enough memory and storage for the server to run smoothly. A domain name is helpful, but a server IP also works at first. You should also know how to open the terminal and run simple commands. Basic tools like Nano or Vim will help when editing configuration files. These simple requirements make the setup smoother and help you avoid early mistakes.
1. An Ubuntu Server That Is Ready to Use
You need a working Ubuntu server before anything else. This can be a VPS, cloud server, or local Ubuntu machine. The server should be active and connected to the internet. A clean server works best for a fresh WordPress setup. This helps you avoid old settings and software conflicts later.
2. Root or Sudo Access for Server Commands
You need permission to install software and edit server files. That means you should have root access or a user with sudo rights. Without this access, you cannot install Apache, PHP, or the database server. You also cannot change file permissions or restart services when needed.
3. SSH or Terminal Access to the Server
You must be able to open the server through the terminal. Most users connect through SSH from their computer. This is the main way to install WordPress via the command line Ubuntu method. If terminal access is not working, you cannot continue with the setup process properly.
4. A Stable Internet Connection for Downloads and Updates
Your server needs internet access to download required packages. You will install the web server, database server, PHP, and WordPress files. A stable connection helps every command finish without interruption. It also reduces the chance of broken package installs or incomplete updates.
5. A Domain Name or Server IP Address
You need a way to open your website in a browser. A domain name is best for live websites. A server IP is enough for testing or early setup. After the install process, you will open the domain or IP to finish WordPress installation on Ubuntu from the browser screen.
6. Basic Knowledge of Simple Terminal Commands
You do not need expert skills for this setup. Still, basic command knowledge helps a lot. You should know how to move between folders, edit files, and run install commands. This makes the Ubuntu WordPress setup guide much easier to follow from start to finish.
7. A Web Server, Database, and PHP Stack Plan
WordPress needs a working server stack before it can run. You should be ready to install a web server, a database server, and PHP. These tools work together to load and manage your website. Planning this early makes the WordPress setup Ubuntu server process smoother and easier.
8. A Database Name, Username, and Password Plan
Before setup starts, think about your database details. You will need a database name, a database user, and a strong password. These details are added to the WordPress config file later. Planning them early saves time and helps prevent setup errors during installation.
9. A Text Editor for Editing Configuration Files
You will need to edit files during the setup. Most users use Nano because it is simple. Some advanced users prefer Vim. These editors help you update WordPress config files and Apache settings. Without a text editor, manual setup becomes slow and difficult.
10. Enough Server Space and Basic Resources
Your server should have enough storage and memory for WordPress. A very small server may cause slow performance or failed installs. Even a simple site still needs space for WordPress files, themes, plugins, and uploads. Good server resources make the install WordPress Ubuntu terminal process more stable.
11. A Clear Folder Location for WordPress Files
You should know where WordPress files will be placed. Some users install in the main web root. Others use a separate folder or test directory. Deciding this first helps you avoid confusion later. It also makes your file paths and Apache setup easier to manage.
12. A Backup Mindset Before You Begin
If this is not a fresh server, take a backup first. Backups protect your files and current settings from mistakes. This is very important when editing configs or changing web server settings. A backup gives safety and confidence during WordPress installation on Ubuntu.
How to Install WordPress On Ubuntu Using Terminal (Detailed Guide)
Step 1: Update and Upgrade Ubuntu Packages Before Starting the Installation
- Update package list
- Upgrade installed packages
- Reboot the server if needed
Step 2: Install Apache Web Server on Ubuntu
- Install Apache
- Start Apache service
- Enable Apache at boot
- Check Apache status
- Test Apache in browser using server IP
Step 3: Install MariaDB or MySQL Database Server for WordPress
- Install MariaDB or MySQL
- Start database service
- Enable database service at boot
- Check database server status
- Secure the database installation
Step 4: Install PHP and Required PHP Extensions for WordPress
- Install PHP
- Install Apache PHP module
- Install WordPress-required PHP extensions
- Check PHP version
- Restart Apache after PHP installation
Step 5: Create a WordPress Database and Database User
- Open MariaDB or MySQL terminal
- Create new database
- Create new database user
- Assign strong password
- Grant database privileges
- Flush privileges
- Exit database shell
Step 6: Download the Latest WordPress Package Using Terminal
- Move to the right server directory
- Download WordPress from official source
- Extract WordPress package
- Move files to website folder
- Remove extra archive files
Step 7: Configure the WordPress wp-config.php File Manually
- Rename wp-config-sample.php
- Open wp-config.php
- Add database name
- Add database username
- Add database password
- Add database host
- Add table prefix
- Add security keys and salts
- Save the file
Step 8: Set Correct File Ownership and Permissions for WordPress
- Change file owner to Apache web server user
- Set secure folder permissions
- Set secure file permissions
- Check writable directories
- Avoid unsafe permission values
Step 9: Create and Configure Apache VirtualHost for the WordPress Site
- Create new VirtualHost file
- Add domain name
- Add document root
- Set directory rules
- Allow .htaccess overrides if needed
- Save configuration file
- Enable the new site
- Enable Apache rewrite module
- Reload Apache configuration
Step 10: Allow Firewall Access for HTTP and HTTPS Traffic
- Check UFW firewall status
- Allow Apache traffic
- Allow full web traffic if SSL will be used
- Keep SSH access safe
- Reload firewall rules if needed
Step 11: Run the WordPress Installation Screen in Browser
- Open domain name or server IP
- Select site language
- Enter website title
- Create admin username
- Create strong admin password
- Enter admin email
- Complete the WordPress installation
Step 12: Check the Site After Installation Is Complete


- Log in to WordPress dashboard
- Check homepage loading
- Check permalink settings
- Test plugin installation
- Test theme installation
- Test media upload
- Confirm database connection is working
Step 13: Add SSL to Secure the WordPress Website
- Install Certbot
- Request SSL certificate
- Configure HTTPS
- Redirect HTTP to HTTPS
- Test SSL renewal
Step 14: Do Final Security and Cleanup Tasks
- Remove unnecessary default files
- Update WordPress settings
- Keep server packages updated
- Review permissions again
- Take a first backup
- Prepare site for live use
Common Errors While Installing WordPress on Ubuntu Using Terminal
Apache Not Starting After Installation
Apache may fail to start for simple server reasons. Another service may already use port 80. A wrong config line can also stop Apache immediately. Sometimes an old default setup creates a hidden conflict. This problem blocks the site from loading in the browser. It also stops the full WordPress installation on Ubuntu process. When this happens, check the Apache status first. Then review the config file and fix the wrong line. A clean Apache setup is very important for every Ubuntu WordPress setup guide.
Database Connection Error While Opening WordPress
This is one of the most common setup errors. WordPress cannot work without a database connection. The problem usually comes from wrong database details. The database name may be incorrect in the config file. The username or password may also be wrong. In some cases, MariaDB or MySQL is not running. This error often appears right after the first browser visit. It can stop your WordPress setup Ubuntu server process completely. Always check the database name, user, password, and host value carefully.
PHP Modules Missing During WordPress Setup
WordPress needs PHP and some required PHP extensions. If a module is missing, pages may break or stay blank. Some users see errors during plugin installation or theme loading. Others see the installer page but cannot continue properly. This problem often happens when users install PHP only halfway. A complete setup needs the right modules from the start. That is why every install WordPress Ubuntu terminal process should include a full PHP package check. Missing PHP support can break an otherwise correct setup.
Permission Denied Errors in WordPress Files and Folders
File permission errors are very common on Ubuntu servers. WordPress needs the correct owner and safe file access. If permissions are wrong, uploads may fail immediately. Themes or plugins may also refuse to install. Some folders may become unreadable by the web server. Other folders may be too open and become unsafe. This makes the site unstable and less secure. When you install WordPress via command line Ubuntu, always set ownership and permissions carefully. Correct file control keeps WordPress smooth and safe.
403 or 404 Errors After the Installation Looks Complete
Some users finish the setup but still see errors. A 403 error usually points to a rules problem. A 404 error often appears after permalink changes. This can happen when Apache rewrite rules are not enabled. It can also happen when the VirtualHost file is incomplete. In some cases, the .htaccess file is missing or blocked. These errors confuse many beginners during WordPress installation on Ubuntu. The site may exist, but the pages do not load correctly. Server rules must match the WordPress setup properly.
WordPress Installation Page Not Opening in Browser
Sometimes the WordPress installer never appears at all. This usually means the browser cannot reach the right folder. The domain may not point to the server yet. The firewall may block the web server traffic. The Apache document root may also be wrong. Some users place WordPress files in the wrong path. Then Apache loads an empty or default page instead. This issue can delay the full Hinstall WordPress on Ubuntu using terminal process. Always check the domain, folder path, and server rules together.
SSL Errors After You Secure the Website
Many users add SSL after the main install process. This step is important, but it can create new errors. The certificate may fail if the domain is not ready. Apache SSL settings may also conflict with the old setup. Some users create redirect loops after forcing HTTPS. Others see a mixed content warning on the site. These issues do not mean the full setup failed. They simply show that SSL needs careful handling. A secure WordPress setup Ubuntu server should always be tested after SSL changes.
How to Troubleshoot WordPress Installation Problems in the Right Way
The best troubleshooting method is always calm and simple. Do not change many things at the same time. First, check which service is failing clearly. Then review logs, file paths, and config values. After that, fix one issue and test again. This method saves time and prevents new mistakes. A step-by-step approach works best for every Ubuntu WordPress setup guide. Guessing without checking often makes the problem worse. Server setup becomes easier when you test one part at a time.
Best Practices for Installing WordPress On Ubuntu Using Terminal
Use a Supported Ubuntu Version for Better Stability
A supported Ubuntu version gives better updates and security. It also works better with current WordPress software. Older Ubuntu versions may create package and compatibility issues. That is why many users now choose Ubuntu 24.04 LTS. It gives a stable base for modern websites. This is a smart start for any WordPress installation on Ubuntu. A strong system base reduces many future server problems.
Keep Ubuntu, Apache, PHP, and WordPress Updated
Updates are very important after the first installation. Ubuntu packages should stay current for security reasons. Apache, PHP, and database software also need regular updates. WordPress core, themes, and plugins should stay updated too. Outdated software can create bugs and security gaps. It can also break features after server changes. A well-updated system makes install WordPress on Ubuntu using terminal work better in the long run.
Use Strong Admin and Database Credentials From Day One
Weak login details create easy security risks. Many attacks start with simple usernames and passwords. Never use weak admin names like admin. Use a strong password for WordPress and database access. This protects both the website and server environment. Good credentials are a basic rule in every install WordPress Ubuntu terminal setup. A strong login habit prevents many avoidable problems later.
Keep File Permissions Safe and Clean
Permissions should be secure, but not too open. Many beginners use unsafe values to fix errors quickly. That may solve one issue, but it creates bigger risks. WordPress files should have proper owner control and safe access levels. Upload folders should work without exposing the full server. This is one of the most important server habits. A secure file structure improves every WordPress setup Ubuntu server project.
Add SSL Early to Protect the Website
A live site should use HTTPS from the beginning. SSL protects login details and visitor data. It also builds trust when users open the site. Modern browsers warn users about insecure pages. That can hurt user trust and traffic. So SSL should not wait too long after launch. It is a key step in a complete install WordPress via command line Ubuntu setup.
Take Backups Before Big Changes
Backups save time when mistakes happen. Server changes can break the site unexpectedly. Plugin updates can also cause issues later. That is why backups should become a normal habit. Save both the files and the database regularly. This gives you a safe restore point anytime. A serious Ubuntu WordPress setup guide should always include backup planning.
Remove Extra Software and Default Files
A clean server is easier to manage. Remove files and tools you do not need. Old default pages can confuse users and developers. Unused packages can also create more maintenance work. Keeping the server simple improves performance and clarity. It also helps during troubleshooting. A cleaner setup supports a better WordPress installation on Ubuntu experience.
Use Logs Instead of Guessing During Troubleshooting
Logs tell you what the server is doing. They show failed services, permission problems, and path issues. Without logs, many fixes become random guesses. Random changes often waste time and create more errors. Good troubleshooting starts with checking the real cause first. This habit helps every install WordPress on Ubuntu using terminal project stay clear and manageable.
Secure WordPress After the Install Is Complete
The install process is only the beginning. After launch, the site still needs protection. Remove unused themes and plugins from the dashboard. Use a trusted security plugin if needed. Limit login attempts and monitor changes carefully. Also review user roles and admin access often. A safe post-install routine makes your WordPress setup Ubuntu server stronger over time.
Conclusion
Installing WordPress on Ubuntu using terminal may seem technical at first. But the process becomes much easier when you follow each step carefully. You start by preparing the server and updating Ubuntu packages. Then you install Apache, PHP, and the database server properly. After that, you create the database, download WordPress, and configure the main files. Once permissions, VirtualHost settings, and firewall rules are ready, the site can go live smoothly. This method gives you better control over your server environment. It also helps you understand how WordPress works behind the dashboard. That knowledge becomes very useful when you need updates, security changes, or troubleshooting later. A manual setup also removes extra tools and keeps the server cleaner. This can improve performance, reduce confusion, and make future maintenance easier.
If you want a stable and flexible WordPress website, this setup method is a smart choice. It works well for developers, VPS users, growing businesses, and anyone who wants a clean hosting setup. The key is to stay careful, follow the right order, and check each step before moving forward. That way, your WordPress site starts on a strong base and stays easier to manage over time.
If you do not want to handle the full server setup alone, 24x7wpsupport is here to help. Our team can assist with WordPress installation on Ubuntu, Apache setup, PHP configuration, MariaDB or MySQL setup, SSL installation, file permission issues, and full WordPress troubleshooting.
We also help with security setup, performance fixes, migration support, and ongoing website maintenance. Whether you are launching a new website or fixing an installation error, 24x7wpsupport can provide fast and reliable support. Contact 24x7wpsupport today and let our experts make your WordPress setup simple, safe, and stress-free.
Related posts:

Brian is a WordPress support specialist and content contributor at 24×7 WP Support. He writes practical, easy-to-follow guides on WordPress troubleshooting, WooCommerce issues, plugin and theme errors, website security, migrations, performance optimization, and integrations. With a focus on solving real website problems, Brian helps business owners, bloggers, and online store managers keep their WordPress sites running smoothly.
