
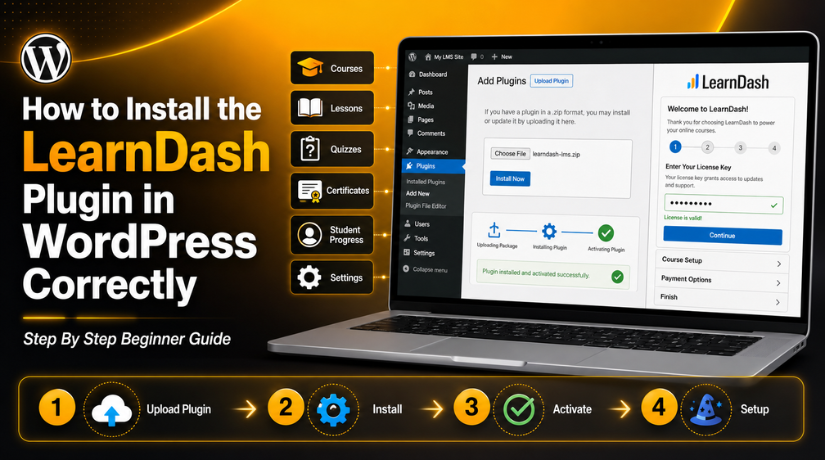
How to Install the LearnDash Plugin in WordPress Correctly: Step By Step Beginner Guide
Introduction
Online learning is growing fast across many business types today. Coaches, teachers, schools, and companies now sell courses online. WordPress makes this process easier with the right LMS plugin. LearnDash is one popular option for building course websites. It helps you create lessons, quizzes, certificates, and student areas. Many website owners choose the LearnDash WordPress plugin for flexible course control. It gives you many tools inside your WordPress dashboard. You can manage learning content without using a separate platform.
This guide will help beginners understand LearnDash before installation. It will also explain its uses in clear and simple steps. Before you install LearnDash in WordPress, you should understand its purpose. This helps you plan your course website in a better way.
What Is a LearnDash Plugin in WordPress?
LearnDash is a WordPress LMS plugin used for online learning websites. LMS means Learning Management System in simple terms. It helps you create and manage courses inside WordPress. You can add courses, lessons, topics, quizzes, and certificates. You can also manage students and track their course progress. The LearnDash plugin installation adds these learning features to WordPress. After setup, your website can work like an eLearning platform. You do not need a separate course system for basic needs. Everything can be managed from your WordPress admin dashboard. That is why many beginners prefer LearnDash for course websites.
LearnDash works by adding LMS tools to your WordPress dashboard. After activation, you will see LearnDash settings and course options. You can create courses like you create pages or posts. Each course can include lessons, topics, quizzes, and assignments. You can set course access as free, paid, or restricted. You can also decide when students can open each lesson. This gives you strong control over the full learning journey. A proper LearnDash LMS setup helps students move through lessons smoothly. It also helps website owners manage content in one place. This makes LearnDash useful for both beginners and advanced users.
What Are The Uses Of LearnDash Plugin In WordPress?
Create Online Courses With Lessons, Topics, And Learning Material
The main use of LearnDash is creating online courses in WordPress. You can divide each course into lessons and topics. This makes the learning path clear for every student. You can add text, videos, images, files, and downloads. You can also organize content in a step-by-step format. This helps students learn without feeling confused or lost. LearnDash gives course owners better control over lesson structure. You can create short courses or detailed training programs. The LearnDash WordPress plugin works well for many course types.
Sell Paid Courses Directly From Your WordPress Website
LearnDash also helps you sell courses through your own website. You can offer free courses, paid courses, or private courses. You can also create memberships or course bundles when needed. This gives you more control over your course business. You can manage course access from the WordPress dashboard. Students can buy a course and start learning online. Paid course setup depends on your payment and access settings. A correct LearnDash LMS setup helps avoid access problems later. This is useful for creators who want direct course sales.
Build Quizzes And Tests To Check Student Learning
Quizzes are another helpful feature inside the LearnDash plugin. They help you check how well students understand lessons. You can create simple or detailed quiz questions. Common question types include multiple choice and true or false. You can also add essay questions and fill-in-the-blank questions. These options make the learning process more active and useful. Quizzes also help students review what they have learned. Course owners can use quiz results to measure progress. This makes LearnDash useful for serious training and education websites.
Offer Certificates After Students Complete A Course
Certificates can make your course feel more valuable and professional. LearnDash lets you offer certificates after course completion. You can also connect certificates with quizzes or learning progress. This gives students a clear reward for finishing training. Certificates can help learners feel more confident about their skills. They are useful for coaching, training, and professional programs. Businesses can also use certificates for staff training records. This feature adds more trust to your online course website. It also gives students a strong reason to complete lessons.
Track Student Progress And Course Completion Easily
LearnDash helps you track how students move through your courses. You can check course progress, quiz results, and completion status. This helps you understand how students use your learning content. You can also see where students may stop or slow down. These details help you improve lessons and course structure. Progress tracking is important for both teachers and businesses. It helps course owners make better content decisions over time. Students also benefit because they can see their learning progress. This keeps them focused and motivated during the course.
Create Training Portals And Membership Learning Websites
LearnDash can also support training portals and membership websites. Companies can use it for employee learning and onboarding. Schools can create private course areas for students. Coaches can build member-only training programs for paid users. This makes LearnDash useful beyond normal online courses. You can restrict content based on course access rules. You can also combine LearnDash with other WordPress tools when needed. This helps create a complete learning system inside WordPress. If planned well, LearnDash can support long-term course growth.
Things To Check Before Installing LearnDash Plugin In WordPress
Check WordPress Admin Access Before Starting LearnDash Plugin Installation
Before you start the LearnDash plugin installation, check your WordPress access first. You must log in with an administrator account. An editor, author, or subscriber account will not work. These roles cannot upload or activate WordPress plugins. Admin access gives you full control over plugin settings. It also lets you manage courses, payments, and student access. This step looks simple, but it is very important. Many users face delays because they use limited dashboard access. If you manage a client website, ask for full admin access.
Check WordPress Version And Plugin Compatibility Before LearnDash Setup
Your WordPress website should be updated before installing LearnDash. An old WordPress version can cause compatibility problems later. It may also create security risks and plugin errors. LearnDash works best when WordPress is clean and updated. You should also review your active theme and plugins. Some old plugins may conflict with LMS features. Page builders, membership plugins, and cache plugins need special attention. They can affect course pages, login pages, or checkout pages. Before installing the LearnDash WordPress plugin, update important website parts.
Check Hosting And PHP Requirements For A Better LMS Website
A learning website needs stronger hosting than a basic blog. Courses may include videos, quizzes, files, and student accounts. These features can increase server load during busy hours. That is why hosting quality matters before LearnDash setup. A slow server can make course pages load poorly. Students may leave if lessons open too slowly. Your hosting should support the latest WordPress needs properly. It should also offer enough memory, storage, and database performance. Check your PHP version before installing any WordPress LMS plugin. A modern PHP version helps plugins work faster and safer.
Take A Full Website Backup Before Installing LearnDash Plugin
Always take a full backup before installing LearnDash on WordPress. A backup protects your website if something goes wrong. Plugin installation is usually safe, but issues can still happen. A conflict may break layouts, forms, or important pages. A backup helps you restore the website quickly. You should back up both website files and databases. Files include themes, plugins, images, and uploaded documents. The database stores pages, settings, users, and website content. You can use your hosting backup tool for this step.
Download The Official LearnDash ZIP File From Your Account
You should download LearnDash only from the official source. The plugin usually comes as a ZIP file. WordPress uses this ZIP file during manual plugin upload. Do not extract the ZIP file before uploading it. WordPress needs the complete compressed file for installation. Avoid nulled, cracked, or shared plugin files completely. These files may include malware or hidden harmful code. They can damage your website and customer data. They may also block future updates and support access.
How to Install the LearnDash Plugin in WordPress (Complete Guide)
Step 1: Log In To Your WordPress Dashboard First
- Open your WordPress admin login page first.
- Enter your admin username and password carefully.
- Make sure you use an administrator account only.
- Other user roles cannot upload or activate plugins.
- After login, you will see the WordPress dashboard.
- This dashboard controls your website settings and plugins.
- Open your website homepage in another browser tab.
- Check if the website is working properly.
- This helps you avoid confusion during setup.
- Now you can start the LearnDash plugin installation process.
Step 2: Go To The Plugin Installation Area
- Look at the left-side menu in WordPress.
- Click on the Plugins option.
- Now click on Add New.
- This page helps you install new plugins.
- LearnDash is a premium plugin.
- So, you need to upload it manually.
- Keep your LearnDash ZIP file ready.
- This step helps you Install LearnDash in WordPress correctly.
Step 3: Click The Upload Plugin Button
- On the Add Plugins page, check the top area.
- Click the Upload Plugin button.
- WordPress will show a file upload box.
- This box allows you to upload plugin files.
- The LearnDash WordPress plugin must be in ZIP format.
- Do not upload any extracted folder.
- Do not upload files from unknown websites.
- Always use the official LearnDash plugin file.
Step 4: Select The LearnDash ZIP File
- Click on the Choose File button.
- Select the LearnDash ZIP file from your computer.
- Make sure you select the correct plugin file.
- Do not unzip the file before uploading.
- WordPress needs the ZIP file for installation.
- Check the file name before moving ahead.
- This helps avoid upload errors.
- It also makes the LearnDash LMS setup smoother.
Step 5: Click Install Now
- After selecting the file, click Install Now.
- WordPress will upload the plugin file.
- Then WordPress will start the installation process.
- Wait until the process is complete.
- Do not refresh the page during installation.
- Do not close the browser tab.
- If your hosting is slow, wait patiently.
- WordPress will show a success message after installation.
- If an error appears, read the message carefully.
- The issue may be upload size or server limits.
Step 6: Activate The LearnDash Plugin
- After installation, click Activate Plugin.
- This will turn on LearnDash on your website.
- LearnDash options will appear in your dashboard.
- You can now manage courses, lessons, and quizzes.
- You can also manage certificates and LMS settings.
- This completes the basic LearnDash plugin installation.
- But the full setup is not finished yet.
- You still need license activation and settings review.
Step 7: Add Your LearnDash License Details
- Go to the LearnDash license settings area.
- Add your license email carefully.
- Add your license key in the correct field.
- You can find these details in your LearnDash account.
- Copy and paste the license key carefully.
- Do not add extra spaces in the key.
- Click save or activate after entering details.
- A valid license helps you get updates.
- It also gives access to official support.
- This keeps your WordPress LMS plugin safe and updated.
Step 8: Complete The LearnDash Setup Wizard
- After activation, LearnDash may show a setup wizard.
- This wizard helps beginners configure basic LMS settings.
- Follow each screen one by one.
- Read each option before selecting it.
- Choose settings based on your website goal.
- It may ask about courses and student registration.
- It may also ask about payment options.
- Choose basic options if you are unsure.
- You can change these settings later.
- This makes the LearnDash LMS setup easier.
Step 9: Check Important LearnDash Settings


- Open the main LearnDash settings area.
- First, check your course URL settings.
- These settings are also called permalink settings.
- Then check student login and registration settings.
- Review course access settings carefully.
- If you sell courses, check payment settings.
- Also check student email notification settings.
- Review certificate settings if certificates are needed.
- Check quiz settings before creating tests.
- These settings help your LMS website work properly.
Step 10: Create A Simple Test Course
- Go to the LearnDash course section.
- Click Add New to create a course.
- Add a simple test course title.
- Add a short test course description.
- Create one lesson under the course.
- Add one topic inside the lesson.
- Add one simple quiz if needed.
- Keep the test course short and simple.
- This helps you understand how LearnDash works.
- It also supports your LearnDash tutorial process.
Step 11: Check The Course Like A Student
- Open the test course from the front end.
- Do not check only from the admin dashboard.
- Use another browser or private window.
- Check the course title and course layout.
- Open each lesson and topic.
- Check if the content appears properly.
- Complete the quiz if you added one.
- Check if course progress updates correctly.
- This helps you review the student experience.
- A smooth student view improves course quality.
Step 12: Test Student Enrollment
- Create one test student account.
- Log in as a student.
- Try to enroll in the test course.
- Check if the student can access the course.
- If the course is free, it should open easily.
- If the course is paid, access should open after payment.
- Check if locked lessons stay protected.
- Check if progress tracking works properly.
- This confirms course access rules are working.
- This step is important before launching courses.
Step 13: Test Payment Settings If You Sell Courses
- Check your payment gateway settings first.
- Confirm Stripe, PayPal, or WooCommerce setup.
- Check your currency settings carefully.
- Review test mode and live mode.
- Place one test order as a student.
- Check if payment completes properly.
- Check if course access opens after payment.
- Review order confirmation emails.
- Also check enrollment notification emails.
- This prevents payment problems after launch.
Step 14: Clear Cache And Recheck Your Course Pages
- Clear your website cache after setup.
- Cache may show old course page versions.
- Clear cache from your cache plugin.
- Clear hosting cache if available.
- Clear CDN cache if your site uses one.
- Open course pages again after clearing cache.
- Check course, login, and checkout pages.
- Test the same pages on mobile devices.
- Make sure buttons and menus work properly.
- This completes the basic Install LearnDash in WordPress process.
Common LearnDash Installation Problems And Easy Fixes For Beginners
Even a careful LearnDash plugin installation can face small setup issues. These issues are common with many WordPress plugins. Most problems happen because of hosting limits, wrong files, cache, or plugin conflicts. Beginners may feel confused when errors appear during setup. However, many LearnDash issues can be fixed with simple checks. You should first note the exact error message shown. This helps you understand the real cause faster. Do not change many settings at the same time.
Plugin Upload Failed During LearnDash Plugin Installation
Sometimes, WordPress may fail during the plugin upload process. This usually happens because of server upload limits. The LearnDash ZIP file may be larger than allowed. Your hosting may also have a short execution time. In some cases, users upload the wrong file format. WordPress needs the plugin ZIP file, not an extracted folder. To fix this issue, check your upload size limit first. You can ask your hosting provider to increase it. You can also upload the plugin through FTP if needed. Always use the official LearnDash ZIP file for safety.
LearnDash License Not Activating After Plugin Setup
License activation issues are also common for many beginners. This may happen because of wrong license details. Sometimes users enter the wrong email or license key. Extra spaces before or after the key can also fail. Your license may also be linked with another domain. In some cases, the server blocks outside license requests. First, copy the license key from your official account. Then paste it carefully in the license field. Check the email address linked with your purchase. Save the settings and check the license status again. A valid license keeps the LearnDash WordPress plugin updated.
LearnDash Menu Not Showing Inside The WordPress Dashboard
After activation, LearnDash should appear in the WordPress dashboard menu. If it does not appear, check the plugin status first. Go to the Plugins page and confirm LearnDash is active. If it is inactive, activate it again from that screen. Also make sure you are logged in as administrator. Some user roles cannot see all plugin settings. If you use a role editor plugin, check permissions carefully. Clear your dashboard cache if the menu still looks missing. You can also refresh the WordPress admin page again.
Course Pages Showing 404 Error After LearnDash Setup
Course pages may sometimes show a 404 error after setup. This usually happens because of WordPress permalink settings. Permalinks control the structure of your website URLs. When LearnDash adds course pages, WordPress may need to refresh. To fix this, go to Settings > Permalinks. Then click the Save Changes button without changing anything. This refreshes your website URL structure. After that, clear your cache and test course pages again. Open the course, lesson, and topic pages carefully. If the error remains, check plugin conflicts or page slugs.
Course Content Not Displaying Properly On The Website
Sometimes, course pages may look broken after installation. Text may appear badly placed or buttons may look misaligned. This can happen because of theme or page builder conflicts. Some themes may not style LearnDash pages correctly. Cache plugins may also show old design files. First, clear your site cache and browser cache. Then test the course page again on another browser. If the issue remains, switch to a default theme temporarily. This helps you check whether the theme causes the issue. You can also deactivate other plugins one by one.
Payment Not Working For Paid LearnDash Courses
Payment issues can stop students from buying your courses. This makes payment testing very important before launch. First, check your payment gateway connection carefully. Make sure your Stripe, PayPal, or WooCommerce settings are correct. Also check whether test mode or live mode is active. Wrong mode settings can stop real payments from working. Confirm your currency, checkout page, and course pricing rules. Then place one test order using a student account. After payment, check if course access opens correctly. Also check order emails and enrollment emails after checkout.
Best Practices After Installing LearnDash In WordPress
Keep LearnDash, WordPress, Theme, And Plugins Updated
After you Install LearnDash in WordPress, keep everything updated. Updates improve security, performance, and plugin compatibility. They also fix known bugs and setup problems. Start with a complete website backup before major updates. Then update WordPress core, theme, plugins, and LearnDash carefully. Avoid updating everything on a live site without checking. If possible, test major updates on a staging website first. This protects your course website from sudden issues. Regular updates keep your WordPress LMS plugin stable for students.
Use A Lightweight WordPress Theme For Better Course Performance
Your theme plays a major role in course performance. A heavy theme can slow course pages and dashboards. Students need a clean and fast learning experience. Choose a theme that works well with LMS websites. The design should be simple, responsive, and easy to use. Avoid themes with too many unused design features. Too many sliders, animations, and scripts can slow pages. Your course layout should focus on learning content first. A lightweight theme makes the LearnDash LMS setup smoother. It also helps students move between lessons without delay. Better performance can improve course completion and user satisfaction.
Create A Simple And Clear Course Structure For Learners
Course structure should be easy for students to follow. Do not make lessons confusing or too long. Divide large content into short lessons and topics. Use clear lesson names that explain the learning goal. Keep quiz placement natural after important learning sections. Add downloads only when they give real value. Students should always know what to do next. A simple structure improves focus and course completion. It also reduces support questions from confused learners.
Test The Full Learning Journey Before Launching Courses
Testing is one of the most important post-installation steps. You should test everything before inviting real students. Create a test student account and enroll in a course. Open lessons, complete topics, and submit quizzes. Check certificates, emails, progress tracking, and course completion. If you sell courses, test the payment flow too. Test on desktop, tablet, and mobile screens. Many students may use phones for online learning. Check buttons, menus, login pages, and checkout forms. Fix all issues before sharing your course publicly.
Use Good Video Hosting Instead Of Uploading Large Videos
Videos can make courses more engaging and helpful. However, large videos can slow your WordPress website. Uploading heavy videos directly to WordPress is not ideal. It can increase storage use and server load. It may also create buffering issues for students. Use reliable video hosting for course video lessons. This keeps your website lighter and faster. You can then embed videos inside LearnDash lessons. This method gives students a better viewing experience. It also helps protect your hosting resources. Good video handling supports a stronger LearnDash LMS setup.
Conclusion
LearnDash is a powerful plugin for building online courses. It helps you create lessons, quizzes, certificates, and student areas. However, correct installation is only the first step. You should also check hosting, license, payments, emails, and course pages. A proper LearnDash plugin installation helps prevent many future issues. It also gives students a smoother learning experience from day one. After setup, always test the full student journey carefully. Check course access, payments, mobile design, and progress tracking. Keep your website updated, secure, and easy to use. With the right LearnDash LMS setup, WordPress can become a complete learning platform.
If you need help with LearnDash setup, 24x7wpsupport can help. Our WordPress experts can install LearnDash, configure settings, fix errors, and test your course website. We can also help with payment setup, speed checks, plugin conflicts, and LMS troubleshooting. Whether you need a new course website or support for an existing one, our team can make the process easier. Contact 24x7wpsupport today and get expert help for your WordPress learning website.

Brian is a WordPress support specialist and content contributor at 24×7 WP Support. He writes practical, easy-to-follow guides on WordPress troubleshooting, WooCommerce issues, plugin and theme errors, website security, migrations, performance optimization, and integrations. With a focus on solving real website problems, Brian helps business owners, bloggers, and online store managers keep their WordPress sites running smoothly.
