
How to Clean Up, Manage, and Delete WordPress Media Files
Introduction
Every WordPress website collects media files over time. These files may include images, PDFs, videos, icons, banners, and documents. Many files are useful when you upload them first. But some files become unused after updates, redesigns, or page changes. This is why WordPress media library cleanup is important for every website owner.
A messy media library can create several small problems. These problems can grow slowly over time. Your hosting storage may fill faster. Your backups may become larger. Your team may also struggle to find the right files.
A clean media library helps your website stay organized. It also helps admins, editors, and developers work faster. But cleanup must be done carefully. Some files may look unused but still appear on pages, products, or design sections.
Before deleting anything, always take a full website backup. This simple step protects your website from accidental file loss.
What Is the WordPress Media Library?
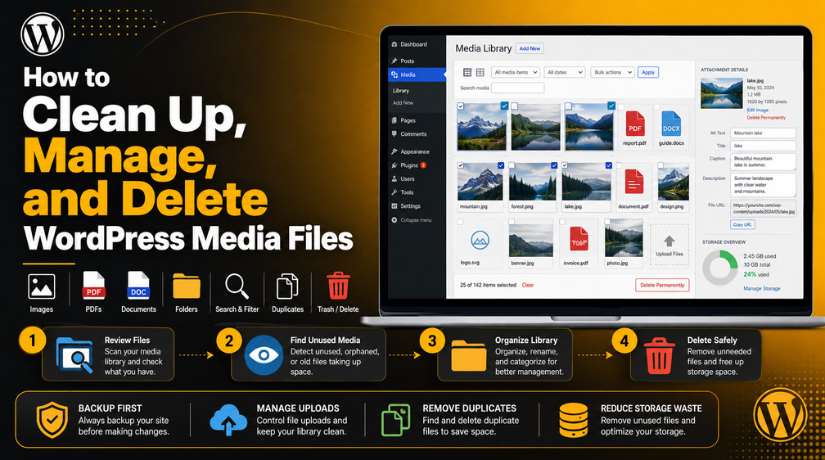
The WordPress Media Library is the main place for uploaded files. You can find it inside your WordPress dashboard. Go to:
Dashboard → Media → Library
This area stores and shows your uploaded website files. These files can include:
- Blog images
- Product images
- PDF documents
- Logo files
- Audio and video files
- Downloadable files
The Media Library helps you upload, view, edit, and delete files. It also helps you manage WordPress media library files from one place.
However, WordPress does not always show every file connection clearly. A file may be used inside a page builder, widget, slider, or theme setting. So, you should always check usage before deleting any file.
Where Are WordPress Media Files Stored?
Many users ask, where are WordPress media files stored after upload. WordPress stores uploaded files inside your hosting account. The main folder is called the WordPress uploads folder.
The common folder path is:
/wp-content/uploads/
WordPress often sorts uploads by year and month. For example, May 2026 uploads may appear here:
/wp-content/uploads/2026/05/
WordPress also stores file details inside the database. The actual file stays on the server. The file record stays inside WordPress.
That is why deleting files directly from hosting can be risky. It may leave broken records inside WordPress. For most users, deleting files from the Media Library is the safer method.
Why You Should Clean Up the WordPress Media Library
A WordPress website can collect hundreds of files over time. Some files stay useful for blog posts, products, and pages. Other files become old, unused, or duplicated after website changes. This is why you should clean up WordPress media library files regularly.
A clean media library keeps your website easier to manage. It also helps you avoid storage waste and file confusion. Regular WordPress media library cleanup is helpful for blogs, business sites, and WooCommerce stores.
- It Reduces Unwanted Storage Use
Unused images, PDFs, and videos can take valuable hosting space. This problem becomes bigger on large WordPress websites. WooCommerce stores often upload many product images and gallery files.
When old media files stay in your library, they keep using server space. This can affect your hosting limits and backup size. A clean media library helps you use storage wisely.
2.It Makes File Management Easier
A messy library makes file search slow and confusing. You may see many similar images or old files. This makes it harder to choose the correct file.
When you organize media files, your team works faster. Editors can find images easily. Developers can also identify active files without extra checks.
- It Keeps Website Backups Smaller
Website backups include your files and database. If your media library is too large, backups become heavy. Large backups take more time to create and download.
Smaller backups are easier to store and restore. They also help during website migration or emergency recovery.
- It Reduces Confusion During Website Updates
Old media files can confuse your team during redesigns. A developer may not know which file is active. An editor may use an outdated image by mistake.
A clean library helps everyone use the right assets. It also supports smooth content updates and design changes.
What to Check Before Deleting WordPress Media Files
Never delete media files without checking their usage first. Some files may look unused but still appear somewhere.
Before deleting, check these areas:
- Featured images on posts and pages.
- WooCommerce product images and galleries.
- Page builder sections and saved templates.
- Sliders, popups, forms, and widgets.
- Logos, favicons, and theme settings.
- PDF files linked from buttons or menus.
Also, take a full website backup before cleanup. This protects your website if any file is deleted by mistake. Safe checking helps you remove only unused files.
How to Manage WordPress Media Library Properly
You should manage WordPress media library files with a clear process. A planned process keeps your files clean and easy to find. It also helps you avoid duplicate uploads and storage waste.
Good media management starts before you upload any file. It continues after every blog post, page update, or product change.
Use Clear File Names Before Uploading
File names should explain what the file contains. A clear name helps you find the file later.
For example, use:
wordpress-media-cleanup-guide.jpg
Avoid names like:
IMG_4587.jpg
Clear file names also help your SEO work. They make image handling easier for admins and editors.
Add Alt Text and Details
Alt text explains an image for users and search engines. It also supports accessibility for screen reader users.
You can add alt text from the Media Library. You can also add captions, titles, and descriptions. These details help you identify files faster.
Remove Duplicate Files


Duplicate files make your media library harder to manage. They also use extra hosting space without adding value.
Before removing duplicates, check which file is active. Keep the best version. Then delete only confirmed duplicate files.
Organize Files by Content Purpose
You can organize files by blogs, services, products, or campaigns. This is useful for large websites with many uploads.
Some users use media folder plugins for better sorting. These plugins can help teams find files faster.
Review Large Files
Large images, videos, and PDFs can fill hosting space quickly. Review heavy files during every cleanup.
You can replace oversized images with optimized versions. This helps your storage and makes file handling easier.
How to Find Unused Media Files in WordPress
Before you delete unused media files in WordPress, find them carefully. WordPress may show some files as unattached. But unattached does not always mean unused.
A file may still appear in:
- Page builder layouts
- Theme settings
- WooCommerce product galleries
- Sliders and popups
- PDF buttons or menu links
- Custom fields or shortcodes
You can start with the Media Library filter. Check unattached files, older uploads, and duplicate images. Also review old drafts and deleted page content.
You may use a trusted cleanup plugin for scanning. But never delete files only based on plugin results. Always compare results with a manual check. This safe process helps you remove files without breaking website images.
How to Delete Unused Media Files in WordPress Safely
You should delete media files with care and proper checks. A wrong deletion can break images, PDFs, and download links. Follow a safe process before you delete unused media files in WordPress.
Step 1: Create a Full Website Backup
Start with a full website backup before deleting anything. Your backup should include files and the database. This helps you restore deleted media if needed.
Step 2: Open the WordPress Media Library
Go to your WordPress dashboard. Then open:
Dashboard → Media → Library
Here, you can view all uploaded media files. You can use grid view or list view. List view gives more details about each file.
Step 3: Filter or Search Media Files
Use filters to sort files by type or date. You can also search files by name. This helps you find old, duplicate, or unwanted files.
Check images, PDFs, videos, and document files carefully. Do not delete any file only because it looks old.
Step 4: Confirm the File Is Not Used
Open the page, post, product, or template linked to that file. Check featured images, galleries, sliders, and page builder sections. Also check theme settings and menu links.
Some files may not show clear usage inside WordPress. That is why manual checking is important.
Step 5: Delete the File Permanently
After confirming the file is unused, open its attachment details. Then click Delete permanently.
This removes the file from your WordPress Media Library. It also removes the related attachment record from WordPress.
Step 6: Check the Frontend After Deletion
After deletion, check your main website pages. Review images, buttons, PDFs, product pages, and blog posts. If anything is missing, restore it from your backup.
How to Permanently Delete Media Files in WordPress
Removing an image from a page does not delete it. Deleting a post also may not remove uploaded files.
To permanently delete media files WordPress, remove them from the Media Library. This is safer than deleting files through hosting.
Avoid direct deletion from the server unless required. Direct deletion can leave broken records inside WordPress. A careful Media Library deletion keeps your site cleaner and safer.
Common Mistakes to Avoid During Media Cleanup
Media cleanup is helpful, but wrong steps can break files. You should always follow a safe process during WordPress media library cleanup. This helps protect your images, PDFs, and design files.
Avoid these common mistakes:
- Deleting files without taking a full backup.
- Trusting unattached status without manual checking.
- Removing WooCommerce product images by mistake.
- Deleting PDFs linked from buttons or menus.
- Removing logos, favicons, or brand images.
- Deleting files directly from the WordPress uploads folder.
- Forgetting to check pages after cleanup.
These mistakes can create broken images and missing downloads. So, always check file usage before deleting anything.
Best Practices to Keep the Media Library Clean
You can keep your media library clean with simple habits. Upload only the files you really need. Use clear file names before uploading images or documents. This makes files easier to find later.
Also, compress images before adding them to WordPress. Large files can use more hosting space. Replace old files instead of uploading many similar copies.
You should review your media library monthly or quarterly. This helps you find duplicate files early. It also keeps your website easier to manage.
Conclusion
A clean media library helps your WordPress website stay organized. It also reduces storage waste and backup size. Before deleting anything, check file usage and take a backup. Safe cleanup helps you manage files without breaking your website.
If your website has many pages, cleanup can feel risky. 24×7 WP Support can help you safely clean up WordPress media library files. Our team can review unused files, protect active media, and organize your library properly.
FAQs
1. Where are WordPress media files stored?
WordPress media files are stored inside the WordPress uploads folder. The common path is /wp-content/uploads/. WordPress usually sorts uploads by year and month. It also stores file details inside the WordPress database.
2. How do I clean up WordPress media library files safely?
First, take a full website backup. Then check each file before deletion. Review pages, posts, products, builders, sliders, and theme settings. After checking, delete only confirmed unused files from the Media Library.
3. Can I delete unused media files in WordPress directly?
Yes, you can delete unused files from the Media Library. But you should not delete files without checking usage. Some files may look unused but still appear in page builders, menus, WooCommerce products, or theme options.
4. How do I permanently delete media files WordPress?
Go to Dashboard → Media → Library. Open the file you want to remove. Then click Delete permanently. This removes the file from WordPress and may not be recoverable without a backup.
5. Is it safe to delete files from the WordPress uploads folder?
It is not safe for most users. Direct deletion can leave broken records inside WordPress. It may also break images, PDFs, and download links. Deleting files from the Media Library is safer.
Related posts:

Brian is a WordPress support specialist and content contributor at 24×7 WP Support. He writes practical, easy-to-follow guides on WordPress troubleshooting, WooCommerce issues, plugin and theme errors, website security, migrations, performance optimization, and integrations. With a focus on solving real website problems, Brian helps business owners, bloggers, and online store managers keep their WordPress sites running smoothly.
