
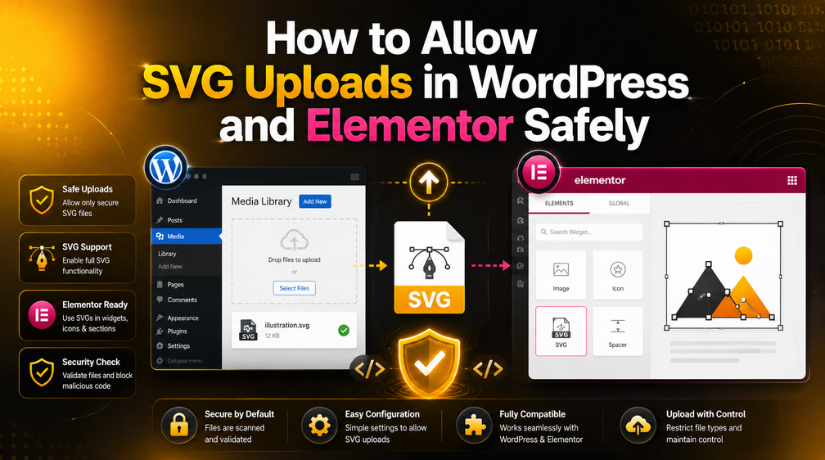
How to Allow SVG Uploads in WordPress and Elementor Safely
Introduction
Many website owners want clean and sharp images today. This is why SVG files are now very popular. SVG files are often used for logos, icons, buttons, and small design graphics. They look clear on every screen size. They also help your website design look more modern and professional.
Many users want to allow SVG uploads in WordPress because regular image formats can lose quality. A PNG or JPG file may look blurry when resized. An SVG file stays sharp because it is based on lines and shapes. This makes it useful for responsive website design.
However, WordPress does not allow SVG uploads by default. When users try to upload SVG files in WordPress, they may see an upload error. This can feel confusing, especially for beginners. It can also stop designers from using clean icons inside pages.
This issue is more common for Elementor users. Elementor designs often use custom icons and visual sections. SVG files can make those designs look better and lighter. Still, SVG files should be handled with care. They can contain code, so safety is very important.
What Is an SVG File in WordPress?
SVG means Scalable Vector Graphics. It is a special image format. It does not work like JPG or PNG images. Instead, it uses code to create shapes, lines, and colors. This helps the image stay clear at every size.
For example, a logo in SVG format can look sharp everywhere. It can look clear on mobile, tablet, laptop, and desktop screens. This makes SVG useful for modern WordPress websites.
Common SVG uses include:
- Website logos
- Header icons
- Service icons
- Social media icons
- Elementor graphics
- Custom button icons
SVG files can also support better design quality. They often have a small file size. This can help page speed when files are clean and optimized.
Still, SVG files need safe handling. Since they contain code, unsafe files may create security risks. So, users should only use trusted and clean SVG files. This helps keep the WordPress website safe and professional.
Why WordPress Blocks SVG Uploads by Default
WordPress blocks SVG files by default for security reasons. SVG files are different from normal image files. They use XML code to display shapes, lines, and graphics. This code-based structure makes SVG files powerful. It also makes them sensitive if handled carelessly.
An unsafe SVG file may contain harmful scripts or hidden code. If that file enters your media library, it may affect site safety. This is why WordPress does not allow SVG uploads automatically. It protects users from risky file types.
Many users think WordPress SVG upload not working means a website error. In most cases, it is not a technical bug. WordPress is only blocking an unsupported file type.
You may notice messages like:
- “Sorry, you are not allowed to upload this file type.”
- The SVG file fails during upload.
- The SVG file does not appear in the media library.
- Elementor does not show the uploaded SVG correctly.
These issues can happen on blogs, business websites, and Elementor sites. The good point is simple. You can still use SVG files safely with the right setup.
Best Method to Allow SVG Uploads in WordPress Safely
The safest method for most users is a trusted SVG support plugin. This option is easier for beginners and website owners. It helps users allow SVG uploads in WordPress without touching risky code.
A good SVG plugin should do more than allow uploads. It should also clean the file before WordPress accepts it. This cleaning process is called sanitization. It removes unsafe code from the SVG file.
A reliable SVG setup should include:
- SVG upload support for WordPress.
- SVG file sanitization before upload.
- Upload access limited to administrators.
- SVG preview support inside the media library.
- Protection against unsafe or unknown SVG code.
This method creates a better safe SVG upload WordPress process. It also reduces the chance of upload mistakes. Users should never upload SVG files from unknown sources. They should use SVGs from trusted designers, brand files, or reliable tools.
Plugin-based support is best for non-technical users. It avoids manual code mistakes and improves site safety. It also helps WordPress users use clean SVG files with more confidence.
How to Enable SVG Support in Elementor Safely
Elementor users often need SVG files for better design control. SVG files work well for logos, icons, buttons, and section graphics. They stay sharp on mobile, tablet, and desktop screens. This makes them useful for modern Elementor website layouts.
Many designers want to enable SVG support in Elementor because default icons feel limited. Custom SVG files can match your brand style better. They also help create a clean and professional page design. However, Elementor depends on WordPress media upload settings. So, SVG support should be enabled in WordPress first.
Before using SVG files in Elementor, make sure they are safe. Use trusted SVG files from your designer or brand kit. Avoid SVG files from unknown websites. Unsafe files may include hidden code, which can create risks.
You can follow this simple process:


- Enable SVG upload support in WordPress first.
- Use a trusted SVG plugin with sanitization.
- Upload the SVG file to the media library.
- Open the page with Elementor editor.
- Add an Image, Icon, or Custom Icon widget.
- Select the uploaded SVG file from media.
- Check the design on desktop and mobile views.
After adding the SVG, review its size and spacing carefully. Some SVG files may look too large inside widgets. You can adjust the width, alignment, and padding from Elementor settings. Always test the design on different screen sizes.
Sometimes Elementor may still reject an SVG file. This usually happens when the file is unsafe or broken. Exporting a clean SVG again can fix this issue. Clearing Elementor cache may also help display the image correctly.
Do not use too many SVG files on one page. Clean and optimized files are better for performance. A limited number of useful SVGs keeps the design fast and clear. This helps users enjoy a better website experience.
How to Add SVG to WordPress Without Plugin Safely
Some advanced users prefer to add SVG to WordPress without plugin. This method can reduce plugin use on the website. It also gives developers more control over file support. However, this method needs careful handling and technical knowledge.
The manual method usually uses custom code. This code is added to the theme functions file. Some developers also use a custom site plugin. The code allows WordPress to accept SVG as a valid file type. After that, selected users can upload SVG files through the media library.
This method can help when you want a lightweight setup. It may also help when you manage a custom WordPress build. Still, it is not the safest option for beginners. One small code mistake can break the website. It may also create upload or display issues.
The manual method usually does these things:
- Adds SVG as an allowed file type.
- Allows WordPress to accept SVG uploads.
- Gives upload access to selected user roles.
- Helps developers control upload behavior.
- Supports custom design needs without extra plugins.
However, there is one important security point. MIME type code only allows SVG uploads. It does not clean the SVG file. It also does not remove harmful code from unsafe SVG files. So, this method can create risks if used carelessly.
You should only use this method when safety steps are clear. Always upload SVG files from trusted sources only. Check each SVG before adding it to WordPress. Limit SVG upload access to administrators only. Create a full website backup before changing code.
This method is useful for skilled WordPress users. It can work well for clean and trusted SVG files. But most website owners should use a trusted SVG plugin. A plugin with sanitization offers better protection. It also makes SVG handling safer and easier.
Fix WordPress SVG Upload Not Working Issues
Sometimes users still face SVG upload problems after setup. This does not always mean the website is broken. The issue may come from settings, file structure, cache, or user permissions. If WordPress SVG upload not working appears again, check each possible cause carefully.
SVG File Type Is Still Blocked
SVG support may not be active on your website. Check your plugin settings or custom code first. Make sure SVG is added as an accepted file type.
SVG File Is Unsafe or Broken
Some SVG files contain broken code or unsafe scripts. WordPress or Elementor may reject those files. Export the SVG again from a trusted design tool.
Elementor Is Not Showing the SVG
Elementor may not display SVG files because of cache. Clear Elementor cache, browser cache, and website cache. Then check the page again in a private browser window.
User Role Has No Upload Permission
SVG uploads should stay limited to administrators only. This keeps your website safer. Avoid giving SVG upload access to editors, authors, or unknown users.
Safe SVG Upload Best Practices for WordPress Sites
A safe SVG upload WordPress setup needs more than upload access. You should also follow basic security steps. These steps help protect your website and visitors.
Use these best practices:
- Upload SVG files from trusted sources only.
- Sanitize every SVG before using it.
- Keep WordPress, Elementor, and plugins updated.
- Limit SVG uploads to administrator accounts.
- Remove unused SVG files from the media library.
- Test SVG files on mobile and desktop screens.
Conclusion
SVG files are useful for clean WordPress website design. They help logos, icons, and graphics look sharp. However, WordPress blocks SVG files by default for security reasons. You can use SVG safely with the correct setup, clean files, and limited access.
If your SVG upload issue continues, contact 24x7wpsupport. Their team can check your website settings and help you use SVG files safely.
Related posts:
How to Build Sales Funnels in WordPress (Step-by-Step Guide)
How to Connect Canva Designs to WordPress Easily (Guide for Beginners)
How to Set Up Business Voicemail Greetings with Examples
Wondering How to Improve WordPress Accessibility? We Have Got Your Back
How to set up Shipstation Woocommerce Integration?

Brian is a WordPress support specialist and content contributor at 24×7 WP Support. He writes practical, easy-to-follow guides on WordPress troubleshooting, WooCommerce issues, plugin and theme errors, website security, migrations, performance optimization, and integrations. With a focus on solving real website problems, Brian helps business owners, bloggers, and online store managers keep their WordPress sites running smoothly.
