
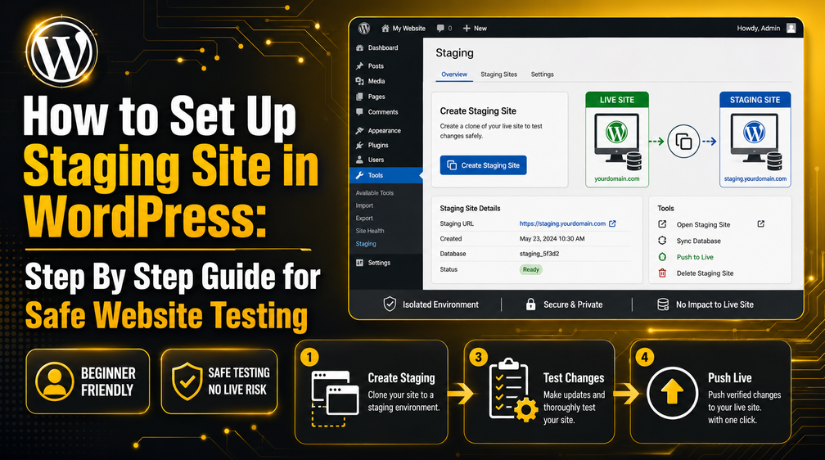
How to Set Up Staging Site in WordPress: Step By Step Guide for Safe Website Testing
Introduction
A WordPress website needs regular care, updates, and testing. You may update plugins, change themes, edit pages, or improve speed. Sometimes, these changes work fine without any issue. But sometimes, one small update can break your website layout. It can also stop forms, menus, images, or checkout pages from working. This is why you should never test major changes directly on a live website.
When you set up a staging site in WordPress, you create a safe testing area. This testing area helps you check changes before visitors see them. Your live website stays active and safe during the process. You can test updates, designs, plugins, and custom code privately. If something breaks, only the staging copy gets affected.
A staging setup is useful for beginners, developers, and business owners. It helps everyone make better website decisions with less risk. You can test new features without creating problems for users. You can also fix errors before they reach your live site. A good WordPress staging environment gives you more control and confidence. It protects your brand, traffic, leads, and online sales.
This guide focuses on a simple plugin-based setup. It will help you create staging sites WordPress users can manage easily. You do not need advanced coding knowledge to start.
What Is a WordPress Staging Site and Why Is It Useful?
A WordPress staging site is a private copy of your live website. It looks and works almost like your main website. It usually includes the same pages, plugins, themes, images, and settings. The main difference is simple. Your live website is public, but staging stays private.
A staging site is also called a WordPress test site. Some people call it a WordPress development site too. It is used for testing updates, designs, features, and code changes. You can make changes there without affecting real visitors.
Think of your live website as your public shop. People visit it, read content, submit forms, or buy products. Your staging site is like a private workshop. You can repair, test, and improve things there first. Once everything works properly, you can move approved changes live.
A staging website WordPress setup is very helpful for safe testing. It lets you check plugin conflicts before updating the live site. It also helps you test theme changes before publishing them. You can check mobile design, page speed, forms, and checkout flow. This makes WordPress website testing safer and easier.
When Should You Create a Staging Site for Your WordPress Website?
Before Updating WordPress Core
You should create a staging site before updating WordPress core. Core updates improve security, speed, and website features. But they can also create plugin or theme conflicts. A safe WordPress staging environment helps you test the update first.
Before Updating Important Plugins
You should use staging before updating important WordPress plugins. Some plugins control forms, SEO, payments, cache, and security. If one plugin fails, your website may stop working properly. A WordPress test site lets you check plugin updates safely.
Before Changing Your WordPress Theme
Theme changes can affect your full website design. They may change layouts, menus, fonts, widgets, and page styles. A staging website WordPress setup helps you test the new theme first.
Before Making WooCommerce Changes
WooCommerce websites need extra care during changes. Online stores handle orders, payments, shipping, taxes, and stock. One small checkout issue can stop customers from buying.
Before Editing Custom Code
Custom code changes can break important website functions. This includes PHP, CSS, JavaScript, and theme file edits. A WordPress development site gives you a safe place for code testing.
Before Changing PHP, Cache, or Server Settings
Server-level changes can affect website performance and plugin behavior. These changes may include PHP updates, CDN setup, or cache rules. You should test these settings inside staging first.
Before Redesigning Important Website Pages
You should create staging before redesigning major website pages. These may include the homepage, service pages, landing pages, or contact page. Design changes can affect mobile layout and user experience.
Before Migrating Your Website
Website migration can create many technical issues. These may include broken links, missing images, database errors, or login problems. A staging copy helps you test the migrated website first.
Things to Do Before Creating a WordPress Staging Site
Before you create a staging site WordPress, prepare your website properly. A few simple checks can save time and prevent mistakes. Good preparation also makes the staging process smoother and safer.
Take a Full Website Backup Before Starting
Always take a full backup before creating a staging site. Your backup should include website files and the database. Files include themes, plugins, uploads, and custom code. The database includes pages, posts, settings, users, and orders.
Check Your Hosting Storage Space Carefully
A staging site creates another copy of your website. This means your hosting account needs enough free space. Large websites with many images need more storage. WooCommerce stores may also have bigger databases. If storage is low, the staging process may fail.
Keep Important Login Details Ready
You should keep important access details ready before staging. These may include WordPress admin, hosting, FTP, and database access. You may not need all details during plugin setup.
Note Important Website and Plugin Settings
Write down important settings before creating your staging copy. This includes SMTP settings, cache settings, CDN rules, and security settings. Also note payment gateway settings and WooCommerce checkout settings.


Avoid Major Live Changes During Testing
Avoid making big live website changes during staging work. Your live site and staging site can become different quickly. This creates confusion when moving changes back to live. It may also overwrite new content, forms, or orders.
Set Up a WordPress Staging Site Without Affecting Your Live Website
A plugin is one of the easiest staging options. It helps beginners create a safe testing copy. You do not need advanced coding skills. You can build a private WordPress staging environment from your dashboard. This method is helpful when hosting does not offer staging. It also works well for many small business websites.
Step 1: Log in to Your WordPress Dashboard Safely
- Open your WordPress admin login page.
- Use yourdomain.com/wp-admin to access it.
- Log in with an administrator account.
- Make sure the dashboard works properly.
- Now you can start creating your WordPress test site.
Step 2: Install a Trusted WordPress Staging Plugin
- Go to Plugins > Add New.
- Search for a trusted staging plugin.
- Check reviews, updates, and compatibility.
- Click Install Now, then Activate.
- This helps you set up staging sites in WordPress easily.
Step 3: Start Creating a New Staging Website
- Open the plugin settings page.
- Click Create Staging Site or Clone Site.
- Add a simple name like “staging.”
- Keep the name clear and easy.
- This starts your staging website WordPress setup.
Step 4: Select Website Files and Database Tables
- Keep default options selected if you are a beginner.
- These usually include themes, plugins, uploads, and databases.
- Do not remove files without technical knowledge.
- Missing files can break the staging copy.
- This creates a complete WordPress development site.
Step 5: Run the Website Cloning Process
- Check all settings before starting.
- Click the start or clone button.
- Wait while the plugin copies your website.
- Large websites may take more time.
- Do not close the browser during cloning.
Step 6: Open and Review Your WordPress Staging Site
- Open the staging URL given by the plugin.
- Log in with your WordPress admin details.
- Check the homepage, menus, images, and forms.
- Test mobile and desktop layouts.
- The staging site should match your live site.
Step 7: Test Updates and Website Changes Carefully
- Test plugin updates and theme changes first.
- Check forms, buttons, speed, and layouts.
- For WooCommerce, test cart and checkout.
- Use test payment mode only.
- Fix all issues before going live.
Step 8: Move Approved Changes to the Live Website
- Review all changes before moving them live.
- Take a fresh backup first.
- Use the plugin’s push-to-live option if available.
- Avoid overwriting WooCommerce orders or form entries.
- Clear cache and test the live website again.
How to Protect Your Staging Site from Google Search Results
A staging site should stay private during the testing process. It is not made for public visitors or search engines. If Google indexes your staging pages, it can create problems. Your test pages may appear beside your live website pages. This can cause duplicate content and SEO confusion.
Use the WordPress Search Engine Visibility Setting
WordPress gives you a simple search visibility option. Go to Settings > Reading inside your WordPress dashboard. Then check Discourage search engines from indexing this site. This setting tells search engines not to index your staging site.
Add Password Protection to the Staging Website
Password protection is one of the safest methods. It blocks visitors before they can view the staging site. You can add this from your hosting control panel. Some security plugins also provide password protection options.
Add Noindex Rules for Extra SEO Safety
You can also add noindex rules to staging pages. A noindex rule tells search engines not to show pages. Many SEO plugins allow noindex settings for WordPress sites. This is helpful for a staging website WordPress setup.
Remove Staging URLs from Sitemaps
Your staging URLs should never appear in XML sitemaps. Search engines use sitemaps to find important website pages. If staging URLs appear there, Google may crawl them. Check your SEO plugin settings after creating staging.
Avoid Sharing Staging URLs Publicly
Do not share staging links on public pages or social media. Also avoid adding them to emails, blogs, or documents. Public links can help search engines find your staging site. Keep the staging URL private until testing is complete.
Common WordPress Staging Site Mistakes to Avoid
A staging site is helpful, but mistakes can still happen. You should follow safe steps during WordPress website testing. This helps protect your live website and business data.
Not Taking a Backup Before Starting
Many users start staging without creating a backup first. This is risky because cloning or pushing can fail. Always take a full backup before major changes. Your backup should include files and database content.
Forgetting to Block Google from Staging Pages
Some users forget to block search engines after staging setup. This can make test pages appear in search results. Always use search visibility, noindex, and password protection together. This keeps your WordPress development site private and safe.
Testing Payments in Live Mode
WooCommerce users should avoid live payment testing on staging. Live mode can create real payment attempts or order confusion. Always use test mode for payment gateway checks. This keeps customer and payment data protected.
Pushing Old Data to the Live Website
This is a serious mistake for ecommerce websites. Your staging database may not include new live orders. If you push old data, it can overwrite orders. It may also remove new users, forms, or stock changes. Always review database changes before pushing live.
Editing Live and Staging Together
Avoid making large changes on both websites together. This creates a mismatch between live and staging versions. You may lose updates during the final deployment. Keep live changes limited while testing staging changes.
Not Testing Mobile Layout Properly
Many users test only desktop pages before going live. But most visitors use mobile devices today. Check your staging website on mobile and tablet screens. Review menus, buttons, forms, images, and checkout pages carefully.
Ignoring Cache and CDN After Deployment
Cache and CDN tools can show old website files. This may confuse you after moving changes live. Clear website cache, browser cache, and CDN cache. Then review important pages again after deployment.
Conclusion
A WordPress staging site helps you test changes before they affect visitors. It gives you a private space to check updates, plugins, themes, forms, and design changes. You can find issues early and fix them safely. This reduces downtime and protects your live website experience. Before pushing any change live, always take a backup, test important pages, protect staging from Google, and review mobile layouts carefully.
For website owners who need help with staging setup, updates, plugin issues, or WordPress testing, 24×7 WP Support provides WordPress support through phone and chat. You can visit 24x7wpsupport or call +1-888-818-9916 for the United States and Canada, as listed on their contact page.

Brian is a WordPress support specialist and content contributor at 24×7 WP Support. He writes practical, easy-to-follow guides on WordPress troubleshooting, WooCommerce issues, plugin and theme errors, website security, migrations, performance optimization, and integrations. With a focus on solving real website problems, Brian helps business owners, bloggers, and online store managers keep their WordPress sites running smoothly.
