
How to Install WordPress on XAMPP: Complete Beginner’s Guide
Introduction
WordPress is a popular platform for building websites. Many beginners want to learn WordPress before buying hosting. This is a smart and safe step. You can test everything on your own computer first. This is where XAMPP becomes very helpful. XAMPP helps you create a local server on your computer. With this setup, you can run WordPress without a live domain. You can also test themes, plugins, pages, and settings safely. This process is called a WordPress localhost setup.
It is useful for students, bloggers, developers, and business owners. You can make changes without affecting any live website. You can also fix mistakes without public visitors seeing them. Many users search for How to install WordPress in XAMPP because it is simple and free. You only need XAMPP, WordPress files, and a browser. Once the setup is complete, you can build a full website locally. This helps you practice before moving your website online. If you want to Install WordPress locally, XAMPP is one of the easiest tools to use. It gives you a safe space to learn WordPress step by step.
What Is XAMPP and How Does It Help WordPress Run Locally?
XAMPP is a free local server software package. It helps your computer work like a web server. WordPress needs a server, PHP, and a database to run. A normal computer does not provide these by default. XAMPP adds these required tools in one simple package. This makes XAMPP WordPress installation easier for beginners. You do not need advanced server knowledge.
You can install XAMPP and run WordPress on your computer. When you use WordPress in XAMPP, your website runs through localhost. Localhost means your own computer works as the server. You can open the website in your browser. The site will not be public on the internet. This makes local testing safe and private. A WordPress local server setup is perfect for learning and testing. You can install themes, check plugins, and create demo pages. You can also test updates before applying them live. This helps prevent errors on real websites.
Why Install WordPress on XAMPP for Safe Website Practice?
Installing WordPress on XAMPP gives beginners a safe learning space. You can build, test, and edit websites privately. Your changes do not affect any live website. This makes XAMPP very helpful for new WordPress users. Many beginners want to install WordPress locally before buying hosting. It helps them understand WordPress without extra cost. You can test pages, menus, plugins, and themes easily.
Practice WordPress Without Affecting a Live Website
A live website is public for visitors and customers. Any wrong change can break its design or features. With XAMPP WordPress installation, you avoid that risk. You can test new changes on your local website first. This helps you check everything before making it live. You can edit pages, change layouts, and update settings safely. If something breaks, only your local site gets affected.
Learn WordPress Without Buying Hosting First
Many beginners do not want hosting at the starting stage. Hosting also needs a domain, setup, and monthly costs. XAMPP removes this problem for new learners. You can Install WordPress on localhost for free. This helps you learn WordPress without a paid server. You can understand the dashboard, posts, pages, and settings.
Test Themes, Plugins, and Updates Safely
Themes and plugins can change your website completely. Some plugins may also create errors or conflicts. A WordPress local server setup helps you test them first. You can install different themes and compare their designs. You can also test plugins before using them live. This keeps your real website safe from sudden issues. You can check speed, layout, forms, and plugin settings locally.
Build a Complete Website Before Launching Online
XAMPP is useful for building a full website offline. You can create pages, menus, blogs, and contact forms. You can also prepare your design before launch. This makes the live setup faster and smoother. Developers often use local setups for client websites. Beginners can also follow the same safe method. After finishing the local website, you can move it online.
Things You Need Before Installing WordPress on XAMPP
Computer With Windows, macOS, or Linux
You need a working computer before starting this setup. XAMPP supports Windows, macOS, and Linux systems. You can choose the correct XAMPP version for your system. Make sure your computer has enough storage space. This helps XAMPP and WordPress run smoothly during setup.
Latest XAMPP Version
You need the latest suitable XAMPP version for local setup. XAMPP includes Apache, PHP, MariaDB, and phpMyAdmin. These tools help WordPress run on your computer. Always download XAMPP from the official Apache Friends website. This keeps your WordPress local server setup safe and updated.
Latest WordPress ZIP File
You also need the latest WordPress ZIP file. Download it only from the official WordPress website. This helps you avoid unsafe or changed files. After downloading, you need to extract the ZIP file. These files will be used for XAMPP WordPress installation.
A Web Browser
You need a browser to open your local website. You can use Chrome, Firefox, Edge, or Safari. The browser helps you access localhost on your computer. You will also use it to open phpMyAdmin. This is important when you Install WordPress on localhost.


Basic Folder Access
You should know how to open and manage folders. WordPress files must be placed inside the XAMPP htdocs folder. This folder works as the local website directory. If files are placed wrongly, WordPress may not open. So, basic folder access is very important.
Admin Permission on Your Computer
You may need admin permission to install XAMPP. Some systems ask for permission during software installation. Admin access also helps Apache and MySQL run properly. Without permission, XAMPP may not start correctly. This can affect your WordPress localhost setup.
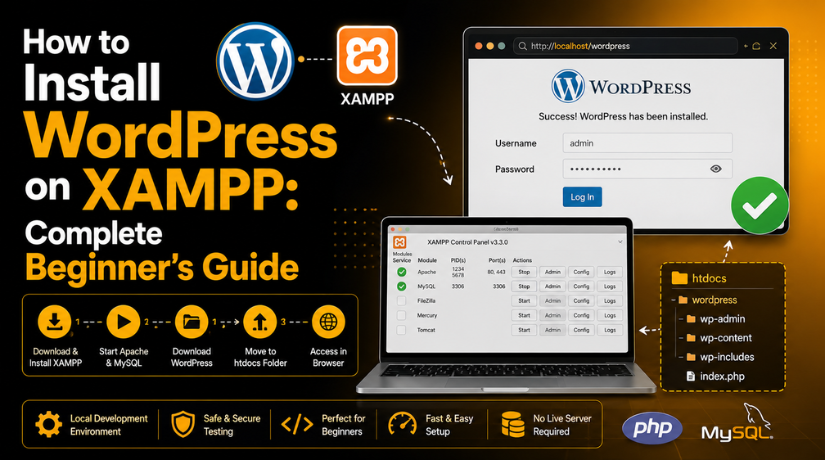
How to Install WordPress on XAMPP (Step By Step)
Step 1: Download XAMPP from the Official Website
- First, visit the official Apache Friends website.
- Choose the correct XAMPP version for your operating system.
- XAMPP works on Windows, macOS, and Linux systems.
- Download the latest stable version for better support.
- XAMPP includes Apache, PHP, MariaDB, and phpMyAdmin.
- These tools help run WordPress in XAMPP locally.
- Avoid downloading XAMPP from unknown third-party websites.
- Unsafe files may create security or setup problems later.
Step 2: Install XAMPP on Your Computer
- Open the XAMPP installer after the download finishes.
- Allow system permission if your computer asks for approval.
- Keep Apache, MySQL or MariaDB, PHP, and phpMyAdmin selected.
- These parts are needed for XAMPP WordPress installation.
- Choose the installation folder during the setup process.
- On Windows, the common folder path is C:\xampp.
- Complete the setup by following the screen instructions.
- After installation, open the XAMPP Control Panel.
Step 3: Start Apache and MySQL
- Open the XAMPP Control Panel on your computer.
- Click Start next to Apache first.
- Then click Start next to MySQL.
- Both services should turn green after starting successfully.
- Apache helps run your local WordPress website.
- MySQL or MariaDB connects WordPress with the database.
- Now open your browser and type http://localhost/.
- If the XAMPP dashboard opens, your WordPress local server setup works.
Step 4: Download WordPress
- Visit the official WordPress website in your browser.
- Download the latest WordPress ZIP file.
- Save the ZIP file on your computer.
- Extract the ZIP file after downloading it.
- You will see a folder named wordpress.
- This folder contains all main WordPress files.
- These files are required to Install WordPress locally.
- Do not change these files during basic setup.
Step 5: Move WordPress Files to htdocs
- Open the XAMPP installation folder on your computer.
- On Windows, go to C:\xampp\htdocs.
- Create a new folder inside the htdocs folder.
- You can name this folder mywebsite.
- Open the extracted WordPress folder.
- Copy all files from inside the WordPress folder.
- Paste those files into C:\xampp\htdocs\mywebsite.
- Your local website URL will be http://localhost/mywebsite.
Step 6: Create a Database in phpMyAdmin
- WordPress needs a database to store website data.
- Open your browser and type http://localhost/phpmyadmin.
- Click the Databases option from the top menu.
- Enter a simple database name, such as mywebsite_db.
- Click Create after adding the database name.
- This database will store posts, pages, users, and settings.
- It also stores comments, theme settings, and plugin data.
- Keep the database name ready for the next step.
Step 7: Run the WordPress Installer
- Open http://localhost/mywebsite in your browser.
- WordPress will show the setup screen automatically.
- Select your preferred language and click Continue.
- Now enter your database connection details carefully.
- Use mywebsite_db as the database name.
- Use root as the database username.
- Leave the password field blank for normal XAMPP setup.
- Use localhost as the database host.
- Keep the table prefix as wp_.
- Click Submit, then click Run the Installation.
Step 8: Add Website Details
- Now enter your local WordPress website details.
- Add a clear site title for your website.
- Create a username for your WordPress admin account.
- Avoid using admin as your username.
- Add a strong password and save it safely.
- Enter your email address in the required field.
- The search visibility option is not important locally.
- Click Install WordPress to complete the setup.
Step 9: Log In to Your WordPress Dashboard
- After installation, click the Log In button.
- Enter your WordPress username and password.
- You can also open the dashboard directly.
- Use http://localhost/mywebsite/wp-admin in your browser.
- Your local WordPress dashboard is now ready.
- You can create pages, posts, menus, and categories.
- You can also test themes and plugins safely.
- This completes How to install WordPress in XAMPP successfully.
Common XAMPP WordPress Installation Problems Beginners May Face
Sometimes beginners face small errors during XAMPP WordPress installation. These errors are common and easy to fix. Most issues happen because Apache, MySQL, files, or database details are incorrect. You do not need to panic when something breaks. A local setup is safe for testing and learning. You can check each setting and fix the issue step by step. This is one major benefit of using WordPress in XAMPP before going live.
Apache Is Not Starting in the XAMPP Control Panel
Apache may not start when another app uses the same port. Port 80 or 443 is usually the main reason. Skype, IIS, or another server tool can cause this conflict. First, close unused apps and restart XAMPP again. You can also run XAMPP as administrator. If the issue continues, change the Apache port settings. After that, start Apache and check http://localhost/ again.
MySQL Is Not Starting During WordPress Local Server Setup
MySQL may stop when another database service is already running. This can happen after a system update or software conflict. First, restart XAMPP with administrator permission. Then click Start beside MySQL again. If it still fails, check the XAMPP error logs. The database must run before you Install WordPress on localhost. Without MySQL, WordPress cannot connect with the database.
localhost Is Not Opening in the Browser
If localhost does not open, Apache may not be running. Open the XAMPP Control Panel and check Apache first. If Apache is green, refresh the browser again. Also, make sure you type the URL correctly. Use http://localhost/ for the main XAMPP dashboard. Use your project URL for your WordPress site. A correct WordPress localhost setup depends on the right local path.
Error Establishing a Database Connection in WordPress
This error means WordPress cannot connect with your database. Check your database name, username, password, and host. For normal XAMPP setup, the username is root. The password field is usually blank. The database host should be localhost. Also, confirm that your database exists in phpMyAdmin. Correct details will fix this issue in most cases.
WordPress Setup Page Is Not Opening Properly
This issue often happens because files are placed incorrectly. Open your project folder inside the htdocs folder. Make sure WordPress files are directly inside that folder. The index.php file should be visible there. If files are inside another wordpress folder, move them correctly. Then open your local site URL again.
Website Shows Folder List Instead of WordPress
A folder list means Apache cannot find the main WordPress file. This usually happens when index.php is missing. Check your project folder inside htdocs. Copy all WordPress files into the correct project folder. Then reload your local website in the browser. This should open the WordPress installer screen.
Conclusion
Installing WordPress on XAMPP is a helpful first step for beginners. It gives you a safe place to learn WordPress. You can test themes, plugins, pages, and settings locally. This setup also helps you understand how WordPress works behind the scenes. You can build your website on your computer first. Then, you can move it to live hosting when ready. A local setup also reduces mistakes on active websites.
It gives you more control during learning and testing. If you face issues with XAMPP, localhost, WordPress setup, migration, or live website errors, you can review support options from 24×7 WP Support Their website lists WordPress support services and contact details for users needing technical guidance. You can visit 24x7wpsupport or call +1-888-818-9916 for WordPress-related support information.
Related posts:
How to Add Accessibility Features In WordPress Website Easily (Beginner’s Guide)
Guide to Editing Source Code of your WordPress Website PHP, MySQL, HTML, JavaScript & CSS
How to Set Up Easy Appointments in WordPress: Complete Installation Guide
How to Add Google Translate to WordPress Website Easily
How to Hide a Featured Image In WordPress for Individual Posts

Brian is a WordPress support specialist and content contributor at 24×7 WP Support. He writes practical, easy-to-follow guides on WordPress troubleshooting, WooCommerce issues, plugin and theme errors, website security, migrations, performance optimization, and integrations. With a focus on solving real website problems, Brian helps business owners, bloggers, and online store managers keep their WordPress sites running smoothly.
