
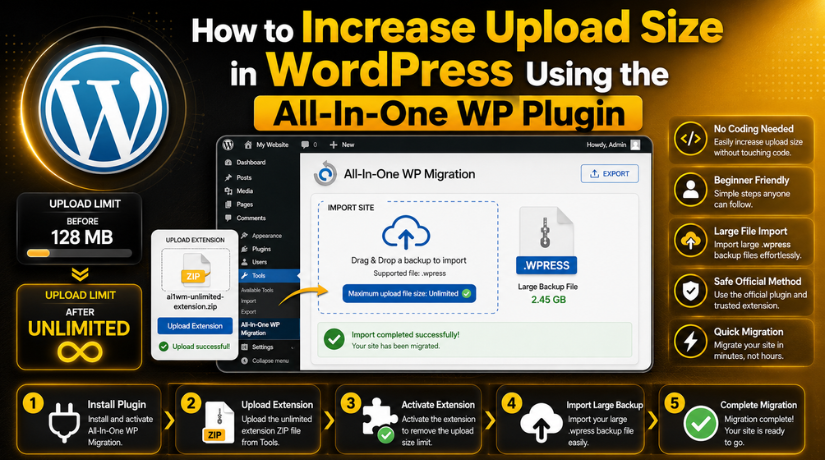
How to Increase Upload Size in WordPress Using the All-In-One WP Plugin
Introduction
Many WordPress users face upload problems during website migration. This issue often appears when importing a large backup file. The problem becomes common with the All-in-One WP Migration plugin. This plugin helps users move, copy, backup, and restore WordPress websites. It is simple to use and works well for many website owners. However, large backup files may not upload successfully every time.
When you import a website backup, WordPress checks the allowed upload size. If your backup file is bigger than this limit, the upload may stop. You may also see an error message on the import screen. This issue is known as the WordPress upload size limit problem. It can stop your website migration before the process even starts.
Many users want to increase upload size in WordPress because their website backup file is large. A complete backup may include images, pages, posts, themes, plugins, and database files. If your website has many images or products, the backup file can become very heavy. WooCommerce stores and business websites often create bigger backup files. This is why many users need a higher upload limit.
This guide explains the basic meaning of upload size in WordPress. It also explains why this limit matters during migration. Before you try to increase WordPress upload limit, you should understand how this setting works. This helps you avoid wrong changes and failed imports.
What Is the WordPress Maximum Upload Size and Why Does It Matters?
The WordPress maximum upload size means the largest file WordPress allows. This limit applies when you upload any file inside WordPress. It can affect images, PDFs, videos, theme files, plugin files, and backup files. When you use the All-in-One WP Migration plugin, this limit becomes very important. The plugin imports website backup files in .wpress format.
A .wpress file can be small or very large. Its size depends on your website content. A simple blog may have a smaller backup file. A WooCommerce store may have a much larger backup file. This happens because stores contain product images, orders, plugins, and database records. These items increase the total backup size.
The WordPress upload size limit is usually shown inside WordPress. You can often see it while adding new media files. You may also see it on the All-in-One WP Migration import page. This number tells you the maximum file size allowed. If your file is bigger than that number, WordPress may block it.
For example, suppose your upload limit is 128 MB. Your website backup file is 500 MB. In this case, the backup file cannot upload successfully. You must increase upload size in WordPress before starting the import. Without increasing the limit, the migration process may fail.
When users want to upload large files in WordPress, they should check three things first. They should check the current upload limit. They should check the actual backup file size. They should also check available hosting storage. These checks help avoid failed imports and wasted time.
Why the Upload Size Limit Appears in All-in-One WP Migration
The All-in-One WP Migration upload limit appears when your backup file is bigger than the allowed import size. This usually happens during website migration or backup restore. The All-in-One WP Migration plugin uses a .wpress file for imports. This file can include your full website data. It may contain pages, posts, images, themes, plugins, and database content. When this file becomes too large, WordPress may block the upload process. This is why many users search for ways to increase upload size in WordPress before importing their backup file. The limit is not always a plugin error. It often happens because the file size is larger than allowed. The plugin simply shows the limit during the import process.
Large Website Backup Files Can Cross the Allowed Upload Limit
A large website backup is the most common reason behind this issue. Small websites may create small backup files. But business websites can create very heavy files. A website with many pages, posts, and images needs more space. WooCommerce stores can create even larger backup files. Product images, order data, customer records, and plugins increase file size. This can quickly cross the WordPress upload size limit. When the backup file is larger than allowed, import cannot continue. In this case, users must increase the WordPress upload limit before trying again.
Heavy Media Files Can Increase Backup Size Quickly
Images and videos can make your backup file very large. Many website owners upload high-size images without compression. These images stay inside the media library. During export, the migration plugin may include those files. This increases the final .wpress backup size. If your website has many banners, galleries, or product images, the file can become heavy. This creates problems when you try to upload large files in WordPress. Before starting migration, check your media library size. You can remove unused files to reduce backup size.
Large Databases Can Also Create Upload Problems
A WordPress website does not only store files. It also stores content inside the database. Your database may include posts, pages, users, comments, orders, forms, and settings. Some plugins also store logs and temporary data. Over time, this data can become very large. When you export the website, the database becomes part of the backup. This can increase the final backup size. A large database can also slow the import process. Even after you increase upload size in WordPress, import may still take time.
Plugins and Themes Can Add Extra Weight to Backup Files
Plugins and themes also increase the size of your backup. Many websites keep inactive plugins and unused themes installed. These files may still be included during export. Some plugins also store large cache folders or backup files. This can make the migration file much bigger. The All-in-One WP Migration plugin may include these items during backup creation. As a result, the import file may cross the allowed limit. Before exporting the website, remove unused plugins and themes. This keeps the backup cleaner and easier to upload.
Limited Import Size Can Stop the Migration Process
The import size limit can stop migration before it starts. You may select the backup file, but upload may fail. Sometimes, the plugin may show a warning on the import screen. This means the file size is not supported yet. In this case, you need a safe method to increase the WordPress upload limit. The official plugin method is usually better for beginners. It avoids manual changes in server files. It also helps users manage large migration files more easily.
Important Safety Checks Before You Increase Upload Size
Before increasing the upload size, you should follow some safety checks. These checks help protect your website during migration. They also reduce the risk of failed imports. Many users directly start the upload without preparation. This can cause data loss or website errors. A little preparation can save your time later. It also helps you understand the real issue clearly.
Take a Full Website Backup Before Making Any Change
Always take a full website backup before increasing upload size. This is one of the most important safety steps. Importing a backup file can overwrite existing website data. If something goes wrong, your fresh backup can help restore it. Keep this backup in a safe place outside WordPress. You can store it on your computer or cloud storage. Never depend only on one backup file. A second backup gives better protection during migration.
Check the Current Upload Limit Inside the Plugin
Before making changes, check the current upload limit first. Open your WordPress dashboard and go to All-in-One WP Migration > Import. The plugin may show the maximum file size allowed. Compare this limit with your backup file size. If the backup file is smaller, the issue may be different. If the backup file is larger, you need to increase the limit. This check helps you avoid wrong troubleshooting steps. It also confirms whether the All-in-One WP Migration upload limit is causing the issue.
Check the Actual Size of Your Backup File
You should always check the actual backup file size. The file usually ends with the .wpress extension. Right-click the file on your computer and check its size. Compare this size with the plugin upload limit. For example, your file may be 900 MB. But the allowed import size may be only 256 MB. In this case, the file cannot upload correctly. You must increase upload size in WordPress before importing it again.
Keep WordPress Login Details Ready Before Import
Keep your WordPress login details ready before starting migration. Sometimes, an imported website changes admin settings. You may need to log in again after migration. Keep the username and password saved safely. Also, make sure you have access to your email account. Password reset links may go to that email. This step is simple but very useful. It helps you avoid login problems after import.
Make Sure the Backup File Is Correct and Complete
A broken backup file can fail during import. This can happen if the download was interrupted. It can also happen if the export process stopped early. Before uploading, confirm that the backup file downloaded fully. Check the file size and creation date carefully. If possible, create a fresh export from the old website. This helps reduce the risk of failed import. A correct backup file is required to upload large files in WordPress safely.
Avoid Editing Plugin Core Files for Upload Limit Changes
Do not edit the plugin core files manually. Some users try to change upload limits inside plugin files. This is unsafe and not recommended. Plugin updates can remove those changes later. Wrong edits can also break the website. They may create security and compatibility problems. The safer option is using the official plugin method. It is cleaner, easier, and better for beginners. This keeps the All-in-One WP Migration plugin working properly during updates.
How to Increase Upload Size in WordPress Using the All-In-One Plugin (Complete Guide)
The easiest way to increase upload size in WordPress is by using the official extension of the All-in-One WP Migration plugin. This method is simple and safe for beginners. You do not need to edit server files. You do not need to change coding files. You only need to install the official Unlimited Extension. This extension helps you import large .wpress backup files. It is useful when the All-in-One WP Migration upload limit blocks your file. If your backup file is larger than the current limit, the import may fail. The official extension helps remove this issue. It lets you upload large files in WordPress more easily.
Step 1: Visit the Official Plugin Website
- Visit the official All-in-One WP Migration website.
- You can also visit the official ServMask website.
- Find the Unlimited Extension option on the website.
- Always use the official website for downloads.
- Do not download extensions from unknown websites.
- Unsafe files may contain harmful code or malware.
- Wrong files can damage your WordPress website.
- Official files help keep your migration process safe.
Step 2: Download the Unlimited Extension ZIP File


- Choose the Unlimited Extension from the official website.
- Download the extension ZIP file to your computer.
- Save the file in a folder you can easily find.
- Do not unzip the plugin file after downloading.
- WordPress needs the ZIP file for installation.
- Make sure the main plugin is already installed.
- The extension works with the main migration plugin.
- This helps avoid setup issues during activation.
Step 3: Log in to Your WordPress Dashboard
- Log in to your WordPress admin dashboard.
- Use the website where you want to import backup.
- Make sure you have administrator access.
- Only admins can install new WordPress plugins.
- If you cannot see Plugins, check your user role.
- Ask the website owner for admin access if needed.
- Keep your login details ready before migration.
- You may need to log in again after import.
Step 4: Go to the Upload Plugin Section
- Open your WordPress dashboard menu.
- Go to Plugins > Add New.
- Click the Upload Plugin button.
- This option lets you upload plugin ZIP files.
- Select the Unlimited Extension ZIP file from your computer.
- Make sure you upload the correct extension file.
- Do not upload the .wpress backup file here.
- The backup file is uploaded from the import page.
Step 5: Install the Extension File
- After selecting the ZIP file, click Install Now.
- WordPress will start uploading the extension file.
- Wait until the installation process finishes.
- Do not close the browser during installation.
- If installation fails, check the ZIP file again.
- The file may be damaged or incomplete.
- Download a fresh copy from the official website.
- After installation, WordPress will show the activation option.
Step 6: Activate the Extension
- Click the Activate Plugin button after installation.
- This will activate the Unlimited Extension on your site.
- The extension will connect with the main migration plugin.
- It helps fix the WordPress upload size limit issue.
- You do not need to edit .htaccess files.
- You do not need to change PHP settings manually.
- This makes the process simple for beginners.
- After activation, open the import page again.
Step 7: Open the Import Page Again
- Go to All-in-One WP Migration > Import.
- This page is used to import backup files.
- Check the upload area after activating the extension.
- The old All-in-One WP Migration upload limit should change.
- If the old limit appears, refresh the page.
- You can also clear your browser cache.
- Make sure both plugins are active.
- The main plugin and extension must work together.
Step 8: Upload Your Large Backup File
- Now select your .wpress backup file.
- The plugin will start uploading the file.
- Large files may take more time to upload.
- Your internet speed can affect upload time.
- Hosting speed can also affect the process.
- Do not refresh the page during upload.
- Do not close the browser tab.
- Wait until the upload process completes.
Step 9: Confirm the Import Message
- After uploading, the plugin may show a warning.
- Read the warning message very carefully.
- It may say your current website will be replaced.
- Import can overwrite files, database, plugins, and settings.
- Continue only when you have a fresh backup.
- If everything is ready, confirm the import.
- Wait until the import process finishes fully.
- Do not close the browser during this step.
Step 10: Check Your Website After Import
- Open your website homepage first.
- Check the main design and layout.
- Open important inner pages one by one.
- Check menus, buttons, images, and contact forms.
- If you use WooCommerce, check product pages.
- Also check cart, checkout, and account pages.
- Open Settings > Permalinks in WordPress.
- Click Save Changes to refresh website links.
Why This Method Is Better for Beginners
This method is better because it is simple. You do not need coding knowledge. You do not need hosting knowledge. You do not need to edit server files. The official extension works directly with the All-in-One WP Migration plugin. It helps you increase WordPress upload limits in an easier way. This reduces mistakes and keeps the process safe.
Troubleshooting After Increasing Upload Size and Fixes
After you increase upload size in WordPress, the import may still face issues. This can happen even after using the official extension. The upload limit is only one part of migration. Your hosting, storage, browser, backup file, and plugins also matter. The All-in-One WP Migration plugin needs enough space and stable server resources. If one part fails, the import may stop or freeze.
Upload Still Does Not Start After Increasing the Limit
Sometimes, the upload does not start after increasing the limit. This can confuse users because the extension is already active. The first thing you should check is plugin activation. Open the plugin list and confirm the extension is active. Also, check if the main All-in-One WP Migration plugin is active. If the main plugin is outdated, update it first. An outdated plugin may not work correctly with the extension. After updating, refresh the import page again. This may fix the upload issue quickly.
Another reason can be a damaged backup file. If the .wpress file is broken, upload may fail. This can happen during download or export. Try downloading the backup file again from the source website. You can also create a fresh backup file. If the browser cache is showing old data, clear it. Then reopen the import page in a new tab. You can also try another browser. These simple fixes can solve many upload problems.
Import Fails Midway During the Migration Process
The import may start but stop before completion. This usually happens with large backup files. Your website may have heavy images, many plugins, or large database tables. Even after you increase WordPress upload limit, hosting resources still matter. A weak server may stop the import process midway. Low storage can also break the migration process. Always check available hosting space before importing the backup. Your server needs extra room for upload and extraction.
To fix this issue, remove old backups from your website. Clear unused cache files and temporary files. You can also delete inactive plugins and themes before export. If possible, create a smaller backup file. Avoid including cache folders in the backup file. Try importing during low-traffic hours. This gives your server more free resources. If the issue continues, ask hosting support to check limits. They can review server logs and timeout issues.
Import Gets Stuck at 100 Percent
Sometimes, the import reaches 100 percent and then gets stuck. This does not always mean the process has failed. The plugin may still be processing the database. Large databases can take more time to complete. Do not refresh the page immediately. Wait for a few minutes and check again. If the server is slow, the final step may take longer. Closing the browser too early can stop the process. Keep the tab open until the plugin confirms completion.
If the screen stays stuck for a long time, open your website in another tab. Check whether the imported website is already working. Sometimes, the front end loads correctly after import. If the website works, save the permalink settings once. Go to Settings > Permalinks and click Save Changes. If the import is still incomplete, create a fresh export file. Then try the import again. A fresh backup can fix hidden file issues.
Website Looks Broken After Import Completion
After migration, your website may look broken or incomplete. This can happen when cache files are imported with the backup. It can also happen when permalinks need refreshing. Sometimes, images may not load correctly after import. Theme files may also need time to load properly. First, clear your browser cache and website cache. Then open the website in a private browser window. This helps you check the latest version.
Next, go to Settings > Permalinks in WordPress. Click Save Changes without changing anything. This refreshes the website link structure. It can fix many page and post errors. Also, check your active theme and plugins. A plugin conflict may break the layout after migration. Disable unnecessary plugins one by one if needed. Then test your pages again. This helps you find the issue without guessing.
Login Page Not Working After Import
Sometimes, the login page may not work after import. This can happen when old website settings are restored. Security plugins can also change login URLs. Redirect rules may send users to the wrong page. First, try opening /wp-admin and /wp-login.php. If one URL fails, try the other. Also, clear your browser cache before testing again. Old cookies may create login problems after migration.
If you still cannot log in, check your email access. Use the password reset option if needed. If a security plugin changed the login page, disable it temporarily. You can do this through the hosting file manager if required. Rename the security plugin folder carefully. Then try opening the login page again. Once you get access, check plugin settings. Make sure the correct site URL is saved. This helps prevent future login issues.
Backup File Uploads Slowly or Stops Again
Large backup uploads can take time. The speed depends on your internet and hosting server. If the upload stops again, check your internet connection first. A weak connection can break large uploads easily. Try using a stable network before uploading again. Avoid uploading large files from the mobile internet. Also, keep your computer active during the upload process. Sleep mode can stop the browser upload.
You should also avoid using too many browser tabs. Heavy browser usage can slow the upload process. If needed, try another browser with fewer extensions. Browser extensions can sometimes block upload actions. Also, avoid uploading during peak server hours. This gives your hosting more free resources. These steps help you upload large files in WordPress more smoothly.
Conclusion
Increasing upload size is important for large WordPress migrations. The All-in-One WP Migration plugin makes migration easier for users. But large backup files can cross the normal upload limit. This creates the common WordPress upload size limit problem. The official Unlimited Extension is a safer plugin-based method. It helps users increase WordPress upload limits without server changes. It is simple, direct, and better for beginners.
However, upload size is not the only migration factor. Hosting storage, server speed, database size, and backup quality also matter. A large import may still fail if these parts are weak. So, always check your backup file before import. Keep a fresh website backup ready. Test the website fully after migration. These steps help you move your website safely.
If you cannot increase upload size in WordPress, 24x7wpsupport can help. Our WordPress experts can check your plugin setup, backup file, upload limit, and hosting restrictions. We can also fix All-in-One WP Migration errors safely. If your import fails, gets stuck, or breaks your website, our team can review the issue. We help website owners restore, migrate, and fix WordPress websites without stress.






Brian is a WordPress support specialist and content contributor at 24×7 WP Support. He writes practical, easy-to-follow guides on WordPress troubleshooting, WooCommerce issues, plugin and theme errors, website security, migrations, performance optimization, and integrations. With a focus on solving real website problems, Brian helps business owners, bloggers, and online store managers keep their WordPress sites running smoothly.
