
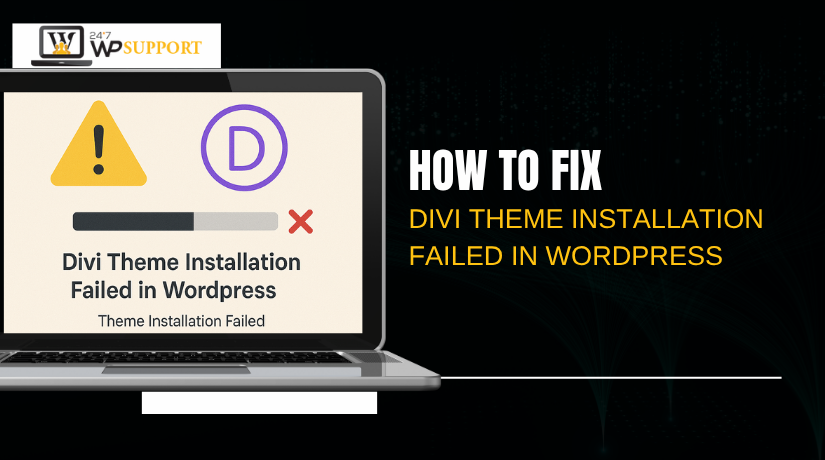
How to Fix Divi Theme Installation Failed in WordPress
Last updated on October 10th, 2025 at 05:20 am
Introduction
One of the most widely used WordPress themes right now is Divi. Thousands of website owners use it, and it was created by Elegant Themes. Divi offers a drag-and-drop builder, which makes design easy. You may create a stunning website without knowing any code.
But many users run into problems while installing the Divi theme. If you’re seeing errors during installation, you’re not alone. It can be frustrating when the theme doesn’t install the first time. You might get messages like “stylesheet is missing” or “link expired.”
These problems are common, especially for first-time WordPress users. The good news is that fixing them is simple. All you need to know is how to fix the mistake and why it occurs.
Common Issues Behind Divi Theme Installation Failures
The Divi theme by Elegant Themes is a top choice for WordPress users. It offers a drag-and-drop builder, beautiful layouts, and powerful design tools. However, installing the Divi theme doesn’t always go smoothly. Many users, especially beginners, face errors while uploading or activating the theme.
Simple errors or server settings are typically the source of these issues. You can save time and stress by being aware of the typical causes of installation failures. Let’s examine the most frequent problems that lead to unsuccessful Divi theme installations in more detail.
- Uploading the Wrong ZIP File
This is among the most frequent causes of unsuccessful installations. When you download Divi from your Elegant Themes account, you get a full product package. That ZIP file contains:
- The Divi theme file
- Documentation
- Licensing files
- Additional resources
WordPress won’t recognize the complete package if you attempt to upload it. The error will be displayed:
“The package could not be installed. The theme is missing the style.css stylesheet.”
This happens because the actual Divi theme file is buried inside the main ZIP.
- Large File Size Exceeds Server Limits
The Divi theme is large compared to free WordPress themes. Many shared hosting providers set a low limit for file uploads by default. If your server has low upload limits, you may see this message:
“The link you followed has expired.”
This error usually points to a timeout or memory limit on the server. It stops WordPress from processing large uploads like Divi.
- Incomplete or Corrupt Download File
Sometimes the ZIP file doesn’t download completely. A weak internet connection or browser interruption can cause this. WordPress won’t be able to process a file that is corrupt or destroyed. You may get a general error like: “Installing theme from uploaded file: failed.”
- Theme Folder Already Exists
If you’ve tried to install Divi before and failed, part of the theme folder might still be on your server. When WordPress sees a folder named “Divi” already in your /wp-content/themes/ directory, it will stop the new upload.
- Server Configuration or Hosting Restrictions
Your server settings play a big role in successful theme installation. PHP limitations on shared hosting services are frequently stringent and include:
- upload_max_filesize
- post_max_size
- max_execution_time
These settings control how much data your site can handle at once. If they are too low, large theme files like Divi will fail to upload.
How to Fix Common Divi Theme Installation Errors
Installing the Divi theme should be easy, but it can go wrong. Many users see errors that stop the process. Technical expertise is not required to correct these mistakes. Below, we will explain each common error and how to solve it. All steps are beginner-friendly and do not require coding.
Let’s fix these problems one by one.
- “The package could not be installed. The theme is missing the style.css stylesheet.”
This is a pretty typical WordPress error while installing the Divi theme. It happens when users upload the wrong ZIP file.
When you download Divi from Elegant Themes, you get a full package. This package contains the theme file, documentation, and other resources. If you try to upload the entire ZIP file, WordPress can’t find the required stylesheet.
This is how the mistake appears:
“The package could not be installed. The theme is missing the style.css stylesheet.”
This means WordPress did not locate the style.css file where it expected to.
How to Fix:
- First, unzip the downloaded file on your computer.
- Open the folder and look for the correct file: Divi.zip
- The real theme file that you must submit is this one.
- Go to WordPress Dashboard → Appearance → Themes → Add New.
- Click Upload Theme, select Divi.zip, and click Install Now.
Once installed, click Activate to enable the theme.
Problem solved!
- “Destination folder already exists.”
When you try to install Divi again, you get this problem. Maybe you already uploaded the theme before, and it failed or was deleted improperly. But the theme folder still exists in your WordPress directory.
WordPress does not allow the same folder to be added twice. So, it shows:
“Destination folder already exists.”
How to Fix:
You need to remove the existing Divi folder manually. Here’s how:
- Log in to your hosting control panel (like cPanel).
- Navigate to this path after launching the File Manager:
/public_html/wp-content/themes/ - Look for a folder named Divi.
- Right-click and choose Delete.
- Once deleted, return to your WordPress dashboard.
- Try uploading Divi.zip again.
As an alternative, you can remove the folder using an FTP client such as FileZilla.
After deletion, your new upload will work without errors.
- “The link you followed has expired.”
This error usually appears after you try to upload the Divi theme. It is not directly related to the theme itself. Instead, it comes from your hosting environment.
This happens because the Divi theme ZIP file is large. Most shared hosting plans have low PHP settings by default. These limits stop large files from uploading.
The error shows up as:
“The link you followed has expired.”
How to Fix:
Your PHP limits need to be raised.You must raise the PHP limitations. You can do this in multiple ways depending on your access level.
Option 1: Update .htaccess File
- Go to File Manager in cPanel.
- Find the.htaccess file in your root folder and open it.
- At the bottom, add the following lines:
php_value upload_max_filesize 64M
php_value post_max_size 64M
php_value max_execution_time 300
php_value max_input_time 300
Save and close the file.


Option 2: Modify php.ini File
- In your hosting panel, find php.ini.
- Add or edit these lines:
upload_max_filesize = 64M
post_max_size = 64M
max_execution_time = 300
max_input_time = 300
Option 3: Contact Hosting Support
If you don’t feel comfortable editing files, ask your hosting provider to increase:
- upload_max_filesize
- post_max_size
- max_execution_time
This will allow you to upload Divi without issues.
- “Installing theme from uploaded file: failed”
This error is more general. You can’t tell exactly what went wrong from it. However, it typically denotes one of three things:
- The file upload was incomplete.
- The ZIP file is corrupt.
- The size of the file is excessive.
How to Fix:
One by one, try these steps:
- From your Elegant Themes account, redownload the Divi theme.
- Don’t unzip or rename the file.
- Verify the stability of your internet connection.
- Go to WordPress Dashboard → Appearance → Themes → Add New.
- Select the ZIP file, click Upload Theme, and then try again.
If this still doesn’t work, your best option is to upload the theme manually using FTP or cPanel.
- Alternative Fix: Uploading Divi Theme via FTP or cPanel
If the WordPress uploader keeps failing, you can bypass it. Uploading the theme via FTP or your hosting’s File Manager is a reliable option. It avoids upload limits and timeouts.
How to Upload via FTP:
- Unzip the Divi.zip file on your computer.
- Open your FTP client (FileZilla is a good choice).
- Log in using your FTP credentials.
- Go to /wp-content/themes/ folder.
- Upload the entire Divi folder (not zipped).
- Once uploaded, go to WordPress dashboard.
- Navigate to Appearance → Themes and activate Divi.
How to Upload via cPanel File Manager:
- Log in to your hosting cPanel.
- Go to File Manager → wp-content → themes.
- Click Upload, and select the Divi.zip file.
- After uploading, select Extract with a right-click on the ZIP file.
- Once extracted, delete the original ZIP file.
- Go to WordPress dashboard and activate Divi.
This method avoids upload errors caused by server limits.
These fixes will solve most Divi theme installation errors in WordPress. Whether it’s a missing stylesheet, expired link, or upload failure, there is a solution. Always download Divi from the official source. Avoid nulled themes or unofficial download sites, as they can be incomplete or unsafe.
Installing Divi Theme via FTP or cPanel
If you’re facing constant errors while installing the Divi theme, don’t worry. You can upload the theme using a different technique. Both FTP and cPanel File Manager allow you to install the Divi theme manually. This bypasses WordPress upload limits and other common errors.
Let’s examine each approach in detail.
Method 1: Installing Divi Theme via FTP
FTP (File Transfer Protocol) lets you connect directly to your website files. When the WordPress dashboard upload fails because of size or timeout constraints, this is helpful.
What You Need:
- An FTP client like FileZilla
- Your FTP login details (from your hosting provider)
- The unzipped Divi theme folder
Step-by-Step Instructions:
- First, go to your Elegant Themes account and download Divi.
- Unzip the file and locate the folder named Divi.
- Open FileZilla and connect using your FTP credentials.
- Navigate to the following folder:
/wp-content/themes/ - Drag and drop the Divi folder into the themes folder.
- A few minutes may pass before all the files have uploaded.
- After finishing, access your WordPress dashboard by logging in.
- Go to Appearance → Themes and click Activate under Divi.
You can now use your theme once it has been installed.
Method 2: Installing Divi Theme via cPanel File Manager
Another simple choice for those who are unfamiliar with FTP is cPanel. Most hosting providers offer cPanel, which includes a File Manager.
Step-by-Step Instructions:
- Log in to your cPanel account.
- Open the File Manager.
- Go to this directory:
/public_html/wp-content/themes/ - Click Upload and select the Divi.zip file.
- After uploading, select Extract with a right-click on the ZIP file.
- The extracted folder will appear as Divi.
- Go to your WordPress dashboard → Appearance → Themes.
- Find Divi and click Activate.
That’s it! Divi is now active on your WordPress site.
Best Practices to Avoid Divi Theme Installation Errors
Following a few basic practices can make installing the Divi theme go more smoothly. Many installation issues happen due to small mistakes or missing steps. You can avoid most errors by preparing your files and server the right way.
Below are some practical tips to prevent Divi theme installation failures in the future.
- Always Download Divi from Official Source
Never download Divi from third-party websites. These copies may be outdated, incomplete, or harmful.
- Download only from your Elegant Themes account.
- Avoid “nulled” versions or free download offers online.
- Official files are clean, safe, and include the full theme package.
- Use the Correct ZIP File
The full download package from Elegant Themes contains several files. Do not upload the entire ZIP package directly.
- Extract the downloaded folder first.
- Look for the correct file: Divi.zip
- Upload only this file inside WordPress.
- Check Hosting and Server Limits
Before installing Divi, make sure your server can handle large files.
- Use a host that supports PHP 7.4 or higher.
- Check for enough memory and file upload size.
- Increase upload_max_filesize and post_max_size if needed.
- Keep WordPress and PHP Updated
Outdated WordPress or PHP can cause compatibility issues.
- Use the most recent version of WordPress at all times.
- If necessary, request that your host update your PHP version.
Keeping your site updated helps ensure smooth theme installation every time.
Conclusion
Getting the Divi theme installed should be a simple process. However, occasionally, minor errors or technological constraints can make it an annoying chore. Expert assistance is only a click away if you’re still having problems or have questions about any step.
At 24x7WPsupport.com, we help WordPress users fix problems fast. Whether it’s a theme upload error, plugin conflict, or a broken site — our team is ready to support you anytime. It’s not necessary for you to do it all by yourself.
Our experts can install Divi for you, optimize your hosting settings, and make sure everything runs smoothly. You focus on your website — we handle the technical part.
Related posts:
White Text and Missing Buttons [Visual Editor Not Working Error Fixed in WordPress]
How to Fix Plugins Disappearing From WordPress Dashboard
How to Fix the Critical Error in WordPress (Step by Step)
How to Fix WordPress admin-ajax.php 400 Bad Request Error
Sure Shot Way to Fix 405 Method Not Allowed Error
