
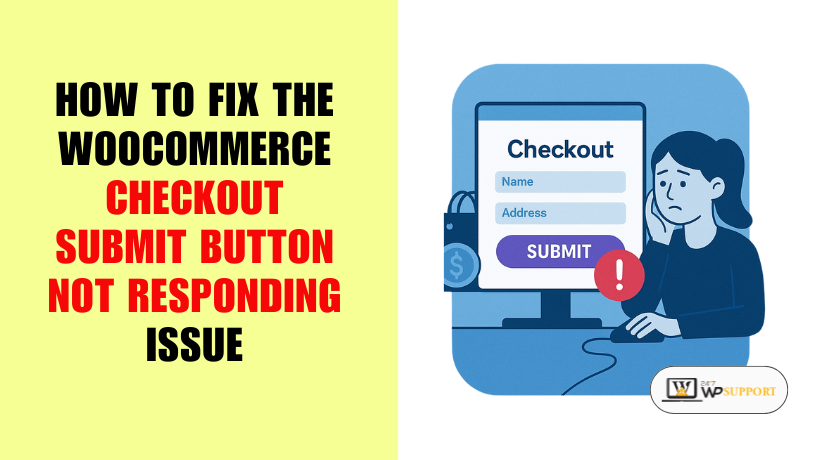
How to Fix Checkout Submit Button Not Responding in WooCommerce
Introduction
Why the Checkout Submit Button Not Responding Can Hurt Your Store
The checkout process is one of the most important steps in any online store. It’s where users finalize their order, make a payment, and receive confirmation. But sometimes, the submit button on the checkout page stops working. You click it, and nothing happens—no page reload, no error message, and worst of all, no order placed.
This issue is more common than most store owners realize. It usually occurs after plugin conflicts, JavaScript errors, or improper theme customizations. Many store owners first notice it when customers start complaining or when sales suddenly drop. In some cases, the button may spin endlessly. In others, it may appear completely unresponsive.
When the checkout submit button fails to respond, your entire order process breaks. Customers feel stuck and may abandon their cart entirely. This not only results in lost sales but also damages trust in your brand. New users may think the site is unsafe or poorly built. Existing customers might hesitate to return.
The good news is, this issue can be fixed with the right approach. Whether you’re a store owner with basic WordPress knowledge or a developer looking to debug, there are step-by-step solutions that work. This guide will walk you through the causes, common fixes, and tips to prevent this issue from happening again.
We’ll cover everything—from checking JavaScript errors to identifying plugin conflicts, testing themes, and applying developer-level solutions. By the end, you’ll know exactly how to restore a working checkout and keep your store running smoothly.
Let’s start by understanding what the issue really means and why it happens.
Understanding the Issue
1. What Does “Submit Button Not Responding” Mean?
When a customer reaches your WooCommerce checkout page, they expect a smooth experience. After filling in their details, they click the “Place Order” or “Submit” button. But sometimes, clicking the button does nothing. The page doesn’t reload, the order doesn’t go through, and no confirmation appears.
In many cases, there’s no error message either. This makes it hard to understand what went wrong. It looks like the button is broken, stuck, or completely inactive. The issue could be visual (spinner keeps loading) or silent (button does nothing at all). Either way, the result is the same—the user can’t complete the purchase.
This problem is more than just annoying. It directly affects the core function of your store: making sales.
2. How This Affects Your Business
When the checkout button fails, customers can’t place orders. Most of them won’t try again—they’ll leave your site. That means fewer completed transactions and more abandoned carts.
You also risk losing customer trust. If the checkout doesn’t work, users may think your site is broken or unsafe. This can damage your brand and lead to bad reviews or support requests.
Here’s what it can lead to:
- Sudden drop in sales.
- High bounce rate on checkout page.
- Increase in customer complaints.
- More work for your support team.
- Bad user experience and reputation.
Even if your product or pricing is great, a broken checkout drives people away.
3. When Does This Problem Usually Occur?
This issue rarely happens without a cause. It usually appears after something changes on your site. Below are the most common scenarios:
- Plugin or Theme Update: A new version might conflict with the checkout code.
- Custom Code Changes: Custom scripts might override or break the submit action.
- JavaScript Errors: One broken script can stop the entire checkout logic from working.
- Missing Dependencies: Some themes or plugins rely on jQuery or AJAX. If they’re missing or blocked, the button won’t work.
- Minified/Combined Scripts: Over-optimized scripts can prevent the button’s JavaScript from running correctly.
Understanding when and why this problem appears is the first step to fixing it. Once you identify what caused it, solving it becomes much easier.
Common Causes of the Issue
1. Theme Conflicts
One of the most common reasons the checkout submit button stops working is a conflict with your theme. Many themes add custom styles and scripts to the checkout page. If these scripts are not coded properly or are outdated, they may block the default WooCommerce functions. Some themes override the default checkout layout, which can break essential elements like the submit button.
If your theme fails to load JavaScript dependencies correctly, the checkout form may not behave as expected. Always use themes that are WooCommerce-compatible and frequently updated. Poorly coded themes can cause major issues without showing any clear error messages.
2. JavaScript or jQuery Errors
The checkout submit button relies on JavaScript to send order data and process payments. If there’s a JavaScript or jQuery error on the page, this process can stop completely. Even one small error in your browser console can prevent the button from working.
This usually happens when a plugin, theme, or custom code uses outdated jQuery or references missing elements. Another possible cause is a script trying to run before the page fully loads. Always check your browser’s developer console for red error messages when this issue appears.
3. Plugin Conflicts
WooCommerce plugins are designed to add features, but sometimes they don’t play well together. If you have multiple checkout-related plugins installed—such as payment gateways, shipping calculators, or form builders—they may conflict with each other.
For example, two plugins might try to handle the same checkout field. Or a third-party gateway might override WooCommerce’s default submission method. These conflicts can silently break the submit button without showing errors. Disabling and testing plugins one by one can help you identify the culprit.
4. Caching and Minification
Caching improves speed, but if not configured properly, it can break dynamic features like checkout. Plugins that cache entire pages might store an outdated version of the checkout page. This makes the submit button inactive or outdated.
Minification tools that combine or compress JavaScript files can also cause trouble. If scripts load in the wrong order or get cut off during compression, the checkout button may stop responding. Always exclude the checkout page from full-page caching. Test your site after enabling minification to avoid hidden issues.
5. Outdated WooCommerce or WordPress Version
Running outdated versions of WordPress or WooCommerce can lead to compatibility issues. As core files get updated, old functions may stop working. If your WooCommerce plugin relies on old scripts, they might fail to connect with the latest themes or payment gateway APIs.
Some plugins also depend on new features available only in recent versions. If those features are missing, they may silently fail. Always update your core WordPress, WooCommerce, and plugins after testing them on a staging site.
6. Broken HTML or Custom Code
Customizations done in the theme’s functions.php file or checkout templates may also cause the issue. If the HTML structure of the form is broken—like a missing closing tag—it can prevent form submission. Similarly, if you’ve added custom actions or filters without proper testing, they might interfere with the checkout process.
Even a small mistake like a missing nonce field or wrong form ID can break functionality. That’s why all changes to the checkout process should be tested in a staging environment first.
Step-by-Step Troubleshooting & Fixes
1. Use Browser Console to Detect JavaScript Errors
Start by opening your browser’s developer tools. In Chrome, press Ctrl+Shift+I and go to the Console tab. Now refresh the checkout page and click the submit button. If there are any red error messages, note them down.
These errors will show if a script is missing, broken, or not loading. For example, a plugin may be calling a function that doesn’t exist. Or a JavaScript file might not load due to a blocked path. Fixing these issues often restores the button’s functionality.
2. Switch to Default Theme (Storefront)
To check if your theme is causing the problem, temporarily switch to the default Storefront theme. This is the official theme by WooCommerce and follows best practices.
After switching, reload the checkout page and test the button. If it works, your previous theme is likely the source of the issue. You can then check that theme’s JavaScript files or contact its developer for support.
3. Disable All Plugins Except WooCommerce
A plugin conflict is another common reason the button fails. To test this, deactivate all plugins except WooCommerce. Then reload your checkout page and try submitting again.
If the button works, reactivate the other plugins one at a time. After each activation, test the checkout page. When the issue returns, you’ll know which plugin is causing it. This process is called plugin conflict isolation and is very effective.
4. Clear Cache and Disable Minification
Caching tools sometimes save an outdated version of the checkout page. This version may not include dynamic scripts required for form submission. Clear your site’s cache using your caching plugin settings.
Also, disable JavaScript and CSS minification. These settings can combine scripts incorrectly or change their loading order. After clearing and disabling them, test your checkout page again. If the button works now, you’ll need to reconfigure caching settings to exclude checkout pages.
5. Update WordPress, WooCommerce, and All Plugins
Outdated software often leads to compatibility problems. Head to your Dashboard → Updates section and check for available updates. Start by updating WordPress core, then WooCommerce, and finally all other plugins.
Always take a full backup before updating. If the issue was due to an old script or missing feature, updating may solve it right away. Once updated, test the submit button to see if the issue is resolved.
6. Enable WooCommerce Logging
WooCommerce provides built-in logs for debugging. Go to WooCommerce → Status → Logs, and choose a recent log file. Look for any errors related to checkout, such as failed payment requests or AJAX validation issues.
These logs can show if a specific gateway or function is blocking the form submission. If something is wrong, the log will usually mention the cause—like a timeout, a missing field, or a failed response.
7. Inspect Custom Code and Checkout Hooks
If your site uses custom code—especially in functions.php or a custom plugin—it could interfere with the checkout form. Review any custom actions or filters that modify checkout fields or validation logic.


Make sure your code includes all necessary WooCommerce functions. Also, check if any custom HTML added to the form is broken or missing required attributes. Even a missing field token or a malformed div tag can stop the button from working.
Developer-Level Fixes
1. Force Rebinding JavaScript Events After AJAX
WooCommerce uses AJAX for dynamic actions during checkout. If a custom script removes or changes elements on the page, the click events tied to the submit button may be lost. Developers can fix this by rebinding the event handler after AJAX reloads.
Use $(document).on(‘click’, ‘#place_order’, function() { … });
This ensures the event is attached even if the button reloads dynamically. It’s a reliable method to make sure the submit button always works, regardless of how the page content changes.
2. Ensure Proper Enqueuing of Scripts
Sometimes, the button doesn’t respond because required scripts aren’t loaded properly. Always use wp_enqueue_script() in WordPress to load JavaScript files. Add dependencies like jQuery if needed using the third parameter.
Example:
wp_enqueue_script(‘custom-checkout-js’, ‘path-to-script.js’, array(‘jquery’), null, true);
This ensures your scripts load in the correct order and at the right time. Also, avoid loading scripts on every page—only load them where they are required.
3. Add Fallback Click Handler
You can create a manual click handler as a fallback. This can be helpful if the default WooCommerce JS fails. Write a script that validates and submits the form when the user clicks the button.
Example:
jQuery(‘#place_order’).on(‘click’, function(e) {
if (jQuery(‘#checkout_form’).length) {
jQuery(‘#checkout_form’).submit();
}
});
This is not a replacement for WooCommerce logic but acts as a backup in some cases. Be sure to test it with various payment gateways before deploying.
4. Use WooCommerce AJAX Debug Tools
WooCommerce uses AJAX for checkout form validation, totals update, and order submission. If you’re a developer, use the Network tab in Chrome Developer Tools to monitor these AJAX calls.
Look for failed requests under the name ?wc-ajax=checkout. If the response status is anything other than 200, inspect the error. This helps identify whether the server is blocking the request, returning an error, or not responding at all.
By reading the JSON response, you can pinpoint issues such as:
- Invalid field values
- Failed payment response
- Security token (nonce) failure
Once you know the error, you can trace it back to the source—plugin, theme, or custom code.
Prevention Tips
1. Regularly Test the Checkout Flow
Every time you make changes to your site, test the full checkout process. Add a product to the cart, go to checkout, and place a test order. This helps you catch problems before your customers do.
Testing should be done after every plugin update, theme change, or custom code adjustment. A quick check can save you from hours of lost sales.
2. Avoid Heavy Customization Without Proper Testing
If you’re adding custom functions or modifying checkout fields, test them on a staging site first. Direct changes to live checkout code can cause hidden issues that only show when a user tries to place an order.
Also, avoid editing WooCommerce core files. Instead, use hooks, filters, or custom plugins to extend functionality. This ensures your changes remain stable even after WooCommerce updates.
3. Choose Trusted Themes and Plugins
Always use WooCommerce-compatible themes and plugins from trusted sources. Cheap or unverified products may not follow WordPress coding standards. These can break essential features like form validation or button actions.
Check plugin reviews, update frequency, and compatibility with the latest WooCommerce version before installation. Poor-quality plugins often cause hard-to-detect conflicts at checkout.
4. Exclude Checkout Pages from Caching Tools
Most caching plugins allow you to exclude specific pages. Always exclude your cart, checkout, and account pages from caching. Caching dynamic pages can break AJAX requests and disable scripts.
If you use a CDN or server-level caching, ensure those settings also skip checkout URLs. This helps keep your checkout page live, fast, and fully functional.
5. Keep Your Site Updated
Outdated versions of WordPress, WooCommerce, or PHP can lead to bugs and security issues. Always keep your website’s core, plugins, and themes updated. Make sure your site is running the latest stable versions.
Use a staging environment to test updates before applying them to the live site. This helps catch any errors without affecting real customers.
6. Monitor Error Logs and Console Output
Use your browser’s console and WooCommerce logs to regularly monitor issues. Even if your site seems to work, errors may be logged silently. Reviewing logs weekly can help you spot problems early.
Also, keep debug mode disabled on live sites but enable it temporarily when troubleshooting.
7. Set Up Automatic Health Checks
Use monitoring tools or uptime checkers to alert you when something fails. Some tools can even test checkout success automatically. This ensures you’re notified immediately if the button stops working.
A few minutes of downtime can cost sales. Automated alerts help you act before users report the issue.
Conclusion
The checkout submit button is one of the most critical elements of any WooCommerce store. When it stops responding, it doesn’t just interrupt the buying process—it can directly affect your revenue and customer trust.
In this guide, we explored what this issue looks like, why it happens, and how to fix it. Whether it’s a theme conflict, a plugin issue, or a JavaScript error, identifying the root cause is the first step toward a reliable solution.
We also covered step-by-step troubleshooting for beginners and deeper fixes for developers. From checking the browser console to debugging AJAX responses, each solution gives you control over your site’s performance.
Remember, prevention is just as important as fixing the issue. Test your checkout process often, keep plugins and themes updated, and use only trusted tools. Exclude dynamic pages like checkout from caching and always test major changes in a staging environment first.
If you stay proactive, you can prevent this frustrating issue from hurting your business. And if it ever returns, you now have a complete roadmap to solve it with confidence.
Need more help? Don’t hesitate to reach out to WooCommerce support or consult with a developer to ensure your checkout stays smooth, secure, and customer-ready.
Looking for more WordPress help? Subscribe to our YouTube Channel for expert video tutorials. Join us on Twitter and Facebook for updates, tips, and insights.
