
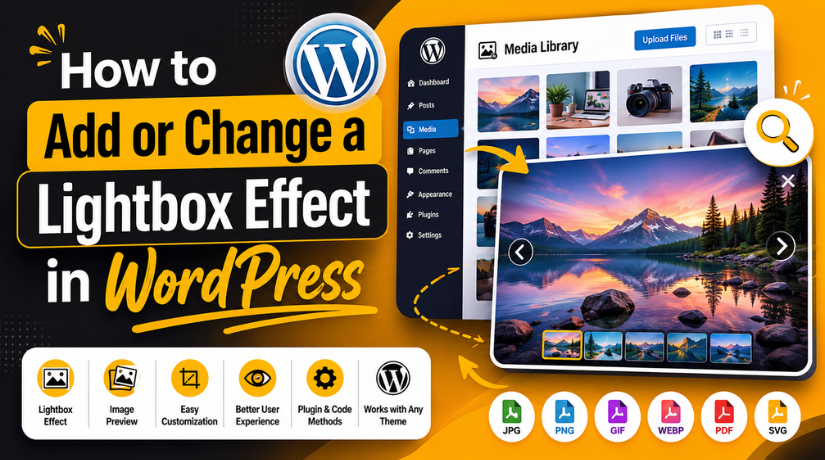
How to Add or Change a Lightbox Effect in WordPress
Introduction
Images play an important role on every WordPress website. They help users understand the content quickly. They also make pages more useful and attractive. But simple images may not always give the best viewing experience. Users may need to zoom, check details, or view images clearly.
A WordPress lightbox effect solves this problem in a simple way. It opens an image in a popup window. The visitor stays on the same page while viewing the image. This makes browsing smooth and easy.
A WordPress image lightbox is useful for many website types. Blog posts, product pages, portfolios, and service pages can use it. It helps visitors see images without opening a new tab. It also keeps the page clean and professional.
This feature is helpful for mobile users too. Small screens make image details harder to see. A lightbox gives users a larger image view. They can close it and return to the content easily.
For WordPress website owners, this improves user experience. It also makes image-heavy pages easier to use. A clean lightbox effect can make your website look modern. It can also help visitors spend more time on your page.
What Is a Lightbox Effect in WordPress?
A lightbox effect is a popup image display feature. When a user clicks an image, it opens larger. The background usually becomes dark or blurred. This helps the image stand out clearly.
The user does not leave the current page. They can view the image and close it anytime. Most lightbox designs include a close button. Some also include arrows for gallery navigation.
A WordPress lightbox effect can work on single images. It can also work on multiple gallery images. This makes it useful for blogs, stores, and portfolios. Users can move between images without loading another page.
A basic lightbox may include:
- A larger image preview.
- A dark background overlay.
- A close button.
- Previous and next arrows.
- Image captions or titles.
A WordPress image lightbox is mainly used to improve viewing. It gives visitors a better way to check image details. It also makes the website feel more interactive.
For example, a tutorial screenshot may show small details. A lightbox helps users view that screenshot clearly. A product image may also need a close view. Lightbox makes this possible without changing the page.
In simple words, a lightbox keeps image viewing clean. It improves the page experience and supports better visual content.
When Should You Add a Lightbox Effect to WordPress Images?
You should add a lightbox effect when images need better viewing. Many WordPress pages use images to explain important details. Small images may not show enough visual information clearly. A lightbox helps users open images in a larger view.
This feature is useful for blog posts with screenshots. It helps readers see steps, settings, and examples clearly. Tutorial websites can use it to improve learning. Users can click the image and view details easily.
You can also add lightbox to WordPress images on service pages. Service images often explain work quality or project results. A larger image view helps users trust your website more. It also keeps them on the same page.
A WordPress gallery lightbox is helpful for photo-based websites. Portfolio websites, event pages, and product galleries can use it. Visitors can view each image without opening another page. This makes the browsing experience smooth and simple.
Lightbox is also useful for WooCommerce product images. Customers may want to check product details before buying. A larger popup view helps them make better choices. It can support trust and improve shopping comfort.
You should use lightbox when images support the main content. Avoid using it only for design effects. The goal should be better image viewing and user comfort.
How to Add Lightbox Effect in WordPress Using a Plugin
The easiest way to add a lightbox is through a plugin. This method works well for beginners and website owners. You do not need coding knowledge for this process. A WordPress lightbox plugin can add the feature quickly.
If you are learning how to add lightbox effect in WordPress, start with the plugin method. It is simple, safe, and easy to manage. Many plugins offer automatic lightbox settings for images. Some also support galleries, captions, videos, and sliders.
Before choosing a plugin, check its basic details carefully. The best lightbox plugin for WordPress should be simple and lightweight. It should also work well with your active theme. Always check plugin updates, reviews, and support details.
You can follow these simple steps:
- Go to your WordPress dashboard.
- Click Plugins, then Add New.
- Search for a lightbox plugin.
- Install and activate your selected plugin.
- Open the plugin settings page.
- Enable lightbox for images or galleries.
- Save the settings and test the frontend.
Some plugins apply lightbox automatically after activation. Others may need manual setup from the settings panel. You may need to choose image types, gallery behavior, or popup style. Always review each setting before saving changes.
After setup, open your website in a new browser tab. Click a blog image, gallery image, or product image. The image should open in a popup view. If it opens in a separate page, check image link settings.
To add lightbox to WordPress images correctly, images should usually link to media files. Some themes and plugins need this setting to work. You can check this while editing the image block.
Also test the lightbox on mobile devices. Many users browse websites from phones today. The popup should open clearly and close easily. A smooth mobile lightbox improves the full user experience.
How to Add Lightbox to WordPress Gallery Images
A gallery needs a smooth viewing experience for visitors. Many WordPress websites use galleries to show several images together. These images may include work samples, product photos, events, or tutorials. A WordPress gallery lightbox helps users view these images clearly.
When visitors click one gallery image, it opens in a popup. They can then move through other images using arrows. This keeps users on the same page. It also makes the gallery feel clean and easy.
A WordPress image lightbox works best when images need more detail. For example, a portfolio image may show design work. A tutorial image may show small dashboard settings. A lightbox lets users view these details without page reloads.
To add lightbox to a WordPress gallery, first create your gallery. Open the page or post where you want it. Add a Gallery block from the WordPress editor. Then select images from the Media Library. You can also upload new images if needed.
After adding images, check the gallery link setting. Many lightbox tools need images linked to media files. This helps the popup open the full image version. If images are not linked correctly, lightbox may not work.
You can follow these basic steps:
- Add or edit a WordPress Gallery block.
- Select images from your Media Library.
- Set image links to media files if required.
- Enable gallery support in your lightbox settings.
- Save the page and test the gallery.
A WordPress lightbox plugin may also include gallery controls. These controls can manage arrows, captions, image size, and overlay style. Some plugins enable these features automatically. Others need settings changed before they work.
Always preview the gallery after setup. Test every image in the lightbox view. Also check mobile screens for smooth navigation.
How to Change Lightbox Effect in WordPress
You may already have a lightbox on your website. But the current design may not match your layout. In that case, you can learn how to change lightbox effect in WordPress through plugin or theme settings.


Start by finding what controls your lightbox. It may come from your theme, page builder, gallery plugin, or separate plugin. This step is important before making changes. Changing the wrong settings may not affect the lightbox.
Open your WordPress dashboard and check active plugins. Look for any image, gallery, popup, or lightbox plugin. Then open its settings page. Most plugins include options for style and behavior.
You may be able to change these lightbox parts:
- Popup animation style.
- Background overlay color.
- Image size and border style.
- Caption display settings.
- Previous and next arrows.
- Close button position.
- Gallery navigation behavior.
If your theme controls the lightbox, check theme settings. Some WordPress themes include built-in image popup options. You may find them under Theme Options or Customizer. Page builders may also include separate lightbox controls.
To customize lightbox in WordPress, keep the design simple. Do not use heavy animation or confusing effects. A clean popup usually works better for users. The image should open fast and close easily.
After changing settings, save everything carefully. Then clear your website cache and browser cache. Old cached files may still show the previous design.
Next, test your lightbox on desktop and mobile. Click single images and gallery images. Check arrows, captions, close button, and image size. This helps you confirm the new WordPress lightbox effect works correctly.
How to Customize Lightbox in WordPress for Better User Experience
A lightbox should make image viewing simple and clear. It should not confuse users with heavy design effects. When you customize lightbox in WordPress, focus on comfort first. The image should open fast and display properly.
Start with the image size setting. The popup image should not look too small. It should also not cover the full screen badly. A balanced image size works better on all devices. This helps users view details without extra effort.
Captions can also improve the viewing experience. They help users understand what the image shows. This is useful for tutorials, product images, and galleries. Short captions work better than long text. They keep the popup clean and easy to read.
A WordPress image lightbox should have a clear close button. Users should quickly understand how to exit the popup. The close button should be easy to see. It should also work properly on mobile screens.
You can also adjust the background overlay. A simple dark overlay is usually enough. It keeps focus on the image. Avoid bright or distracting overlay colors. They can make the image harder to view.
Good lightbox customization may include:
- Clear image size for all screens.
- Simple background overlay.
- Easy close button placement.
- Short and useful captions.
- Smooth gallery arrows.
- Fast-loading image files.
Do not use too many animation effects. Heavy effects can slow the page. They may also disturb mobile users. A clean lightbox gives a better user experience.
Why Your WordPress Lightbox May Not Work Properly
Sometimes, the lightbox may stop working without warning. This can happen after plugin updates, theme changes, or cache changes. If your WordPress lightbox not working issue appears suddenly, start with basic checks.
A plugin conflict is a common reason. Two plugins may try to control images together. For example, a gallery plugin and lightbox plugin may conflict. This can stop the popup from opening correctly.
Theme conflict can also create lightbox problems. Some themes include built-in lightbox features. If you install another WordPress lightbox plugin, both tools may clash. This can break the image popup or gallery navigation.
Cache can also cause old scripts to load. Your website may still show previous JavaScript files. Clear your website cache after making changes. Also clear the browser cache before testing again.
JavaScript errors are another common reason. Lightbox features depend on scripts to open popups. If another plugin breaks scripts, lightbox may fail. You may see images opening on a new page instead.
Wrong image link settings can also cause problems. Many lightbox tools need images linked to media files. If images link to attachment pages, lightbox may not open.
Lazy loading can also affect image popups. Some image optimization plugins delay image loading. This may stop the lightbox from reading images correctly.
Check these common causes carefully:
- Plugin conflict.
- Theme conflict.
- Cache issue.
- JavaScript error.
- Wrong image link setting.
- Outdated plugin.
- Lazy loading issue.
Fix one issue at a time. Then test the lightbox after each change. This helps you find the real problem faster.
Quick Fixes When WordPress Lightbox Is Not Working
If your WordPress lightbox not working issue appears, start with simple checks. Many lightbox problems happen because of cache, plugin conflict, or wrong image links. You should avoid changing many settings together. Fix one possible cause, then test the result.
First, clear your website cache and browser cache. Cached files may still load old scripts or styles. This can stop the lightbox from showing correctly. If you use a cache plugin, clear all cached files. Then open the page in a private browser window.
Next, check your WordPress lightbox plugin settings carefully. Make sure lightbox is enabled for images and galleries. Some plugins have separate settings for single images and galleries. If gallery support is off, images may not open properly.
Also check how your images are linked. Many lightbox tools need images linked to media files. If images link to attachment pages, the popup may fail. Open the image block settings and review the link option.
You can also test for plugin conflict. Disable other image, gallery, slider, or optimization plugins temporarily. Then check the lightbox again. If it starts working, one plugin is causing the issue.
Use these quick checks:
- Clear website and browser cache.
- Update your lightbox plugin.
- Check image link settings.
- Disable conflicting gallery plugins.
- Test with another theme.
- Check mobile lightbox behavior.
- Review lazy loading settings.
If you recently learned how to add lightbox effect in WordPress, review each setup step again. A small missed setting can stop the feature. Also test your site after every update. This keeps your image popup working smoothly.
Conclusion
A WordPress lightbox effect can improve image viewing across your website. It helps users view images without leaving the current page. This creates a cleaner and smoother browsing experience.
Plugins are the easiest option for most beginners. They help you add lightbox features without coding. You can also learn how to change lightbox effect in WordPress through plugin or theme settings.
Always keep the design simple and fast. Test your lightbox on desktop, tablet, and mobile. If you need help with setup, plugin issues, or image display problems, 24x7wpsupport can help you manage your WordPress website correctly.





Brian is a WordPress support specialist and content contributor at 24×7 WP Support. He writes practical, easy-to-follow guides on WordPress troubleshooting, WooCommerce issues, plugin and theme errors, website security, migrations, performance optimization, and integrations. With a focus on solving real website problems, Brian helps business owners, bloggers, and online store managers keep their WordPress sites running smoothly.
