
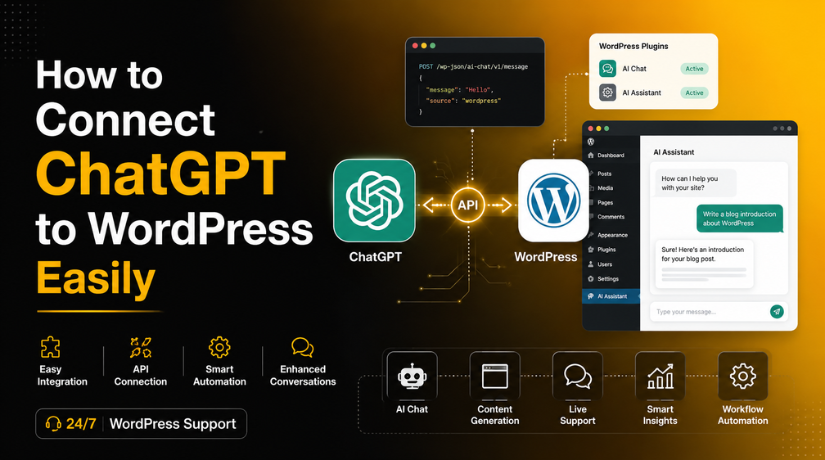
How to Connect ChatGPT to WordPress Easily
Introduction
WordPress website owners handle many tasks every day. They write blogs, update pages, reply to visitors, and manage products. These tasks take time, skill, and regular attention. This is why many users now want ChatGPT WordPress integration for their websites. It can help them save time and work faster.
ChatGPT can support many website tasks in a simple way. It can help create blog ideas, draft content, write FAQs, and suggest replies. It can also help WooCommerce store owners create product descriptions. A smart setup can improve daily website work without extra pressure.
Many business owners also want better customer support on their websites. An AI chatbot for WordPress can answer common visitor questions quickly. It can guide users to services, products, or contact pages. This helps visitors get answers without waiting for manual replies.
This guide explains how to connect ChatGPT to WordPress in a simple way. It focuses on clear steps and easy understanding. You will learn what the connection means first. Then, you will understand why it matters for your website.
What Does It Mean to Connect ChatGPT to WordPress in Simple Words?
Connecting ChatGPT to WordPress means adding AI-powered features to your website. These features can work inside the admin dashboard. They can also work on the front side for visitors. This type of WordPress AI integration helps improve content, support, and automation.
For example, you can add a chatbot to your website. This chatbot can answer common visitor questions. You can also use AI tools to create blog drafts. Some plugins can help write product descriptions and FAQs. Others can suggest titles, summaries, and meta descriptions.
A ChatGPT for WordPress website setup can support many goals. It can help bloggers plan articles more quickly. It can help service websites answer customer questions faster. It can help online stores improve product content. It can also help teams reduce repeated writing work.
This connection does not mean ChatGPT controls your full website. It only works based on the features you enable. You can choose a chatbot, content writer, or assistant tool. You can also control where it appears on your site.
Things You Need Before Connecting ChatGPT to WordPress
WordPress Admin Access Before Starting the Setup
Before you start ChatGPT WordPress integration, you need WordPress admin access. Admin access allows you to install plugins and change settings. Without admin access, you cannot complete the setup properly. You should log in with a user role that has full control.
Trusted ChatGPT Plugin for WordPress
A good ChatGPT plugin for WordPress makes the setup easier. It helps you add ChatGPT to WordPress without custom coding. You should not install the first plugin you see. Check the plugin details before using it on your site. A trusted plugin should have recent updates and good reviews.
OpenAI Account and API Key
Most plugins need an API key to work properly. This key connects your website with OpenAI services. An OpenAI WordPress plugin usually asks for this key. You can add it inside the plugin settings area. The API key works like a private access code.
Website Backup for Safe Plugin Installation
You should always create a backup before installing new plugins. A backup protects your website if something breaks. Sometimes, plugins may conflict with themes or other plugins. This can cause errors, layout issues, or loading problems.
SSL Security Before Adding AI Features
Your website should use HTTPS before adding AI tools. HTTPS protects data sent between users and your website. It is important when visitors type questions into a chatbot. An AI chatbot for WordPress may collect user inputs. So, secure website data is very important.


Clear Goal for ChatGPT WordPress Integration
You should decide your goal before choosing any plugin. A clear goal helps you select the right setup. Some users want a chatbot for visitor support. Some want AI help for blog writing. Others want product descriptions for WooCommerce stores.
How to Connect ChatGPT to WordPress (Step By Step Guide)
Using a plugin is the easiest setup method for beginners. You do not need coding knowledge for this process. A ChatGPT plugin for WordPress adds AI features through simple settings. You can manage most options from the WordPress dashboard. This makes the setup easy for website owners and bloggers.
Step 1: Log In to Your WordPress Dashboard
- First, open your WordPress login page.
- Enter your admin username and password.
- Use an account with full administrator access.
- Limited editor access may not allow plugin installation.
- After login, check that the dashboard loads correctly.
- Make sure no major website error appears there.
- Fix active errors before starting the AI setup.
- This helps you connect ChatGPT to WordPress safely.
Step 2: Go to Plugins and Add a New Plugin
- From the dashboard, check the left-side menu.
- Click on the Plugins option.
- Then click on the Add New button.
- This page lets you search WordPress plugins.
- You can find many AI tools from this page.
- Make sure plugin installation is allowed on your website.
- If installation fails, check hosting or file permissions.
- You may also contact hosting support for help.
Step 3: Search for a ChatGPT or AI Plugin
- Use the plugin search box at the top.
- Search for terms like ChatGPT or OpenAI.
- You can also search for AI chatbots.
- Try an AI content generator for writing tools.
- Choose a plugin based on your main goal.
- Select chatbot features for visitor support.
- Select content tools for blog and page writing.
- A good OpenAI WordPress plugin should be updated.
- Check plugin reviews before installing it.
- Also check support activity and WordPress compatibility.
Step 4: Install and Activate the Selected Plugin
- After choosing the plugin, click Install Now.
- WordPress will download the plugin files automatically.
- Wait until the installation process is complete.
- Then click the Activate button.
- The plugin will become active on your website.
- It may add a new menu in the dashboard.
- Open that menu to start the setup process.
- If an error appears, deactivate the plugin quickly.
- Then check for theme or plugin conflicts.
Step 5: Add Your API Key in Plugin Settings
- Most AI plugins need an API key.
- This key connects WordPress with OpenAI services.
- Open the plugin settings inside your dashboard.
- Find the API key field in the settings.
- Paste your API key carefully into that field.
- Make sure there are no extra spaces.
- Save the settings after adding the key.
- Then test the connection from the plugin.
- Never place the API key in public code.
- This supports safer WordPress AI integration.
Step 6: Choose the AI Feature You Want to Use
- After adding the API key, choose your feature.
- Different plugins offer different AI tools.
- You can choose an AI chatbot for WordPress.
- You can also choose a blog writing assistant.
- Some plugins help create WooCommerce product descriptions.
- Some tools help generate FAQs and summaries.
- Others can help draft customer support replies.
- Start with one main feature first.
- Add more features after proper testing.
- This keeps your setup simple and controlled.
Step 7: Configure Chatbot or Content Settings Properly
- Open the chatbot or content settings area.
- Add a short and helpful welcome message.
- Choose where the chatbot should appear.
- You can show it on all pages.
- You can also show it on selected pages.
- Set a clear response tone for visitors.
- Add prompt rules for better AI answers.
- Set usage limits to control API cost.
- Limit dashboard access to trusted users only.
- These settings improve your ChatGPT for WordPress website setup.
Step 8: Test the Setup Before Making It Live
- Open your website in a private browser window.
- Check if the chatbot loads correctly.
- Ask simple questions related to your business.
- Test the feature on mobile devices.
- Also test it on desktop and tablet screens.
- Check contact, service, and product pages.
- Make sure the layout does not break.
- Review every AI answer before going live.
- Improve prompts if answers are unclear.
- This improves your Add ChatGPT to WordPress setup.
Step 9: Publish and Monitor the Integration Regularly
- Make the AI feature live after testing.
- Keep checking the plugin after launch.
- Monitor website speed and loading time.
- Review chatbot replies and visitor questions.
- Track your API usage regularly.
- Update plugin settings when needed.
- Keep the plugin updated for security.
- Remove unused AI features from the website.
- Check if answers stay helpful and correct.
- A managed setup makes ChatGPT WordPress integration more useful.
Common Problems and Fixes While Connecting ChatGPT to WordPress
API Key Not Working After Plugin Setup
Sometimes, the API key may not work after setup. This is a common issue during ChatGPT WordPress integration. It usually happens because users copy the wrong key. Extra spaces can also break the connection. In some cases, billing may not be active.
Chatbot Not Showing on the WordPress Website
Your chatbot may not appear after plugin activation. This can happen due to cache or display settings. Some plugins need page rules before showing the widget. The chatbot may also be hidden on mobile devices. Theme conflicts can also stop scripts from loading.
Website Loading Slow After Adding ChatGPT Plugin
Some AI plugins can add extra scripts to pages. This may slow your website if not configured well. A heavy AI chatbot for WordPress can affect page speed. This issue is more visible on mobile devices. To fix this, disable unused plugin features first. Show the chatbot only on important pages.
AI Answers Are Wrong, Weak, or Not Helpful
AI tools need clear instructions to answer correctly. Weak settings can create unclear or wrong responses. This may confuse visitors and reduce trust. To fix this, improve the chatbot prompt rules. Add business details, service information, and common questions.
Plugin Conflict Happens After Activation
A plugin conflict can happen after installation. It may affect layout, forms, or dashboard settings. Cache plugins, themes, or security tools may conflict. First, deactivate the new ChatGPT plugin for WordPress. Then check if the website works normally again
API Usage Cost Increases Faster Than Expected
API cost can increase when usage is not controlled. Long prompts and repeated questions may use more tokens. Public chatbots can also receive many visitor requests. To fix this, set clear usage limits. Keep answers short and focused. Limit chatbot access where possible.
Conclusion
Connecting ChatGPT to WordPress can make website management easier. It can help with content ideas, FAQs, chatbot replies, and customer support. It can also support WooCommerce product content and daily admin tasks. The plugin method is the easiest choice for beginners. It helps you add AI features without editing website code. Still, you should set it up carefully. Always protect your API key, test plugin settings, and check website speed. Also review AI-generated content before publishing it live. A proper setup can save time and improve user experience.
Need help connecting ChatGPT to your WordPress website safely? 24x7wpsupport can help you choose the right plugin, configure the API key, test chatbot settings, and fix plugin conflicts. Our WordPress experts can also check speed, security, and performance after setup. Visit 24x7wpsupport today and get professional WordPress support for your website.
Related posts:
How to Integrate Facebook Login With Your WordPress Website
How to Embed or Add a Media Player in WordPress (Complete Guide)
How to Add and Enable Caching in WordPress Easily (Beginner's Guide)
How to Use the ActivityPub Plugin On WordPress: Complete Beginner's Guide
Fixing the 413 ‘Request Entity Too Large’ Error like a Pro

Brian is a WordPress support specialist and content contributor at 24×7 WP Support. He writes practical, easy-to-follow guides on WordPress troubleshooting, WooCommerce issues, plugin and theme errors, website security, migrations, performance optimization, and integrations. With a focus on solving real website problems, Brian helps business owners, bloggers, and online store managers keep their WordPress sites running smoothly.
