
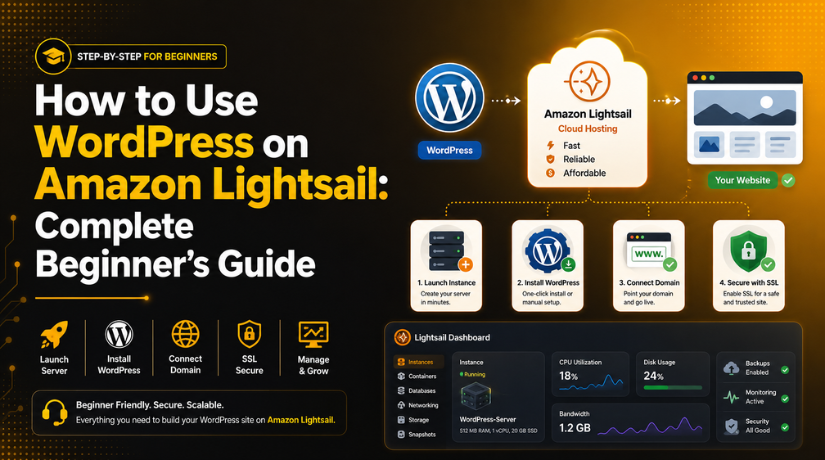
How to Use WordPress on Amazon Lightsail: Complete Beginner’s Guide
Introduction
Choosing the right hosting can shape your whole WordPress journey. A slow or weak host can hurt user experience. It can also affect website speed, safety, and growth. Many beginners want simple hosting with better control. They also want a platform that feels stable and trusted. This is where WordPress on Amazon Lightsail becomes useful.
Amazon Lightsail gives users a simple way to use AWS. It is easier than many advanced AWS services. Beginners can launch a WordPress website without complex server setup. This makes Amazon Lightsail WordPress hosting helpful for blogs, business websites, portfolios, and small service websites.
Many website owners want to host WordPress on Amazon Lightsail because it offers more control than shared hosting. You get your own cloud server resources. You can manage your site, domain, SSL, backups, and settings. This gives you a better learning path for cloud hosting. This Amazon Lightsail tutorial will help beginners understand the basics. It will explain what Lightsail is and why it matters.
What Is Amazon Lightsail and How Does It Help WordPress Users?
Amazon Lightsail is a simple cloud hosting service from AWS. It helps users create websites, apps, and online projects. You can think of it as a ready cloud server. It gives you server power, storage, networking, and basic tools.
For WordPress users, Lightsail offers a ready WordPress setup option. This is often called a WordPress blueprint. It helps beginners install WordPress on Lightsail without manual server work. You do not need to install every server part yourself. Lightsail prepares the basic hosting environment for you.
This makes WordPress hosting on AWS easier for new users. AWS is powerful, but it can feel confusing. Lightsail keeps the setup more direct and beginner-friendly. You can create an instance, select WordPress, and launch your site.
Amazon Lightsail is different from normal shared hosting. In shared hosting, many websites use the same server space. That can sometimes affect speed and control. With Lightsail, your WordPress site runs on its own cloud instance. This gives you more freedom to manage your website.
In simple words, Amazon Lightsail gives beginners a clean starting point. It helps you build a WordPress site with better control. It is a good choice when shared hosting feels limited. It also helps when the full AWS setup feels too advanced.
Main Features of Amazon Lightsail for WordPress Users
Amazon Lightsail gives beginners many useful hosting features. These features make WordPress setup easier and faster. If you want WordPress on Amazon Lightsail, these tools can help you manage your site better.
WordPress Blueprint Helps You Start Without Complex Server Setup
The WordPress blueprint is one of the best Lightsail features. It helps you Install WordPress on Lightsail without manual server work. You do not need to install PHP, database, or web server tools yourself. Lightsail prepares the basic WordPress environment for you.
Predictable Monthly Plans Make Hosting Costs Easier to Understand
Lightsail offers simple monthly plans for cloud hosting. These plans include server power, storage, and data transfer. This helps beginners understand their hosting cost more clearly. Many users choose AWS WordPress hosting because they want reliable cloud service.
Static IP Helps Your Domain Stay Connected Properly
A static IP is important for every serious WordPress website. Your domain name needs to point to your server. If the server IP changes, your website may stop loading. Lightsail lets you attach a static IP to your instance.
DNS Management Makes Domain Setup More Organized
Lightsail also gives DNS management options. DNS connects your domain name with your hosting server. You can manage records like A record and CNAME record. These records help users open your site correctly. You can manage DNS inside Lightsail or your domain provider.
SSL and HTTPS Support Helps Build Website Trust
SSL is very important for every WordPress website. It adds HTTPS to your domain name. This helps protect data between users and your website. It also prevents browser security warnings. Lightsail supports SSL setup for WordPress websites.
Snapshots and Backup Options Help Protect Your Website
Lightsail snapshots help you save a copy of your server. This is useful before updates, changes, or plugin testing. If something breaks, a snapshot can help recovery. You should also use a WordPress backup plugin.
CDN and Storage Options Can Improve Website Speed
Lightsail also offers extra storage and CDN options. A CDN can help load website files faster. It is useful when visitors come from different locations. Image-heavy websites may also need better storage planning.
What You Need Before Using WordPress on Amazon Lightsail
An Active AWS Account Before Starting
You need an active AWS account to use Amazon Lightsail. This account gives you access to Lightsail services. You can create servers, manage billing, and check resources there. Make sure your account details are correct. Also keep your login details safe.
Valid Payment Method for Lightsail Services
Amazon Lightsail is a paid cloud hosting service. So, your AWS account needs a valid payment method. Lightsail plans usually follow a monthly pricing model. Still, extra services may add more cost. These can include snapshots, storage, or data transfer
Domain Name for Your WordPress Website
A domain name helps users visit your website easily. You can test your website with the server IP first. But a live website should use a proper domain. Your domain will later point to the Lightsail static IP.
Basic DNS Access for Domain Connection
DNS connects your domain name with your hosting server. You need DNS access from your domain provider. You may need to update the A record. This record points your domain to the Lightsail IP address. Basic DNS knowledge helps avoid connection mistakes.
Choose the Right Lightsail Plan
Before setup, choose a plan based on your website needs. A small blog can start with a basic plan. A business website may need more server resources. A WooCommerce store may need even better performance.


Website Details Ready Before Setup
Prepare your website name before starting the setup process. Also keep your logo, pages, images, and content ready. This saves time after you install WordPress. You can quickly build your homepage and main pages.
WordPress Admin Details for Login Setup
You should plan your WordPress admin username and email. Use a strong password for better website security. Avoid simple usernames like admin or test. These names are easy for attackers to guess. After you Install WordPress on Lightsail, update your login details carefully.
Basic Knowledge of SSL and HTTPS
SSL adds HTTPS security to your website domain. It protects data between your website and visitors. It also removes browser security warnings. Beginners should understand why SSL is important. After connecting the domain, enable HTTPS quickly.
Safe Storage for All Login Records
Keep all important login records in a safe place. Save AWS login, WordPress login, and domain login details. Also save DNS access and email account details. These records help during updates, fixes, or support work.
How to Use WordPress on Amazon Lightsail (Step By Step)
Using WordPress on Amazon Lightsail is easier when you follow each step carefully. Lightsail gives beginners a simple way to create a WordPress website on AWS. You do not need advanced cloud knowledge to start. You only need an AWS account, a domain, and basic setup details. This section will guide you through the main setup process. You can use this Amazon Lightsail tutorial to launch your first site with more confidence.
Step 1: Sign In to Amazon Lightsail from Your AWS Account
- First, sign in to your AWS account.
- Search for Amazon Lightsail in the AWS search bar.
- Open the Lightsail dashboard from the search results.
- This dashboard helps you manage hosting resources easily.
- You can create servers, DNS zones, and static IPs.
- You can also manage snapshots and other website resources.
- Beginners prefer Lightsail because its dashboard looks simple.
- It makes AWS WordPress hosting easier for new users.
Step 2: Create a New WordPress Instance in Lightsail
- Click the “Create instance” button inside Lightsail.
- An instance means your cloud server for WordPress.
- This server will run your full WordPress website.
- Choose the region closest to your main visitors.
- Select a USA region for visitors from the USA.
- Select a nearby region for visitors from India.
- A closer server region can improve website speed.
- This step supports better Amazon Lightsail WordPress hosting performance.
Step 3: Select the WordPress Blueprint for Easy Setup
- Choose Linux/Unix as the platform option.
- Select the WordPress blueprint from available app options.
- This blueprint helps you Install WordPress on Lightsail quickly.
- It includes the basic tools needed for WordPress.
- You do not need to install PHP manually.
- You do not need to configure the database yourself.
- This saves time and avoids beginner setup mistakes.
- It makes WordPress setup easier and more reliable.
Step 4: Choose the Right Lightsail Plan for Your Website
- Choose a Lightsail plan based on your website needs.
- A small blog can start with a basic plan.
- A business website may need more server resources.
- A WooCommerce store may need stronger hosting power.
- Avoid choosing a plan only because it is cheap.
- Pick a plan that matches your website goal.
- You can upgrade the plan when traffic grows.
- This makes WordPress hosting on AWS flexible for beginners.
Step 5: Name and Launch Your WordPress Instance
- Give your instance a clear and simple name.
- You can use names like business-wordpress-site.
- You can also use myblog-wordpress for easy tracking.
- A clear name helps manage multiple websites later.
- After naming the instance, click the create button.
- Lightsail will start creating your WordPress server.
- The setup process may take a few minutes.
- Once ready, the instance appears in your dashboard.
Step 6: Open Your New WordPress Website Using Public IP
- Copy the public IP address from your instance.
- Paste the IP address into your browser.
- Your new WordPress website should open there.
- The website may show a default WordPress design.
- This is normal for a fresh WordPress setup.
- You can customize the theme and pages later.
- This step confirms that WordPress is installed correctly.
- It also confirms that your server is working.
Step 7: Get Your WordPress Admin Login Details Safely
- Now collect your WordPress admin login password.
- Lightsail stores the default password inside the instance.
- Open your instance details in the Lightsail dashboard.
- Click the browser-based SSH or terminal option.
- Run the password command shown in Lightsail guidance.
- Copy the password and save it in a safe place.
- Use the default username shown in your setup details.
- Change the default password after your first login.
Step 8: Log In to the WordPress Dashboard
- Open your WordPress admin page in the browser.
- Use this format: http://your-public-ip/wp-admin.
- Enter the username and password you collected earlier.
- After login, open your user profile settings.
- Change the default password to a strong password.
- Use letters, numbers, and special characters together.
- Avoid using simple names or common password words.
- This protects your website from basic login attacks.
Step 9: Attach a Static IP Before Domain Setup
- Attach a static IP before connecting your domain.
- A static IP keeps your server address fixed.
- Without it, your IP may change later.
- If the IP changes, your domain may stop working.
- Open the Networking section in Amazon Lightsail.
- Create a new static IP in the same region.
- Attach it to your WordPress instance.
- Copy this IP for your domain DNS setup.
Step 10: Connect Your Domain Name to Lightsail
- Open your domain provider’s DNS management panel.
- Add an A record for your main domain.
- Point the A record to the Lightsail static IP.
- Add a CNAME record for the www version.
- This helps both domain versions open correctly.
- You can also manage DNS inside Lightsail.
- DNS updates can take some time to reflect.
- Avoid changing DNS records repeatedly during propagation.
Step 11: Enable HTTPS SSL for Website Security
- Enable HTTPS after your domain points correctly.
- SSL protects data between visitors and your website.
- It also shows a secure lock in browsers.
- This makes your website look safe and professional.
- Lightsail provides SSL options for WordPress websites.
- Follow the guided SSL steps when available.
- Test both domain versions after SSL setup.
- Check your homepage and WordPress admin page too.
Step 12: Configure Basic WordPress Settings After Setup
- Open the WordPress dashboard after successful login.
- Go to Settings and update your site title.
- Add a clear tagline for your website.
- Set the correct time zone and admin email.
- Open permalink settings and choose clean URLs.
- Most websites use the post name permalink structure.
- Update WordPress core, themes, and plugins regularly.
- Install only trusted plugins that your site really needs.
Common Problems Beginners Face When Using WordPress on Amazon Lightsail
Beginners may face some issues after setting up WordPress on Amazon Lightsail. Most problems happen because of DNS, SSL, plugins, or server settings. These issues are common and can be fixed with careful checks. This section explains the main problems in simple words.
Website Does Not Open After the First Setup
Sometimes the website does not open after launching the instance. The server may still be starting in the background. The browser cache may also show an old error. Wait for the instance to become active. Then open the public IP again in a fresh browser. This is common during a new Amazon Lightsail WordPress hosting setup.
Domain Does Not Point to the Lightsail Server
A domain must point to the correct static IP. If the A record is wrong, the website will not load. DNS changes can also take some time to update. Always check the domain DNS records carefully. This helps you Host WordPress on Amazon Lightsail without connection problems.
SSL Certificate Does Not Work Properly
SSL problems often happen when DNS is not correct. Your domain must point to the Lightsail static IP first. After that, you can enable HTTPS for your website. If SSL fails, check the domain records again. Then retry the SSL setup after DNS updates fully.
WordPress Shows the IP Address Instead of Domain
Sometimes WordPress still shows the server IP address. This can happen after connecting the domain name. You may need to update the WordPress Address and Site Address. These settings are available inside the WordPress dashboard. Use your domain name instead of the public IP.
Website Loads Slowly After Setup
A slow website can hurt visitors and search performance. Heavy themes, large images, and many plugins can slow pages. A low Lightsail plan can also limit performance. Use caching, compress images, and remove unused plugins. This improves your AWS WordPress hosting performance.
Best Practices for Running WordPress on Amazon Lightsail Safely
Good setup habits can prevent many future problems. Beginners should follow these best practices from the start. They help keep the website safe, stable, and easier to manage.
Use a Static IP Before Connecting Your Domain
Always attach a static IP before domain setup. This keeps your server address fixed and stable. It also prevents domain issues after server restarts. This step is important for reliable WordPress hosting on AWS.
Enable HTTPS Before Launching the Website Publicly
HTTPS protects visitor data and builds user trust. It also prevents browser security warnings on your website. Enable SSL after your domain points correctly. Then test the homepage, inner pages, and admin area.
Keep WordPress, Themes, and Plugins Updated
Updates fix security issues and improve website stability. Check WordPress core, active theme, and plugins often. Do not keep unused plugins or themes installed. They can create security and speed problems later.
Take Regular Snapshots and WordPress Backups
Snapshots help you restore your Lightsail server when needed. Take a snapshot before major updates or design changes. Also use a trusted WordPress backup plugin. This gives your website stronger recovery protection.
Use Lightweight Themes and Trusted Plugins Only
A clean setup keeps your website faster and safer. Avoid heavy themes with unused features. Install only plugins that support your real needs. This makes Install WordPress on Lightsail setup easier to manage.
Conclusion
Amazon Lightsail is a useful choice for WordPress beginners. It gives you simple cloud hosting with strong AWS support. You can launch WordPress, connect a domain, enable SSL, and manage backups. You also get better control than basic shared hosting. However, you still need proper setup and regular care. DNS, SSL, security, updates, and backups must be handled correctly. A small mistake can affect website speed, safety, or uptime.
If you want to use WordPress on Amazon Lightsail, follow each step carefully. Start with the right plan, attach a static IP, and secure your site with HTTPS. Keep your WordPress files, themes, and plugins updated. Also, take regular backups before making major changes.
Need expert help with your WordPress website? 24x7wpsupport can help you set up, manage, secure, and optimize your WordPress site on Amazon Lightsail. Our team can handle installation, domain setup, SSL, speed improvement, troubleshooting, and ongoing support. Visit 24x7wpsupport today and get reliable WordPress support from experienced professionals.
Related posts:

Validation Error- PayPal IPN Response From A Different Email Address In WordPress
How to Troubleshoot and Fix a WordPress Critical Error Easily (Advanced Guide)
How to Add Google Calendar to WordPress Without a Plugin (Step-by-Step Guide)

How to Integrate Facebook Login With Your WordPress Website

How To Delete Page In WordPress

Brian is a WordPress support specialist and content contributor at 24×7 WP Support. He writes practical, easy-to-follow guides on WordPress troubleshooting, WooCommerce issues, plugin and theme errors, website security, migrations, performance optimization, and integrations. With a focus on solving real website problems, Brian helps business owners, bloggers, and online store managers keep their WordPress sites running smoothly.
